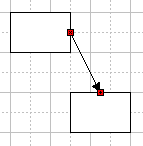
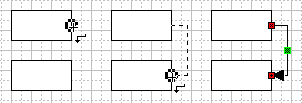
You can draw direct connectors (line segments) and smart connectors (made up of horizontal and vertical lines).
To draw a Smart Connector, use the Connector tool
To draw a Direct Connector, use the Direct Connector tool
ConceptDraw offers you powerful ways for connecting objects:
by gluing the connectors to objects or to their connection
points, you can establish connections which will be maintained even when the
objects are repositioned, flipped or resized.
And moreover, you can connect several objects at a time, connect objects automatically,
and turn any object into a connector.
Connectors
Connecting to the Entire Object
Connecting to a Connection Point of the Object
Connection Points
Smart Connector
Direct Connector
Using an Object as a Connector
Tools for Multiple Connection
Auto-Connection Modes
Connectors
Connectors are used for tying objects together. They rebuild
automatically and keep the objects connected even when they are moved, resized, etc.
You can draw direct connectors (line segments) and smart
connectors (made up of horizontal and vertical lines).
To draw a Smart Connector, use the Connector tool ![]() or the Tools / Draw / Connector menu.
or the Tools / Draw / Connector menu.
To draw a Direct Connector, use the Direct Connector tool ![]() or the Tools / Draw / Direct Connector
menu.
or the Tools / Draw / Direct Connector
menu.


All connectors have the begin point and the end point (that is, they are 1D objects). By dragging an endpoint, you can change the form and size of a connector. The most important function of the endpoints is that you can glue them to the objects or to their connection points to establish connection.

Note: You can always swap the begin and end points by choosing Reverse Link from the connector's context menu.
To break the connection, unglue the connector: simply drag its glued endpoints away from the objects.
You can manipulate the connectors in the same way as you do with other objects - you can select them, send to back or to front, delete, set formatting (line color and style, arrowheads - see the "Line Properties" section).
You can also assign text to a connector as to any other object - just select
the it and start typing the text.
On a Smart Connector, the associated text appears on its central control point, or where
the lines meet.
On a Direct Connector, the text stretches along the connector, from its begin point to the
end point.
You can manipulate the Text Box to reposition the text - see "Working with Text".

You can glue a connector to an object in two different ways:
1) connect it to the entire object,
2) glue it to a connection point of the object.
Connecting to the Entire Object
Position one the endpoints of the connector over the center of the object's alignment box, until a black rectangle appears round the object. On releasing the mouse button, a magenta square will indicate the point at which the connector is currently glued to the object. As you move the object, the point of connection changes its location, keeping to the side facing the connector. It snaps to the side of the alignment box nearest to the connector, and appears in the middle of that side.

Connecting to a Connection Point of an Object
This way of connecting lets you glue the connector to a certain particular place on the object (or even outside it). The connector will remain attached to this exact place - connection point - when you manipulate the objects.
Each object has 4 default connection points - in the middle of each side of its alignment box. They become visible when you position an endpoint of a connector over one of them.
Note: You can assign additional connection points to an
object (either on its body or outside it): use the Connection Point tool ![]() (or the Tools / Draw / Connection Point
menu) to create, move and delete connection points. For more information, see the "Connection Points" section.
(or the Tools / Draw / Connection Point
menu) to create, move and delete connection points. For more information, see the "Connection Points" section.
Position one of the endpoints of the connector over the object, until you see a gray plus in a circle indicating the pointer is over a connection point of the object. Release the mouse button to establish the connection. The glued endpoint turns red, indicating the place of connection.

To break the connection, just move the connector or its attached endpoints away from the objects.
See further:
Connection Points
Smart Connector
Direct Connector
Tools for Multiple Connection
Auto-Connection Modes