DRAWING EXTERNAL WALL BASE EXAMPLE
*** using the 'draw external walls' option from FILE / NEW to draw a basic house plan ***

* If at any stage you go wrong * just click File / New and start again using the same drawing name to overwrite your previous work
Start the Fast Plans programme and select file / new, Input test as the drawing name and select ôdrawing external wallsö, then select your preferred measuring system. The title at the top of the screen will show drawingname.PLN as this is a plan view. For now just leave the following dialogue boxes, as they appear, by pressing enter (if you really want to you can click OK with the left mouse button) the cursor will now appear in the top left corner.-
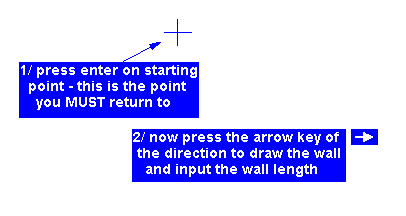
Press enter on the start point of the outer line of the first wall (the drawing base will automatically centre itself when you finish back at the start point - so for most cases you can start with the cursor where it appears in the top left corner)
starting point

for this example just leave the cursor there and press enter - that is our starting point
1/ press right arrow, input 39 ft 6 inches or 12000 m.m - and press enter to close dialogue box
2/ press down arrow, input 32 ft 9 inches or 10000 m.m
3/ press left arrow, input 52 ft 6 inches or 16000 m.m
The guide line at the bottom of the screen shows the horizontal and vertical distances back to the starting point.
4/ press up arrow, input 13 ft or 4000 m.m
5/ press right arrow, input 13 ft or 4000 m.m, just press enter
6/ press up arrow, this time the dialogue box will show the distance back to the starting point - 19 ft 9 inches or 6000 m.m- just press enter
for step by step detailed drawings of the above click external walls
Once you return to the starting point, the drawing will centre on screen and the external dimensions and drawing title are added. external walls


NOTE
click drawing angled external walls if your design will use them.
External walls must be drawn CLOCKWISE, and must finish EXACTLY back at the start point.
You can split an external wall into two parts and change one part to another wall type width, click splitting and changing external walls

HINT
Too big, or too small on screen?
You can use zoom / fit on screen with or without the dimensions (view / display).
Always look at the guide line at the bottom of the screen- it will normally show you how to use the function selected and if you do need more help press the F1 key.

DRAWING UPPER FLOORS
Once you have the ground floor drawn, you can add the floors above,
click drawing floors above

SITE PLAN
You can now add the site location plan
click adding a site plan

TO FINISH
click FINISHING - EXAMPLE 3

TROUBLESHOOTING
External Wall Marking :-
Draw the walls in a CLOCKWISE direction
Finish back at the original start point - otherwise the programme will not continue because it will not know you have finished marking the walls