|
|
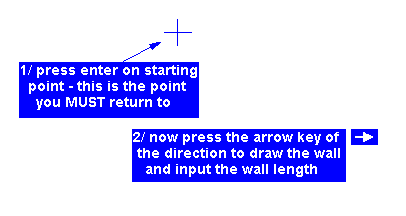
- so for most cases
you can start with the cursor where it appears in the top left corner) |
 |
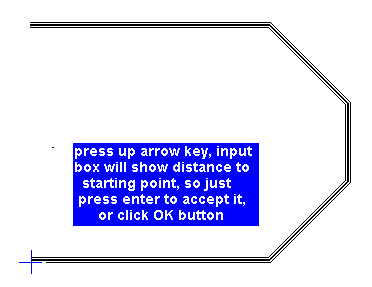
| ALWAYS watch the cursor position box on the icon line and the guide line at the bottom of the screen as they show the distances back to the starting point. | 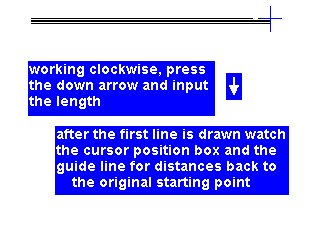 |
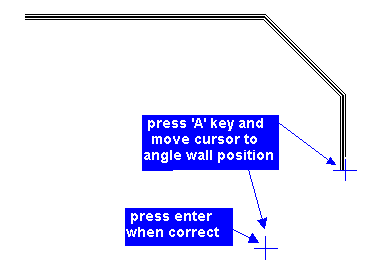
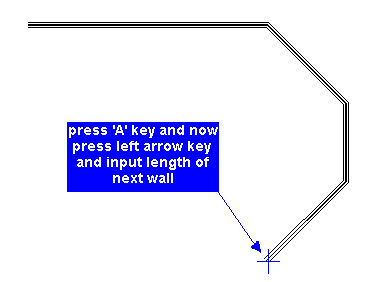
| 3/ continue drawing walls in a CLOCKWISE direction | 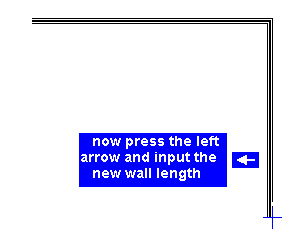 |
| 4/ continue drawing walls in a CLOCKWISE direction | 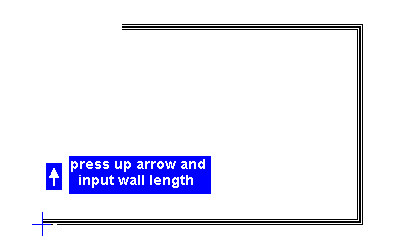 |
| 5/ continue drawing walls in a CLOCKWISE direction | 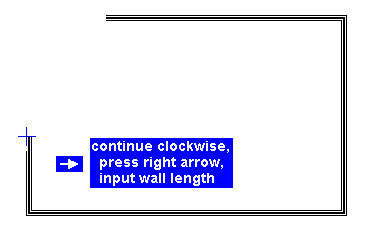 |
| press the up arrow key and the input box will appear with the distance back to the starting point, accept that distance by pressing enter or clicking the OK button | 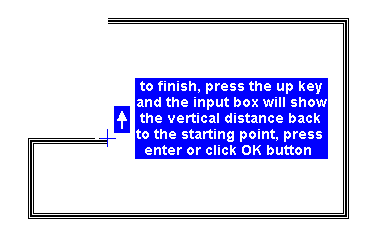 |
| 7/ Once you return to the starting point, the drawing will centre on screen and the external dimensions and drawing title are added. |  |
| ALWAYS watch the guide line at the bottom of the screen as it shows the horizontal and vertical distances back to the original starting point. | 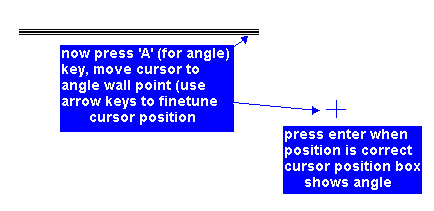 |
| 2/ when you need to continue but want the arrow keys for input, press the æaÆ key again (it is a toggle on/off), | 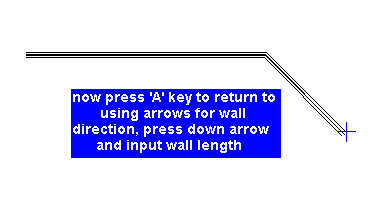 |
|
3/ continue drawing in a CLOCKWISE direction |
 |
|
4/ continue drawing in a CLOCKWISE direction |
 |
|
5/ and finish back at your starting point 0,0. |
 |
| 6/ drawing is then centred on screen with dimensions and floor name |  |
|
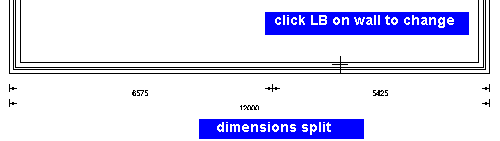
1/ press Enter on the split point somewhere between the external wall lines |
 |
|
2/ and Fast Plans will re dimension the drawing. |
 |
|
External wall, split to two and one wall with new width |
 |
DELETE EXTERNAL WALL
this is the only function used to delete an external wall permanently
this should only be used for drawings that do not need to show any external walls