When your Red Hat Linux system starts, you'll see an array of messages speeding past you on the screen. Many of these messages simply tell you what services are starting on your computer.
Tip: Want to read those startup messages more closely? At a shell prompt, type dmesg | more. You'll be able to read the file one screen at a time. To move forward, press the [Spacebar]; to quit, press [Q].
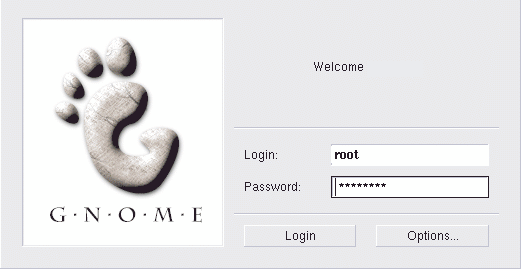
Finally, we'll come to ``the login prompt'' (as shown in Figure 3).
You'll find:
Login:Password:
At this point, some new users can easily feel rattled, but don't panic. Instead, think back: When you installed Red Hat Linux 6.0, you were asked for a root password.

In detail, that is the password you were asked to choose to log in to your root account. When you log in -- either in the root account or other accounts -- you're introducing yourself to the system. The root account, unlike all other accounts for your system, has access to everything. Also known as the superuser, the root account can control everything the system does.
Go ahead and login; at the Login: prompt just type:
root
and press [Enter] or the [Tab] key.
Tip: Case matters. Linux, like UNIX, makes a distinction between uppercase and lowercase letters. So root is not the same as Root. In fact, as far as Linux is concerned, they're two different accounts.
Don't worry about mistakes when you log in; you can always use the [Delete] key to start over.
When you're asked, type in the password you chose when you installed Red Hat Linux. You won't see your password on the screen as you type; that's just one of the security features of your Linux system.
Tip: Be sure to type commands exactly as you see them -- spaces, dashes and all. To Linux, an extra space or letter can make all the difference in the world.
When you're finished typing in your password, press [Enter].
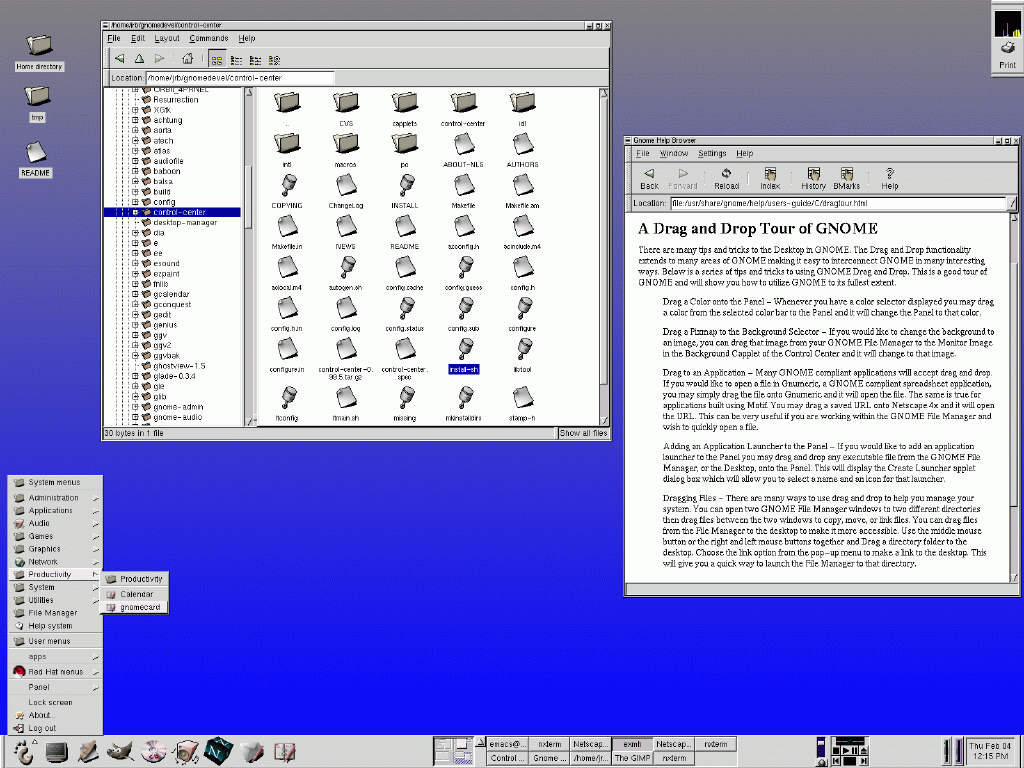
You'll be presented with your new desktop (similar to 4). Once you become more comfortable with your new operating system and with GNOME, you'll probably be able to fill up that desktop quickly with applications.

There's plenty of space to fill up, not just on your current desktop but on numerous desktops -- four by default.
Tip: To learn specifics about GNOME, including applications and navigation, turn to the GNOME User's Guide section of this manual.
But for now, let's just concentrate on your current desktop.
Go ahead and look around. You can begin by double-clicking with the left mouse button on the file folder called Home Directory on the desktop.
Here, you'll find icons representing the various directories and files on your system.
From the panel on the bottom, left-click once with your mouse, and you can begin to investigate some of the applications which have been included with your environment.
From here, you can find ways to customize your workspace, search for files, write letters or other documents, start spreadsheets and more.
But before you get too daring...
While you're logged into the root account, avoid the temptation to make any changes to files or directories unless you know exactly what you're doing!
Here's why: Whenever the system recognizes you as the root account you're allowed to do just about anything: change configuration files, make new directories, create and manage accounts for users who are allowed to use your computer and more.
That kind of power comes with a price, and tinkering around with configuration files, accounts and directories can easily lead to disaster.
So how are you supposed to operate safely?
By creating a user account, which we'll cover shortly. With a user account, you can work and play with the assurance that you're not damaging your system.