|
|
|
|
Shading Modes
Shading refers to the process of applying material channel values to an object. When an object is shaded, the different values in the material are applied to the object. The shading modes available in Bryce determine how material channels are applied to create different effects.
To choose a shading mode:
Surface Material Shading Modes
This section explains the surface material shading modes.
Normal
Normal mode applies the values of the material without modifying them in any way. Objects are shaded according to the values you set in the material channels. This mode has no special effects; it simulates a real-world appearance using the material channel values.
This is the default mode and is appropriate for most objects.
Blend Transparency
In Blend Transparency mode, visibility is controlled by Transparency. When this mode is active, areas of the object that are 100% transparent are ignored. Transparent areas are not shaded and do not cast shadows. These areas appear as gaps or holes in the object's surface.
This mode lets you create punch-outs when using a texture.
Anything less than 100% Transparency results in normal transparent areas.
Fuzzy
Fuzzy mode changes the effective transparency based on the thickness of the object. As a result, objects appear fuzzy on the edges and solid at the center.
Since Bryce uses depth information to synthesize this blurry effect, it is not available for 2D objects such as Squares or Disks.
Use the Transparency setting to adjust the degree of fuzziness.
Light
Light is a very specialized shading mode best used to create visible lighting effects. Objects shaded with this mode appear transparent and self-illuminating.
Only the Diffuse, Ambient, and Transparent Color channels are used to determine the color of the light. All other channels are ignored.
This mode is useful for creating point lights without the rendering overhead that comes with true volume light objects (that is, light-sensitive volume materials).
Volume Material Shading Modes
This sections explains the volume material shading modes.
Flat Shading
Flat shading mode is designed for clouds, gases and other self-luminous gaseous materials. Flat shading mode does not shade an object, meaning that light sources have no effect on the color or brightness of the object.
When this mode is active, Diffusion, Ambience, Specularity, Ambient Color, Specular Color and Transparency Color have no effect.
The color of the material is determined entirely by the Diffuse Color channel.
Basic Shading
Basic shading mode is designed to apply shading and light effects to the exterior surface of a volumetric object without affecting the interior. When this mode is active, volumetric objects are shaded as if they have a surface material applied to them rather than the actual volume material.
In this mode, light sources have a limited effect on the color and brightness of an object. Only the exterior surface of the object will be affected by light sources; light and shadows will not be generated within the object.
Full Shading
Full shading mode is designed for hard edged, sharp objects like rocks. When Full shading mode is active, the visible portions of the material are shaded and can be affected by light sources.
Since light sources can affect portions of your material, shadows will appear within the object. This can greatly increase rendering time. If you don't need to see shadows in the object, make sure the Receive Shadows filter is disabled. Usually you should disable this filter unless you're creating very specialized effects.
Light Sensitive
Light Sensitive mode is designed for creating visible light effects such as light beams. Light Sensitive mode does not shade objects, but the particles in your material are sensitive to light.
In this mode, Density doesn't control density as much as it sets the light sensitivity of material particles. Higher values create brighter particles and lower values create darker particles.
To get the best results for light objects, use the Additive blend mode.
The color of the particles is determined entirely by the Diffuse Color channel.
The result is like shining a light through a volume. If you were shining a light through a cloud material, you would be able to see the clouds within the light cone.
When this mode is active, Diffusion, Ambience, Specularity, Ambient Color, Specular Color and Transparency Color have no effect.
Uniform Density
Objects can have varying densities. By default, objects have a density that varies from center to surface. The object is most dense at the center and becomes less dense as you approach the surface. You can control the starting point of this variation in density by using the Edge Softness control.
However, you may want to create objects that do not vary in density. Uniform Density mode sets the object to have a consistent density throughout the object. The density at the starting point is used throughout the object. This results in harder-looking objects and faster rendering times.
Sky Integration
Sky Integration mode is designed to increase the realism of volume objects in scenes that have hazy or foggy atmospheres. When Sky Integration mode is active, the sky effects such as haze and fog are taken into account when the volume object is rendered. This helps blend objects realistically into the atmosphere.
This mode is very useful for creating realistic cloud objects or fog objects.
Shading Mode Modifiers
Shading mode modifiers are not shading modes, but they modify an existing shading mode. When you select a modifier it remains enabled until you disable it. You can also apply more than one modifier at the same time.
Additive
When this modifier is active, material channels are applied to the environment behind the object instead of to the object's surface.
If you put an object on a bright background, it appears almost white. For best results, set your Ambient Color control to zero and render against a dark, plain background. Objects with this shading mode modifier selected will not cast shadows.
This mode is very useful for creating planets and quarter moons, light beams, and ghost images.
Distance Blur
This modifier is designed to minimize the problem created by highly bumpy textures fading into infinity (i.e., the horizon). Often, moiré-like patterns appear in these cases as the pixels try to resolve the infinitely receding high frequencies of bumpy water or grooved sand, and so on. The Distance Blur modifier fades the bumpiness well before it hits the horizon.
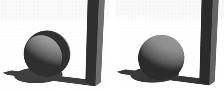
Receive Shadows
This modifier prevents an object's surface from accepting shadows cast by objects around it. The object itself will cast a shadow, but it won't accept shadows from other objects.
When the Receive Shadow filter is disabled, no shadows will appear on the object's surface.
Cast Shadows
This modifier prevents an object from casting shadows. The object's surface still reacts normally with light but it does not cast any shadows.
Self Shadows
This modifier prevents an object from casting a shadow onto itself, yet still shadow all the other elements of the scene.
Volume Blend-Altitude
This modifier gradually blends in the Volume color based on altitude. Areas at lower altitudes are tinted with the 100% Volume Color; as you move higher up, less of the Volume Color is added.
This modifier can be used to create a sense of depth in an infinite water slab. If you blend between a light Diffuse Color and a darker Volume Color, you can create the illusion of depth as you sink deeper into the water.
Volume Blend-Distance
This modifier blends the Diffuse and Volume Colors of your material based on the distance from the camera. Areas that are closer to the camera will be tinted less with the Volume Color. As you move further away, more of the Volume Color is visible.
This modifier is excellent for creating underwater depth effects. If you blend a darker Diffuse Color with a lighter Volume Color in an infinite slab, you can simulate the effects of murky water on distant objects.
 Corel Corporation http://www.corel.com Voice: (800) 772-6735 Fax: (716) 447-7366 www.corel.com/support |