 |
| Previous Top Next |
|
Open project
|
| 1. | Select a source control provider from the list of those installed on your PC, and confirm with the OK button.
|

|
| 2. | Enter your login data in the Source Control Login dialog box, and confirm with OK.
|

|
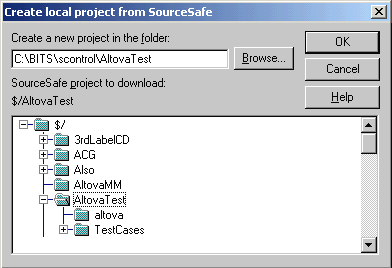
| 3. | Define the directory to contain the local project.
|
| 4. | Select the Source control project you want to download.
|
| If the folder you define does not exist at the location, a dialog box opens prompting you to create it there. Click Yes to confirm the new directory.
|
| 5. | Click the OK button to download the source control project.
|

|
| 6. | XML Spy now displays the Open dialog box, and attempts to find the XML Spy project file (*.spp) in the local directory. Click the project file you want to create, if there are several to choose from.
|

|
| A message box might appear at this point stating that the directory is under source control, offering you the option of checking it out or not.
|
| 7. | Click the OK, if you want source control to be enabled.
|
| The Check out dialog box opens, allowing you to check out the *.spp file.
|
| 8. | Add any comments to the file in the Comment text box and Click OK, to check out the XML Spy project file. Depending on your source control provider, the dialog box might contain extra command buttons. In this case the Advanced... button opens the Advanced Check Out Options dialog box.
|
|
|

|
|
|

|
|