- Creating and Composing New Email
- Using Attachments
- Managing Email in Folders
- Sending and Receiving Email
Creating and Composing New Email
To create a new email, either:Using Attachments
- Click the new mail button on the toolbar.
- Press Ctrl-N.
- Click Mail -> New Message.
The toolbar buttons (from left to right) are as follows:
To the left of the toolbar you will see panels for the "To" and/or the "From" fields. These can be collapsed to leave more room on the window, when collapsed they appear next to the toolbar. To show them again, click on the "+" sign.
- Prev message (in main window list)
- Next message
- Send email now
- Delete
- Save changes (doesn't mark for sending. email will stay in Outbox till explicitly sent)
- Save changes and close window
- Attach file
- Reply to sender
- Reply to sender and all recipients
- Forward email (if there are attachments you will be asked whether you want to forward the attachments as well as the email itself).
Also when you have text processing plugins installed they put their commands next to the toolbar.
Under the toolbar is where the "To" and "From" will appear. Depending on the context these window will be made visible. And address in the "To" or "From" panels has a right click context menu that allows certain commands to be executed on that address.
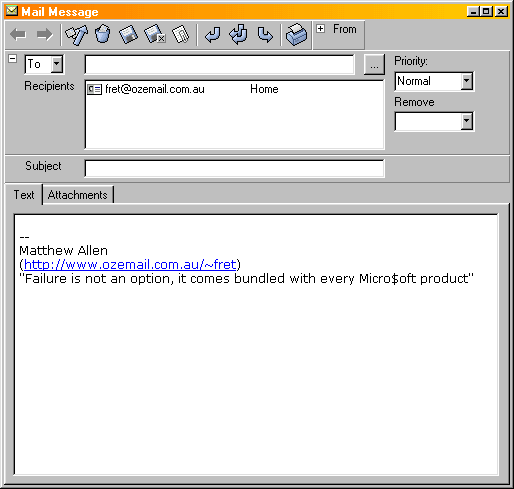
Underneath the addressing panels is the subject bar and tabs for the email's content. The first tab displays the text of the email where you can compose your message. The second tab displays a list of files that are attached to the email. And in the case of email that you have received from elsewhere there is a third tab showing the orginal email headers.
- The "To" panel contains a list of recipients that the email was/is sent to. To add another recipient, type an the email address into the space above the list and hit enter. Alternatively if the address is in the contacts database you can just type their first or last name and the address will be looked up automatically. You can also browse the contacts and directory services plugins by clicking the "..." button to show the "Add contact" windows.
To set the recipients to CC or BCC select them in the list and use the right click menu.- The "From" panel shows who the email is from.
To attach files to a email you are composing, either click the attach files button on the toolbar or right click in the attachment list (away from existing entries) and browse to the file you want to attach. Or you can drag the file onto the mail window from the explorer/tracker window.Managing Email in FoldersTo view an attachment sent to you, double click the entry in the attachment list. It will save the file to a tempory directory and open it using the default program specified in the operating system settings.
Each folder in the main view contains object of one type only. So if you create more folders you have to decide what they contain up front. When you drag and drop email/contacts between folders only items that match the destination folders type will be moved.Sending and Receiving
You can receive mail using Scribe using two methods. Manually by clicking receive mail on the toolbar or Mail -> Receive mail. Or automatically by going into the options and on the POP3 tab set the "check every <field> minutes". The field being the number of minutes between checks. New mail appears in the "Inbox" folder by default and a "New mail" icon appears in the system tray. Clicking on this icon opens the first new mail in the /Inbox folder (or sub-folders). You can specify a non-default destination folder in the receive account options.To send mail using Scribe can be done from the mail message by clicking send, by clicking send on the toolbar or clicking Mail -> Send Mail. Sending sends all unsent mail in the /Outbox folder. Once a mail is sent successfully it is marked as sent and placed in the sent mail folder. To resend a mail, move it to the outbox, open it up and click "send" again. It's that simple (try doing that in Outlook).
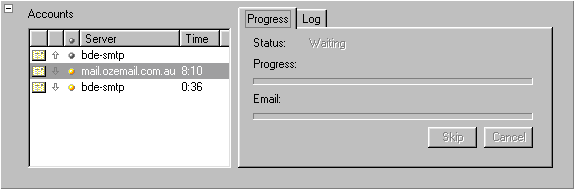
The progress status looks like this:
The skip button will cancel the email transfer in progress. The button on the cancel button will end the transfer thread immediately. This could have unpleasant side effects.
Preview Mail on Server
To view the messages on your Pop3 account click Mail -> Preview Mail on ServerThe client will attach to the server, query the server for the size and number of email still on the server and then present a list of items to you. Then by selecting the items and clicking "delete" or "download" you can decide how to process each email individually before you receive them. This allows you to skip large messages or delete them when they get in the way. The selected delete or download action is carried out when you click Ok. If an item hasn't been assign an action (delete or download) then it is ignored and left on the server. Beware that if you have the leave mail on server option set to on then you will see all the mail currently on the server not just the "new" mail. This is what the window looks like:
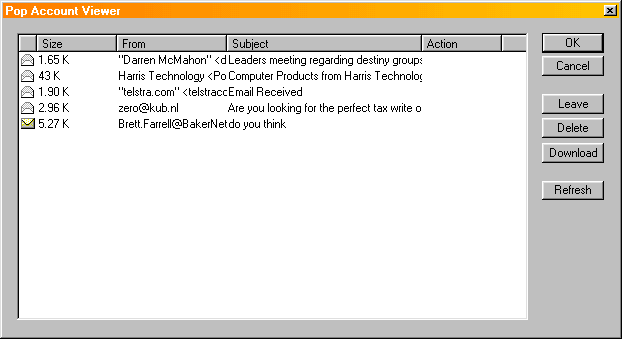
The opened envelope icon shows you which email have already been downloaded and have been left on the server. The unopened icon represents new email that hasn't been downloaded yet. You can from this window download mail that has already been downloaded. This is handy if you have leave mail on server switched on and you deleted a email by accident and would like to download it again.
If your downloading mail and you notice a really huge email then cancel that download (the bottom "request abort" button on the progress window) and then open up the preview mail on server window to either download the email either side of the large one or delete the large email altogether.