You can use layers to organize related objects on one page in the document. For example, when you draw a house plan, you may put the electrical system to one layer, the water-supply system to another, etc.
ConceptDraw lets you use up to 9 layers. Only one layer can be active at a moment. To
specify the active layer, choose it in the Layer box ![]() on the toolbar.
on the toolbar.
Manipulating Layer Properties
Assigning Objects to a Layer
Manipulating Layer Properties
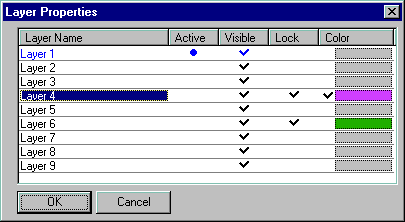
Each layer has a set of properties which can be changed in the Layer Properties dialog. To call this dialog, select Layer Properties from the View menu.

The dialog lets you modify the following properties of layers:
- Layer Name - here you can change the default "Layer
N" name to a new one. Double-click the name in the list, type a new one and click OK.
- Active - only one layer at a time can be active. All the new
objects drawn or dropped on the page are assigned to the active layer.
- Visible - check/uncheck this option to show/hide the objects of
the layer.
- Lock - lets you lock all the objects of the layer from editing. You may
find this helpful for creating borders, background drawings, etc.
- Color - displays all objects on the layer in one color. To assign the
color, click on the Color box and specify the color in the menu
which appears. All the objects of the layer will take the chosen color. To restore the
original colors of the objects, just uncheck the option.
Note: To modify a setting for all the layers at once, you can click on the title bar of a section.
Click OK to close the dialog and apply the settings you specified. To quit the dialog without applying the changes, click Cancel.
Assigning Objects to a Layer
Each object belongs to a certain layer on the page. When you create or drop an object
on the page, it is assigned to the active layer. You can put one or more selected
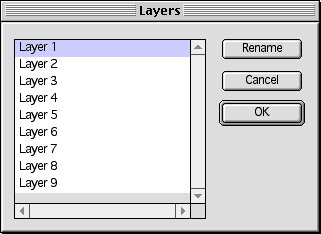
objects to another layer: use the the Set Layer dialog from the Format
menu.
Just select the new layer from the list and click OK.

This dialog also lets you rename layers: select the needed layer in the list and click Rename. In the Layer Rename dialog, type a new name and click OK to save the changes.