
A Concept Draw document may consist of one or several pages. This is very useful when there are descriptions, drawings and other various information in one document. Then a document is some sort of collection of pages.
A new document is created to have one page by default. However you can create a template with several pages initially and create new documents using this template.
A row of buttons in the bottom left-hand part of the screen corresponds to the list of pages of the document. The current page is selected. To scroll through the list use the buttons to the left.
For operations on pages, you can use the Page menu or call the context menu over the page bar at the bottom of the screen. The second way is more convenient.
Global properties of the pages.
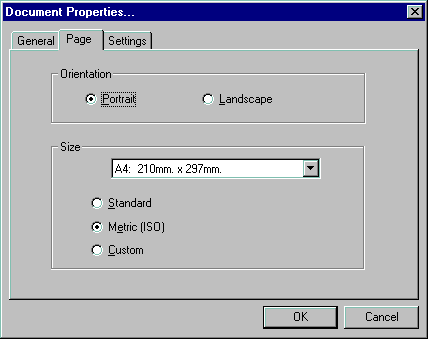
Orientation and size are global page properties. In ConceptDraw, these properties are assigned to all pages of the document in the Document Properties dialog under the Page tab (File/Document Properties)
Size types.
There are 3 types to choose from: Standard, Metric and Custom. Each of them has a specific set of dimensions:
Standard:
Letter - 8.5 in * 11 in;
Folio - 8.5 in * 13 in;
Legal - 8.5 in * 14 in;
Tabloid - 11 in * 17 in;
Metric(ISO):
A5 - 148 mm * 210 mm;
A4 - 210 mm * 297 mm;
A3 - 297 mm * 420 mm;
A2 - 420 mm * 594 mm;
A1 - 594 mm * 841 mm;
A0 - 841 mm * 1189 mm;
Custom:
Sets the width and height of the page. You may enter the values
in whatever units of measure supported in Concept Draw, for
example: 10 in, 2 ft, 30 cm...etc.
Orientation
Determines the way the page is displayed:
Portrait - the height and the width correspond to the
specified values;
Landscape - exchanges the values for the height and the
width. For example, an A4 size page will have the 297 mm * 210 mm
dimensions, (i.e. will be wider than it's tall).
A document page and a printed page are not exactly same things. So, if the document page is of A3 size, and the paper in your printer is of A4 size, each document page will be printed out on 2 paper sheets. To see how the document pages will be arranged on printed pages, enable Page Breaks under the View menu. Bold grey lines correspond to the nonprinting areas of the page, thin grey lines - are separators between the printed pages.
For example, if you want to create and print a document page
of A4 size horizontally rather than in its normally vertical
orientation, then you have to go through 2 steps.
1) Iná the Document Properties dialog
(File/Document Properties), under the Page tab specify A4 size
and Landscape orientation. These are the document pages
parameters only, and they don't affect printed pages parameters.
2) In the Print setup dialog (File/Print
Setup), choose A4 size and Landscape orientation as well.
Check Page Breaks under the View menu to make sure whether your
settings are okay.
To add a new page to the document, choose Add from the Page menu. The Page Properties dialog box will come up.
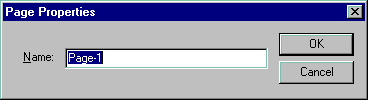
For every new page, the program suggests a name like "Page - N", where N is the new page number. You may type in some other name, if you wish. Clicking OK adds the new page to the page list, and you can edit it like all other pages.
To delete a page, choose Delete from the Page menu. The Delete Page dialog will come up.
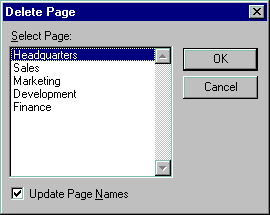
In the list of pages select the page to be removed. If the "Update Page Names" option is checked, the program will rearrange all pages with default names so that they have correct numbers. On clicking OK the page you selected will be deleted.
Besides adding or deleting pages, you may sometimes want to change the order in which pages are placed. To do this, choose Reorder from the Page menu. The Reorder Page dialog box will come up.
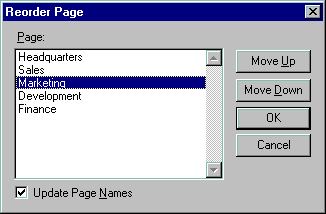
Select a page from the list. Use the Move Up and Move Down buttons to change its position in the list. If the Update Page Names option is checked, the program will rearrange all pages with default names so that they have correct numbers. Click OK to apply the changes.
There are 2 methods for jumping to another page.
First option is to click the respective page button from the list in the bottom left-hand corner. To scroll the list, use the scroll buttons.
Another option is to specify the page in the Goto Page dialog (Page/Goto).
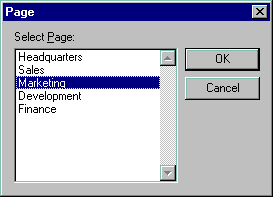
Choose the page you want to jump to from the list and click OK.
Note: you may set the double-click action of objects (see the Double Click section), or their hyperlink options (see the Hyperlink section) so that you can use these objects as links to other pages of the document.
The name of the active page appears in main window title bar. To change it, choose Properties from the Page menu.
In the dialog, type a new name and click OK.