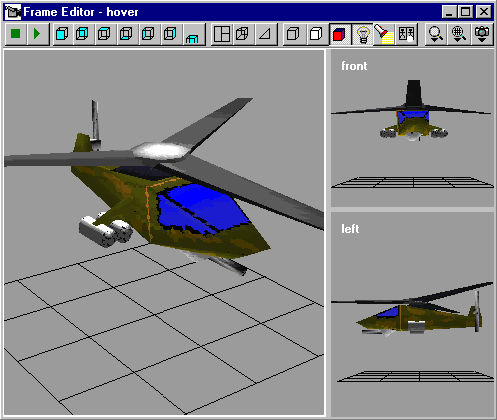
The frame editor is used for editing the 3D mesh and painting on the skin in 3D.
![]()
These two buttons control the playing of animations. Pressing the right button will start playing the scene that is selected in the main window's frame tree panel. Pressing the left button will stop the scene playing.
![]()
These presets let you choose a predefined viewing angle in the Edit Panel. From left to right these presets let you view the model from :
![]()
Use this button to switch between a single editor panel and three editor panels.
If you want to view the model from different directions simultaneously during editing you should use the three editor panels. If you want to work with a single editor use the single editor panel.
![]()
Use this button to switch between perspective and parallel projection. When the button is up, Perspective projection is used and when the button is down Parallel projection is used.
Parallel projection does not take into account depth information, perspective projection does. Normally the Edit Panel shows the model with perspective projection. This will show the model in a way that resembles most closely the way it would look in reality. However, a drawback of Perspective projection is that it is very hard to align parts of the model (like objects or vertices) exactly. Because objects that are draw farther away are rendered smaller than objects nearby.
You will want to use the parallel projection mode, for example because you want to align vertices. To activate parallel project click the button to make it go down. To get perspective correct projection click the button to make it go up.
![]()
Press this button to show the backside of triangles. The backsides of triangles are shown in dark red. Normally you will not see any back side triangles popping up, but in models that are created from import files some or all of the triangles may be flipped.
![]()
These three buttons determine how the model is rendered in the Edit Panel.
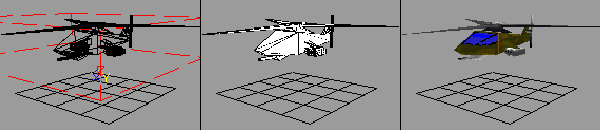
Pressing the first button will select wireframe mode in the Edit Panel. In wire frame mode you can see through the model. The red box you see in this mode indicates the model's bounding box. Take a look at the model property editor to see the exact dimensions of the bounding box for either the current frame or a cumulative bounding box for the complete model.
Pressing the second button puts the Edit Panel in solid rendering mode. The triangles are rendered as white polygons with a black border.
Pressing the third button will put the Edit Panel in textured rendering mode. In this mode the spotlight button and the skin recorder button will be enabled.
![]()
Use these buttons to turn on a spotlight to illuminate your model and to position the spotlight. The spotlight implemented in qME will do simple Gouraud shading. The ambient light level that is used during shading is identical to the gamma correction you can select in the options dialog. So to change ambient lighting, change the gamma correction.
The left button is used to turn on the spotlight. The spotlight initially shines from above. Pushing down the right button will snap the spotlight to your camera position, which means that the light seems to becoming from the viewing direction. Now position the spotlight by rotating the model until the spotlight shines on the spot you want illuminated. Now pushing the right button again will make it stay up and unsnap the spotlight from the camera position.
An alternative way to change the position of the spotlight is by using the camera tool. You can left click drag to move and right click drag to rotate your camera around the model. When you hold down the CTRL key when doing this, the spotlight will snap to your camera. Releasing the CTRL key again will unsnap the spotlight from your camera and leave it at the position it had at the moment of unsnapping. Note however that this method seems to introduce some strange "trailing" effects where the model will go on turning long after you have stopped moving the mouse. The preferred method of positioning the spotlight is by using the right spotlight button.
![]()
You can create nicely shaded skins from flat colored ones by using the skin recorder. Just press down the skin recorder button to start a recording session. Note that the skin recorder is only enabled when textured rendering mode is selected.
The principle of skin recording is quite simple. When you press the skin recorder button a new skin is created internally. While qME is rendering the model, texels (pixels in a skin) are read from the current skin and shaded according to the spotlight and ambient light settings. These texels are then written to the new internal skin. When you press the skin recorder button again, the skin recorder will stop recording and you get to select if you want to keep or discard the new skin.
To quickly create a shaded skin, do the following :
![]()
The zoom button will pop-up the menu below that allows you to change the zoom percentage.
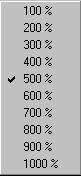
Change the zoom percentage to take a closer look at your model.
When you have the camera tool selected, you will be able to left click to zoom in one step and right click to zoom out one step. Also holding down both mouse buttons and moving the mouse up and down will zoom in and out.
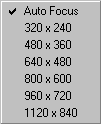
qME gives you flexible control over the rendering resolution. The resolution selection menu lets you choose the resolution for viewing the model. You'll mostly select low resolutions in order to speed up the rendering when viewing an animation and higher resolutions during editing.
If you select "Auto Focus" the edit panel will match the resolution to the panel size, giving you the best resolution possible.
![]()
![]()
The snapshot menu lets you take snapshots of the edit panel contents. The snapshot can be put on the clipboard or saved into a file.
The edit panel is the main 3D editor for editing the selected frame. You will do most of the model editing in this view, using tools to move vertices and triangles and objects around and to paint on the model directly in 3D.
The way you edit in qME is different from the 'normal' way of editing found in most 3D modellers. Most modellers use a 4 view editor where you can edit the model in one of the three 2D windows and use the single 3D preview window to see the result. qME takes a radical break from this approach and let's you do everything in a single integrated 3D editor.
You can choose between a single editor panel or three editor panels. If you favor the 2D editing experience, use the camera presets to select a standard viewing direction in each one of the three editor panels.
The tool palette found in the main window lets you select a tool to use in the edit panel.
Use the tool palette to activate a tool. When you select a tool, the tool properties palette is changed to show the properties for the selected tool. Initially you will find the tool properties palette directly on the right side of the tool palette.
In most cases clicking outside the model with a tool will default to camera tool behavior. This means that for example when you have the vertex tool selected, you can still rotate and move the camera around the model.
Below you'll find a description of what you can do with each tool in the edit panel.
![]()
With the camera tool you can change the angle and position from which you view the model. You can also zoom-in (left click) and zoom-out (right click) of the model. The camera tool allows you to view the frame and animations from all direction without actually changing the model.
Note, that the camera tool will never change your model, it only changes the angle and position from which you view the model.
![]()
This tool is used to select and drag around vertices in a frame and to insert new vertices. Un-selected vertices are a solid black color and selected vertices are a solid blue color.
You can insert new vertices by holding down the CTRL and ALT key and then left clicking the editor panel. The vertex will be inserted at the same depth as the closest neighbor vertex from the viewing direction.
You can multi-select vertices with a selection rectangle or by selecting them one by one. To select multiple vertices one by one, hold down the SHIFT key and click every vertex you want to select separately. Use a selection rectangle by left clicking outside the model and then dragging a selection rectangle around the vertices you want to select.
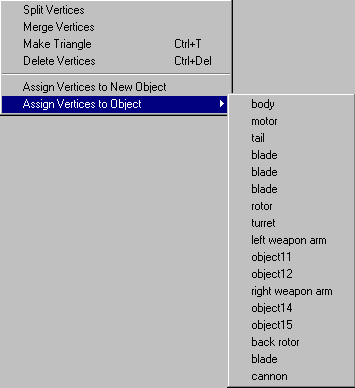
If you have some vertices selected you can right click anywhere in the frame edit panel to bring up the vertex menu.
![]()
This tool is used to select and drag around triangles in a frame. You can select multiple triangles by holding down the shift key and then clicking the triangles you want to select. Selected triangles are blue and have black borders.
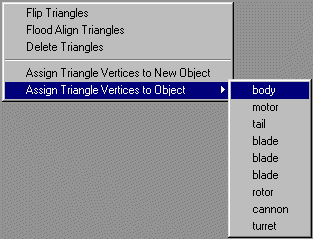
You can flip and flood align triangles directly by using either or both the CTRL and ALT keys. To flip a triangle left click a triangle while holding down the CTRL key. To flood aligning triangles use the ALT key and then left click a triangle. This will flood align triangles with the clicked one. Holding down both the CTRL and ALT key and then left clicking a triangle will first flip the clicked triangle and then flood align all triangles with the flipped one.
If you have some triangles selected, then you can right click anywhere in the frame edit panel to pop-up the triangle menu.
![]()
You can paint directly on your model in 3D using the pen tool.
The pen size used during painting can be selected in the tool properties palette. The tool properties for the paint tools have been described in detail in the main window description.

The color that is used for painting can also be selected in the color palette or in the skin color editor.

![]()
The flood fill tool will replace an area of solid color with the currently selected color.
![]()
The color dropper is used to select the current color from the model and to replace a color in the current skin.
![]()
With the object tools you can move, rotate and scale objects. When any one of the object tools is selected, you can configure the tool via the tool properties palette. The tool properties for the object tools have been described in detail in the main window description.
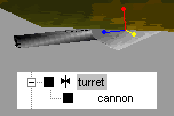
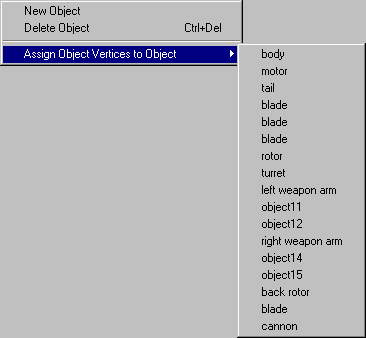
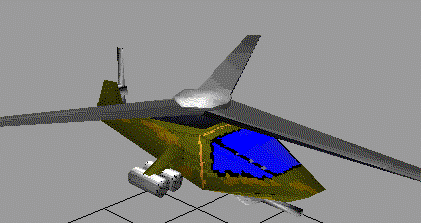
All object tools let you select an object in the edit panel. Below is a cut out where you can see that the "turret" in the chopper model is selected, the outline also shows this. The coordinate system displayed for the selected object has three unit vectors. Red indicates the Z direction, blue indicates the X direction and yellow indicates the Y direction.
The first tool is the "object move tool". It lets you select and move an object in the model. For objects that have child objects, the child objects are moved too. So if you would move the turret, the cannon which is a child of the turret would move too.
The second tool is the "object rotate tool". It lets you select and rotate an object around its center. To get better control over the rotation grab one of the handles. Although you can rotate directly with the tool, it is usually more convenient to use the tool properties palette to set the rotation exactly.
The third tool is the "object scale tool". It lets you select and scale an object. You can use the tool properties palette to set the scale exactly. Note that you can use negative scaling to turn an object inside out.
If you have an object selected, you can right click anywhere in the frame edit panel to pop-up the object menu.