are all placed in AlbumShelves. You can put different groups of images into different Albums, and put different groups of Albums into different AlbumShelves. An Album can hold 100 images at most.
About Album
Albums are all placed in AlbumShelves. You can put different groups of images into different Albums, and put different groups of Albums into different AlbumShelves. An Album can hold 100 images at most.
Create New Album
You can click  on PhotoFamily Toolbar to add new albums into selected shelf. You can also select New Album in the File menu or press Ctrl+N to add new albums. The Album icon will be shown below the Shelf icon. The default Album name is "Album", you can click the album name to change it.
Operations with Album
to  .
.
You can change the Alubm Properties and create your own style album. In the main UI, select Property in the pop-up menu after right-click an album, or select an album and click  on the PhotoFamily Toolbar.
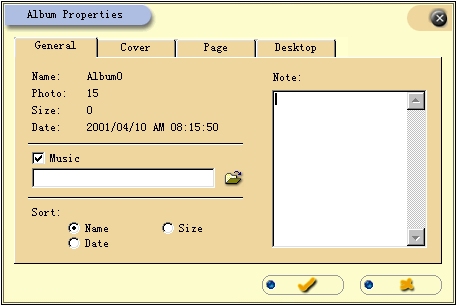
General Information
The first page of Album Properties dialog box is General Information:
In this page, you can see seven items, namely:
 to locate a music file).
Cover Settings
The second page is the settings for Album Cover:
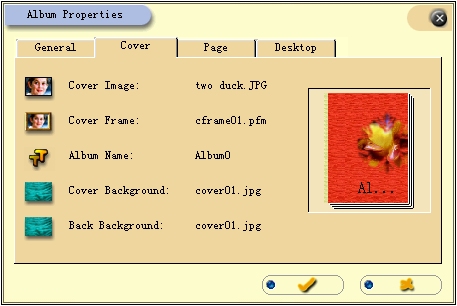
In this page you can see four items, namely:
 to change the cover.
 to change it, PhotoFamily provides several patterns for you to choose.
 to change the album name.
 to change it. to change it.
Page Settings
The third page of this dialog box is Page Settings, there are two item and two checkboxes in this page:
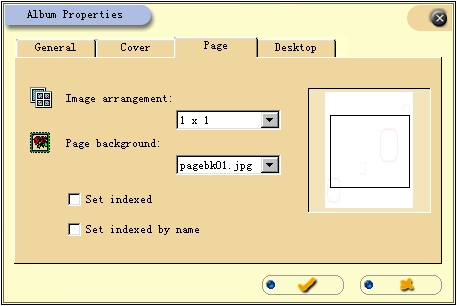
Image Arrangement ---- From the Image Arrangement pull down list, you can select how many images you would like to view in one Virtual Album page: 1x1, 2x1, 2x2, 3x2. You can preview the layout in the preview window on the right.
Page Background ---- From the Page Background pull down list, you can select a background texture image for Album inner pages.
Set Indexed ---- If you check this checkbox, you will see the image index number at the top left corner of each image when you view the Virtual Album.
Set Indexed by Name ---- If you check this checkbox, you will see the image file name at the foot of each image when you view the Virtual Album.
Desktop Settings
The fourth page of this dialog box is Desktop Settings, you can set the color or pattern of the stage on which your Album is placed:
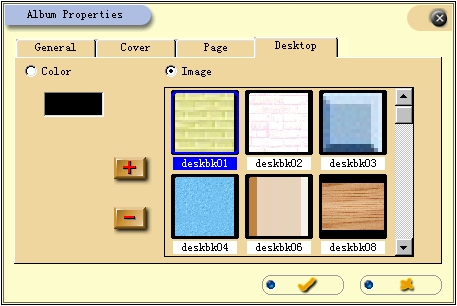
Color ---- Check the Color radiobox, then click the color block below the radiobox, a color palette will appear. Pick any color you like, and press OK button to save settings.
Image ---- Check the Image radiobox. In the preview window on the right, you can see many desktop patterns for you to select, just click to select one. If you don't like any of them, and want to add a desktop pattern of your own, click  to browse for a new pattern in your harddisk; if you want to delete some patterns, select them and click
  .
.
When you've done all the settings, press  to save the settings and close Propertise dialog; otherwise click
  to abort your settings and exit.