| Graphics must be RGB 8 or 16 bits, or grayscale. |
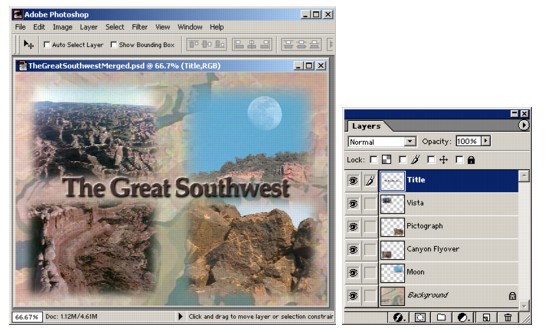
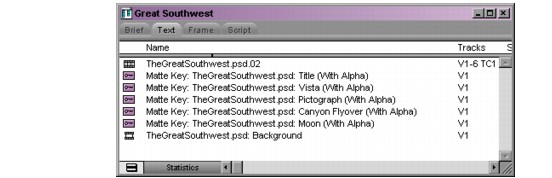
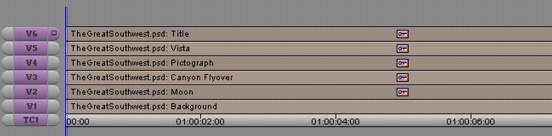
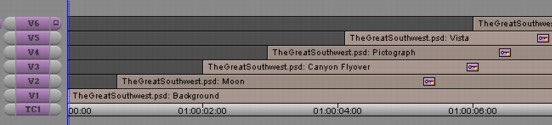
| Layer order and layer names are preserved during import. |
| Hidden layers are imported as matte keys. |
| Opacity is converted to Foreground level in the Matte Key effect. |
| Text and shape layers are rasterized (converted from vector-based to bitmap) during import. |
| 1. | For the first import, click Select Layers and select all layers except the layers that contain layer effects. |
| 2. | For the second import, open Photoshop, hide the layers you've already imported, and show the layers that contain layer effects. During the import, click Flattened Image. The resulting image contains only the layers that contain layer effects. |
Layer Option
| Supported
| Notes
|
|---|---|---|
Blending Mode | No | To preserve the blending mode (Dissolve, Multiply, and so on), merge the layer into another layer that does not use a special blending mode. Only normal mode is supported. |
Opacity | Yes | The imported layer's Level is set to the opacity specified in Photoshop. You can adjust the opacity level with the Foreground Level control in the Effect Editor. |
Layer Group | Partial | Layer grouping is ignored. All layers, including grouped layers, are imported as individual layers. To preserve a clipping group, merge the grouped layers into the base layer. |
Layer Set | Partial | All layers within a set are imported as individual layers. |
Layer/Set Mask | No | Layer and set masks are ignored. To preserve a layer mask, apply it to the layer. To preserve a set mask, merge the set into an empty layer. To preserve a special layer's mask, rasterize the layer. |
Layer Style | No | Layer styles are ignored. To preserve a layer style, you must convert the style into layers. |
Layer Option
| Supported
| Notes
|
|---|---|---|
Type Layer | Yes | |
Solid Layer | Yes | Solid layers are imported as a graphic with a full screen opaque alpha channel. |
Gradient Layer | Yes | Gradient transparency is preserved. |
Pattern Layer | Yes | |
Adjustment Layer | No | Adjustment layers include Levels, Curves, Color Balance, Brightness/Contrast, Hue/Saturation, Channel Mixer, Gradient Map, Invert, Threshold, and Posterize. |