How to start working
Probably you have started the PCTweaker(PCT) for the first time?
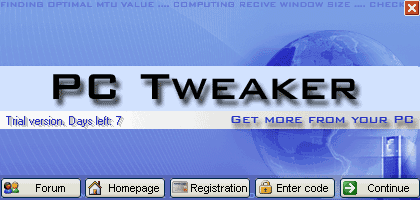
Well. That means you are seeing the Splash Screen now.
This screen is just a signal that this software is
under trial (familiarization) period.

You may know much more about the Splash Screen from chapter
Acquaintance with the PCT interface,
but now we needn't to concentrate your attention on this. Press button "Continue" - and, you are in the Main Screen!
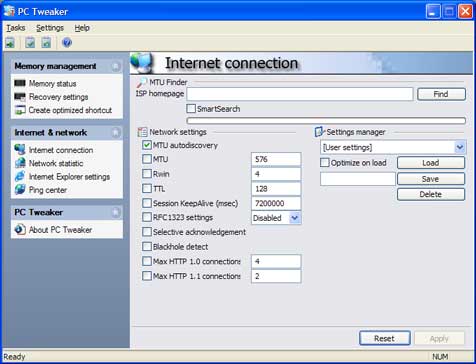
If you use Net Edition of PCT you will see the Internet Connection screen.
This tool allows optimize Internet connection for different types of
Network: Dial-Up, DSL, T1 or Cable network.
Take a look at the picture:

There are 3 main zones on the Main Screen:
- Menu and Toolbar on the top of the window;
- Tasks List on the left;
- Current Task Area
Menu and Toolbar area (1) consists common menu items and icons which are relevant to all tasks.
The File Menu allows to open additional modules or close the PCT;
The Tasks Menu will help you navigate within tasks (more detailed description of this menu
and all its subitems see below)
And the Help menu opens this help file, consists links to Web resources, where you can get
additional info and request form, where you can write message directly to PCT technical support service.
Buttons placed on the ToolBar are quick access to the most important menu items. So, you may execute
the same operation using either ToolBar icons or Menu Items.
Task List (2) consists currently loaded modules. Every module consists header (name of the module) and
task list the module provides.
Current Task Area (3) is an area where main settings controls are located. Every task provides its own task area.
Generally, this are consists buttons Reset and Apply. Purposes of these buttons are described in the next paragraph.
General Provisions

Tip: It is recommended to store your settings
before any changes. It allows easilly rollback
any wrong changes.
Select in the Task List the task you want to execute.
In the right-hand area an appropriate dialog will appear.
We will consider this task as Active Task
Generally, the Task Dialog consists buttons Apply and Reset
the Apply button applies the changes (if these changes have been made in the dialog);
the Reset button loads current settings into the dialog window.

Tip: If you've made something wrong
and can not remember previous settings
use the Reset button to rollback
to the previous settings

Note: These Apply and Reset buttons are
applicable to the current task only
(another words, for dialog where they are located)
These dialogs may consist additional buttons. Purpose of these buttons will be explained in the appropriate topic.
If you want to know more, or can not remember function of any button,
checkbox or something else, please refer to
Acquaintance with the PCT interface topic.
Finishing the work
If you have finished your work but not applied the changes yet, the PCT will remind about this.
You may agree or decline all changes you have made in this session.

- the Yes button: apply all changes;
- the No button: decline all changes;
- the Cancel button: return to the PCT and show first dialog where are unsaved changes
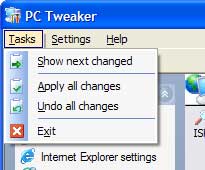
You may Tasks Menu to easy navigate from these tasks:

- the "Show next changed" menu will help you easy come back to dialog where
you have added changes;
- the "Apply all" menu - applies all changes, you have made in any dialog(s);
- the "Undo all changes" menu - declines all changes (if they wasn't applied in the appropriated dialog(s)).

PCTweaker ©2004 Moveax


