To measure multiple points along a line or polygon, use the
![]() tool, which inserts control points with each click as
the following image shows:
tool, which inserts control points with each click as
the following image shows:

Control points may be moved, added and deleted. When the
points are properly arranged, the measurement is
done by right clicking and selecting Write
measurement or alternatively Write
measurement and extended information.
The SHIFT key locks the measuring in ONLY 90 degree directions to the previous
control point, allowing drawing lines perfectly vertical or horizontal
(orthogonal lines)
Drawing points along a line
Select the Polygon tool ![]() and draw the line, clicking twice to place both end points.
If it is an orthogonal line, keep pressed the SHIFT key:
and draw the line, clicking twice to place both end points.
If it is an orthogonal line, keep pressed the SHIFT key:
![]()
Add the intermediate points, taking care of clicking as exactly as possible on the line (Learn more):
![]()
If you click too close to another point,
instead of adding a new point the program will selected the other point.
To avoid such problem, click more far away from other points and keep pressed
the mouse button.
Then you can move the new point in 1 pixel increments by pressing the arrow
keys and move it as close to another points as you want.
Right-click and select Write measurement in the shortcut menu:

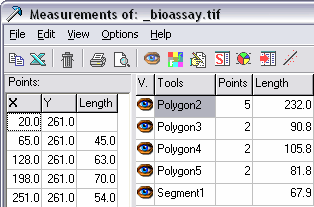
The measurements will be recorded in the Measurements window, as the following image shows:

Note: to see each point coordinate and segment length make sure the Left Pane is visible by checking the View > Left pane menu option, if necessary.