|
|
|
|
Post Production
Bryce is a 3D application that creates landscapes, it is not an image-editing program. As such, you won't find the image-enhancing capabilities of an image editor. For post production operations you'll need to use applications like Corel® Painter, Corel PHOTO-PAINT® or Photoshop. You can use these applications to adjust colors, contrast or brightness. You can even paint in elements that were not in the original scene.
Rendered images can be saved to formats compatible with almost any image-editing application.
Compositing
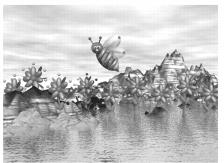
Compositing is the process of pasting one image into another. For example, if you create a farm scene in Bryce and then create a mask for that scene, you could paste it into a scanned image of a tornado. With a little creativity you can make the farm appear as though it were about to be destroyed by the storm.
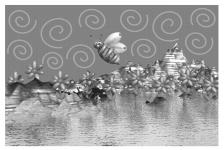
The shape of the foreground image is taken from a black-and-white image that contains the shape of your scene. This image is called a mask. You can generate a mask in Bryce by using the Mask Render mode.
Using compositing, you can take the scene you created in Bryce...
...render it as a mask, using Mask Render mode...
...and then use the image as a selection mask in a 2D image-editor. Once selected, you can place your Bryce scene into a 2D image.
To render a scene as a mask:
1 Click the triangle next to the Render controls and choose Object Mask from the menu.
2 Choose File menu>Export and choose either BMP or PICT.
Using Corel® Painter
The following compositing procedure uses Corel Painter as a post production application. The steps for Adobe Photoshop would be almost the same.
To composite using Corel Painter:
1 Render the scene normally using Perspective Render mode.
2 Save the image in a convenient location.
3 Select the objects you want masked.
4 Render the scene again, this time using Object Mask mode.
5 Save the mask image to the same location.
6 Open the Perspective Render image in Painter.
7 Choose Select menu>Load Selection.
8 In the dialog, select the Object Render image. Click OK.
Painter selects the objects in your scene.
10 Open the background image (the image you want to paste your Bryce scene into).
The selection is pasted into the image as a floater.
12 Position the floater where you want it.
Refer to the documentation that came with your image-editing application for more information on working with masks.
Adding Depth
Distance Mask Render mode produces an image that can be used as a distance mask in most image-editing applications. The Distance Render image contains grayscale representations of all the images in your scene. Objects closer to the camera appear black, while those furthest away appear white. The objects in between are various shades of gray depending on their distance from the camera.
This grayscale information can be used to create photographic depth of field effects. For example, if you take an image that has a lighthouse in the foreground and a fishing village in the background and render it using Distance Mask Render mode, you can take the image into Photoshop and create an image where the lighthouse is in sharp focus while the village is blurred.
To render a scene as a distance mask:
1 Click the triangle next to the Render controls and choose Distance Mask from the menu.
2 Choose File menu>Export and choose PICT.
3 Choose the drive and folder where you want to save the file.
Using Photoshop
The following procedure uses Photoshop as a post production application. The steps for Corel Painter would be almost the same.
To create depth of field using Photoshop:
1 Render the scene normally using Perspective Render mode.
2 Save the image in a convenient location.
3 Render the scene again, this time using Distance Mask Render mode.
4 Save the mask image to the same location.
5 Open the Perspective Render and the Distance Render images in Photoshop.
6 Place the Distance Render image into the alpha channel of the Perspective image.
7 Load the alpha channel as a selection.
Objects close to you will appear sharp while objects farther away will become progressively more out of focus.
- You can also invert the selection and apply Motion Blur to the image. In this case, objects in the foreground would be motion blurred, and the background would be sharp, as if you took a picture from a moving car.
- You could determine very specifically which objects in your scene are in focus and which are not. Select the Distance Rendered alpha channel and remap the gray values in the Curves dialog in Photoshop. Remap black input to lighter output, and the gray value of the desired focal object to black.
 Corel Corporation http://www.corel.com Voice: (800) 772-6735 Fax: (716) 447-7366 www.corel.com/support |