
Create panel > Shapes > Splines > Object Type rollout > Text
Create menu > Shapes > Text
Use Text to create splines in the shape of text. The text can be any Windows font installed on your system, or a Type 1 PostScript font installed in the directory pointed to by the Fonts path in the Configure Paths dialog. Since fonts are loaded only at first-use, changing the font path later in the program has no effect. The program must be restarted before the new path is used, if the font manager has been used by the program.
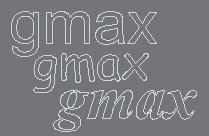
Examples of text
You can edit the text in the Create panel, or later in the Modify panel.
Tip: You can enter Windows extended characters (such as letters with accents, non-English characters, and so on) in the Text object's Text field. To enter an extended character, hold down the ALT key, and use the number pad to enter the character's numeric value. For example, if you hold down the ALT key and enter 0233 on the number pad, the Text object includes an e with an acute accent. Some characters, such as this one, require you to enter a leading zero. You must use the number pad. The numbers above the alphabetic letters won't work.
Text shapes maintain editable text as a parameter so you can change the text at any time. If the font used by your text is deleted from the system, gmax still properly displays the text shape. However, to edit the text string in the Text edit box you must choose an available font.
The text in your scene is just a shape where each letter and, possibly, pieces of each letter are individual splines. You can apply modifiers like Extrude, Bend, and Edit Shape to Text shapes just like any other shape.
Procedures
To create text:

 Go to the Create panel and choose Shapes.
Click Text.
Enter text in the Text box.
Do either of the following to define an insertion point:
Click in a viewport to place the text in the scene.
Drag the text into position and release the mouse button.
To enter a special Windows character:
Hold down the ALT key.
Enter the character's numeric value on the number pad.
You must use the number pad, not the row of numbers above the alphabetic keys.
For some characters, you must enter a leading zero. For example, 0233 to enter an e with an acute accent.
Release the ALT key.
Interface
Settings available for text include kerning, leading, justification, multiple lines, and a manual update option.
Mesh Settings and Interpolation rollouts
All spline-based shapes share these parameters. See Splines for an explanation of these parameters.
Parameters rollout
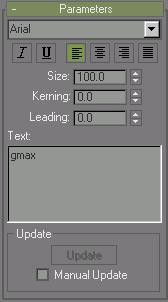
Once you have created text, you can make changes using the following parameters:
Font list: Choose from a list of all available fonts. Available fonts include:
Fonts installed in Windows.
Type 1 PostScript fonts located in the directory pointed to by the Fonts path in the Configure Paths dialog.
 Italic style button: Toggles italicized text.
 Underline style button: Toggles underlined text.
 Align Left: Aligns text to the left side of its bounding box.
 Center: Aligns text to the center of its bounding box.
 Align Right: Aligns text to the right side of its bounding box.
 Justify: Spaces all lines of text to fill the extents of the bounding box.
Note: The four text-alignment buttons require multiple lines of text for effect because they act on the text in relation to its bounding box. If there's only one line of text, it's the same size as its bounding box and has nowhere to go.
Size: Sets the text height where the height measuring method is defined by the active font. The first time you enter text, the default size is 100 units.
Kerning: Adjusts the kerning (the distance between letters).
Leading: Adjusts the leading (the distance between lines). This has an effect only when multiple lines of text are included in the shape.
Text edit box: Allows for multiple lines of text. Press ENTER after each line of text to start the next line.
The initial session default is gmax Text.
The edit box does not support word wrap.
You can cut and paste single- and multi-line text from the Clipboard.
Update group
These options let you select a manual update option for situations where the complexity of the text shape is too high for automatic updates.
Update: Updates the text in the viewport to match the current settings in the Text display window. This button is enabled only when Manual Update is on.
Manual Update: When on, the text that you type into the Text display window is not shown in the viewport until you click the Update button.