Select an object > Create panel > Geometry > Compound Objects > Morph
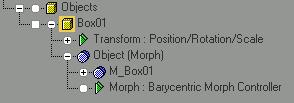
The Barycentric Morph controller is automatically applied when a morph object is created in Create > Geometry > Compound Objects > Morph. Morph targets are selected and keys are created at different times to morph the original object into the shape of the Morph Targets.
Note: The Morpher modifier provides an alternative to the Morph controller to morph objects.
See also
The Barycentric Morph controller represents each key as a series of weights for all targets. One barycentric key represents a new object, which is a blending of all targets.
You can adjust each morph key to various percentages of the available morph targets. This lets you create subtle adjustments in the animation.
You can add keys between existing morph keys. The added keys contain interpolated values for all targets.
To access the key properties dialog, select the Morph track, select one of its keys, and click Properties to display the Key Info dialog.
Procedure
See
Barycentric Controller Key Info Dialog
Interface
After assigning the Barycentric Morph controller in Create panel > Compound Objects > Morph, then morph parameters for the controller display in the Modify panel and in the Barycentric Controller Key Info dialog, which is displayed by right-clicking over a morph key in Track View or the track bar.
See Morph for Morph parameters.