


Use the Group tool to make one or more objects behave as a single object. Unlike the Weld tool, this association can be reversed.
|
|
The Ungroup tool will ungroup the objects in a group.
q Grouping (PC: Ctrl+G; Mac: Command+G)
How do you use it?:
1. Selecting the Group tool. ![]()
Click on the icon depicting the Group tool in the Control Panel.
The Wand cursor appears.
2. Selecting the objects to group.
There are two ways:
¨ Selection using the Wand (selection tool)
Þ Click (left mouse button) on each element to be grouped.
Þ Validate the selection pressing the Return key.
¨ Selection with the Lasso
You can access the Lasso either through:
Þ The Assistant Palette: Click on the icon depicting the Lasso tool in the Assistant Palette.
Or
Þ The mouse:
On PC: Click the right mouse button.
On Mac: Press the Option key and simultaneously click the mouse button.
The Lasso appears.
Þ Use the Lasso to surround the objects that you want to group and press the Return key.
The selected elements are grouped and are displayed in cyan.
3. To create another group, repeat step 2.
4. Ending the action.
Validate the action to end it or put the tool aside. See chapter User Manual/Tools/Generic use of a tool/How do you end an action?
After this operation the objects are grouped. They are treated as one object.
![]() This operation can be reversed. See the Ungroup tool below.
This operation can be reversed. See the Ungroup tool below.
![]() You can also group the objects of a scene without selecting the tool.
You can also group the objects of a scene without selecting the tool.
Þ Select the first element of the group using the Wand.
Þ Press the Shift key and do not release it.
Þ Click on the other objects you want to group.
Þ Release the Shift key.
|
Practical exercises:
|
q Ungroup (PC: Ctrl+U; Mac: Command+U)
How to use it:
1. Select the Ungroup tool. ![]()
Click on the icon depicting the Ungroup tool in the Control Panel.
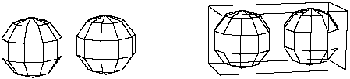
Existing groups will be displayed surrounded by a white cube in the scene.
The Wand appears.
2. Selecting the groups to be ungrouped.
Select with the Wand, clicking on the left mouse button each group to be ungrouped.
Each object composing the group is once again treated as an individual object.

If you ungroup a group made up of sub-groups, those sub-groups will be displayed surrounded by a white cube when you destroy the master group. You will then be able to ungroup those sub-groups.
3. Ending the action.
Validate the action to end it or put the tool aside (depending on the interface). See chapter User Manual/Tools/Generic use of a tool/How do you end an action?
![]()
You can also use the following keyboard shortcut to ungroup a group:
Þ Select the group using the Wand.
Þ Press the Shift key and simultaneously click on the element you want to ungroup.
Release the Shift key.
q Entering and leaving a group
If you want to momentarily work on an element that is part of a group but without having to ungroup and then re-group it, you can use the “Enter and leave a group” mode.
To enter a group:
1. With no tool selected, place the cursor above the group.
2. Place the cursor above the group tool icon or above the Ungroup tool icon in the Control Panel.
3. Then, on PC: Click the right mouse button.
4. On Mac: Holding down the Option key, click the mouse button.
5. In the popup menu, select: “Go in group” and release the mouse button. The group will be momentarily ungrouped allowing you to work separately on the elements that are part of the group. (The other elements of the scene will be hidden during the operation.)
Leaving a group:
1. With no tool selected, place the cursor above the Group tool icon in the Control Panel. Then, on PC: Click the right mouse button. On Mac: Holding down the Option key, click the mouse button.
2. In the popup menu, select: “Go out of the group”. The group will be re-created once again and the whole scene will reappear.

