A page is made up of objects. An object may be a picture, a drawing or a text frame; everything on a page is an object.
There are six types of objects that you can place on a page in PageStream:
Text frames are containers in which text may be entered. Most text frames are rectangular text column frames with one or more columns. Text frames created from irregular shapes are referred to as text shape frames. Text column frames are normally used for the body text of a document and text shape frames are used for special effects. Text frames can be linked together so that text will flow between them. Use text frames for the body text of your documents.
Text blocks are frameless text used for titles, headers, footers and other small blocks of type. They lack defined right and bottom margins, so they don't have fixed edges within which to wrap text. You must press the Return key to end each line of text in a text block. Text blocks cannot be linked to other blocks or frames.
Shapes and paths are the two types of graphic objects which can be drawn in PageStream. Shapes are lines, boxes, ellipses and polygons. Once drawn, they can be resized without losing their shape. A path is a series of lines and curves. The lines and curves are linked together by points. Paths can be created with the Pen and Freehand tools. Unlike shapes, the points connecting path lines and curves may be changed with the Reshape tool. Shapes can be converted to paths with Convert to Path from the Object menu.
Pictures: Pictures are generally created with paint, image processing and scanning software. They cannot be created in PageStream, but can be imported.
EPS illustrations are non-editable graphics which can be printed only with PostScript printers and cannot be edited within PageStream.
Drawings are non-editable illustrations which can contain any other type of object. They can be created in PageStream or imported from an illustration program. Drawings can be dissolved so that they can be edited, and can be printed on any type of printer. Certain types of EPS files may be converted into drawings when they are imported.
You can use PageStream's drawing tools to create simple shapes, such as lines and boxes, and complex paths. You can change the color, fill style and line style of shapes and paths after drawing them.
1. Select a shape tool from the toolbox.
Choose the Line, Box, Ellipse or Polygon tool. Some of these contain flyout groups for additional shapes. The mouse pointer will change to a drawing crosshair.
2. Drag the mouse to start the shape.
Position the mouse crosshair over the start point of the shape. Drag the mouse in any direction while holding down the mouse button.
3. Release the mouse button to end the shape.
The shape will be created after you release the mouse button.
1. Select the Pen tool from the toolbox.
The mouse pointer will change to a drawing crosshair.
2. Start the path.
Position the mouse crosshair over the start point of the path. Click the mouse button to start the first line or curve.
3. Draw lines.
Move the mouse and click the button again to end a line and start the next line or curve. Continue as required.
Or draw curves.
Drag the mouse while holding down the mouse button to shape the start of a curve. Release the button and then drag the mouse again to shape the end of a curve. Release the button to end the curve. Continue as required.
4. End the path.
Press the space bar or Esc to end the path, or move the mouse pointer over the start of the path and click to close and end the path. If you have a two button mouse, you can also press the right mouse button to end the path.
You can import pictures, drawings and EPS illustrations created with other programs such as Adobe Photoshop', Adobe Illustrator' and Cloanto Personal Paint'.
1. Select the Object tool from the toolbox.
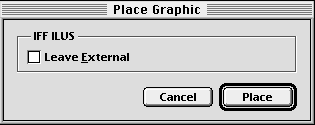
2. Choose Place Graphic from the File menu.
Select a file in the Place Graphic file selector. Click Open.
3. Select the import options.
The Place Graphic dialog box will appear. The options available will depend on the type of graphic selected. Click Place to import the graphic.
The graphic will appear in the center of the visible page area. You can now move or scale it as required.

Choose Place Graphic to import a picture, drawing or EPS illustration.
You can use the Object tool to select objects so that you can move, resize or otherwise manipulate them. You can select one object and change it alone, or you can select multiple objects and change them together.
Objects are placed on the page in a stack. The first object created will be at the bottom. Subsequent objects will be on top in the order they are created.
To select an object: Click on it with the Object tool pointer.
To select multiple objects: Drag around the objects with the Object tool pointer.
To select additional objects: Shift click on the objects to add to the selection.
To deselect all objects: Click on a blank area of the page, or press the space bar.
You can use the Object tool to move and resize objects. If snap-to-grid is toggled off, you can move an object to any position and scale it to any size. If snap-to-grid is on, you can move and resize objects only in grid increments.
1. Select the Object tool from the toolbox and select the object(s).
2. Position the mouse pointer.
Position the pointer on the object, but not on a size handle. Hold down the mouse button and drag until you see the mouse pointer change to a four-way arrow, and then drag the object to a new position. Release the mouse button to set the new position.
If you drag the object without pausing, only the bounding box of the object will be shown. If you hold down the mouse button and pause before moving, the mouse pointer will change to the four-way arrow. When you drag after pausing, the actual shape of the object will be shown.
1. Select the Object tool from the toolbox and select the object(s).
2. Position the mouse pointer.
Position the pointer over any size handle. Hold down the mouse button and drag until you see the mouse pointer change to a two-way arrow, and then drag the object to a new size. Release the mouse button to set the new size.
Resizing an object usually changes its aspect ratio (the ratio of the horizontal to vertical size). To resize an object proportionally, hold down a Shift key while you drag the mouse.