In this lesson, you will create a letterhead for a fictional coffee shop. This lesson will provide you with the skills you will need to create most documents with PageStream. The first step is to create a new document.
This lesson is designed for North American letter-size pages. Metric sizes are provided, but you may prefer to use the North American inches. If you decide to use millimetres, keep in mind that it is more important to learn the concepts and skills than to reproduce the tutorial document exactly.
1. Start PageStream3.
Double-click on the PageStream3 icon in the PageStream3 folder. When the PageStream Navigator appears, you're ready to start.
2. Click New in the Navigator.
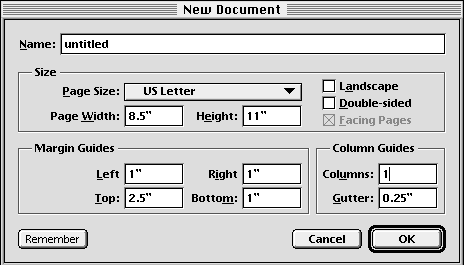
The New Document dialog box will appear.
Name: untitled
Page Size: US Letter
Landscape: Unselected
Double-sided: Unselected
Facing Pages: Unselected
Margin Guides:
Left: 1" (25mm)
Right: 1" (25mm)
Top: 2.5" (64mm)
Bottom: 1" (25mm)
Column Guides:
Columns: 1
Gutter: not applicable
Change each option in the New Document dialog box to match the picture shown above. You do not need to type the inch marks after numbers unless your default measurement system is not inches.
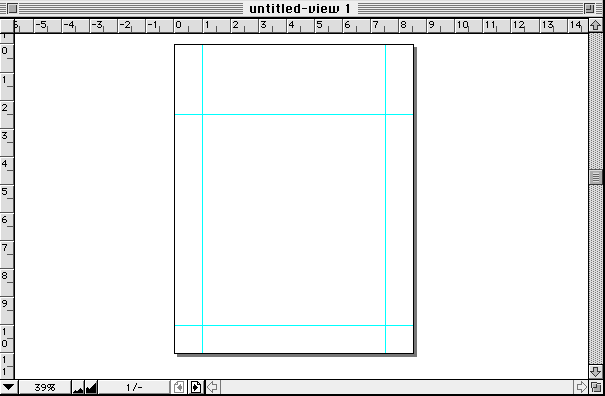
If you cannot see the entire page in the window, you have changed your default view magnfication. Choose Full Page from the View submenu in the Window menu to view the entire page now.
3. Click OK.
Your new page already has non-printing margin guides to help you later place a text frame for the body of the letter, but you should create page guides now to help place other objects on the page.
1. Choose Set Page Guides command from the Layout menu.
The Set Page Guides dialog box will appear. It has rulers representing the vertical and horizontal directions of your page. Margin and column guides are not shown on these rulers, so there will not be any guides shown yet.
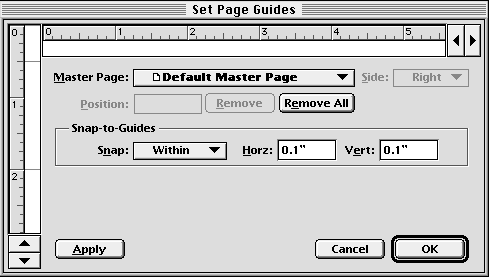
2. Create the guides.
Click on the vertical ruler at 0.5" to create a new horizontal guide. A black line to the right of the ruler will indicate its position. If value shown in the Position text box is not 0.5", drag the black marker to make it 0.5", or enter 0.5" into the text box. Create a second guide at 2."
3. Click OK.

Step 3: Placing a Graphic
In this step, you will import a drawing created with an illustration program to use as a logo for the letterhead. The logo will be placed near the top left corner of the page.
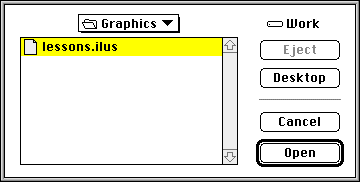
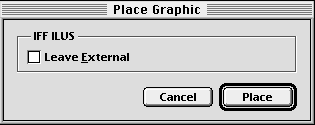
1. Choose Place Graphic from the File menu.
The Place Graphic file selector will appear. Select Lessons.ILUS from the Graphics folder in the PageStream3 directory. If you don't see this file, you may not be in the correct folder. Click Open.
2. Click Place in the Place Graphic dialog box.
A status dialog box will appear to indicate the time to load the drawing. When it disappears, the logo will appear in the center of the window if Place Graphics in Center is selected in the Files panel in Preferences.
It's a good idea to save your work regularly to avoid data loss in case of a power failure or other problem.
1. Choose Save command from the File menu.
The Save file selector will appear.
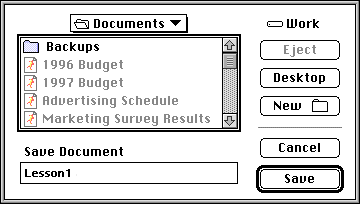
Choose a folder in which to save the document. Enter Lesson1 as the name.
2. Click Save.
PageStream allows you to view your document at magnification levels from 5% to 3000% of actual size. The current magnification level is shown on the Custom Scale button to the right of the View pop-up menu.
You need to enlarge the top of the page so that you can work on it more easily, so choose the Show Full Width command now from the View pop-up menu. This will change the magnification so that the entire width of the page can be seen at once, regardless of the height.
Depending on your screen size, you may need to use the vertical scrollbar to adjust the portion of the page shown in the window. If so, adjust it now so that you can see the top of the page.
The View pop-up menu is located in the horizontal scrollbar in PageStream for Macintosh and Windows, and above the horizontal ruler in PageStream for Amiga.
You can now move the logo to align it with the top guide. Ensure that Snap-to-Guides in the Layout menu is selected, and deselect Snap-to-Grid if it is selected. A checkmark will appear beside them when they are selected.
1. If you deselected the logo, select it now.
The logo drawing will be selected when size handles (small squares) are shown at its corners and side midpoints. If it is not selected, click on it with the mouse pointer. You can deselect objects by clicking on a blank area of the page or by pressing the space bar. Practice selecting and deselecting objects if you have not done this before.
When the logo is selected, its coordinates will be shown in the Edit palette below the document window. If it is not visible, display it now by choosing Show Edit Palette from the Window menu.
2. Move the logo.
Position the mouse pointer over the drawing. Hold down the mouse button and drag the logo. If you drag the mouse without pausing first, PageStream will show just the bounding box of the drawing. If you pause before moving the mouse, the mouse pointer will change to the 4-way move arrow to indicate that dragging now will show the actual object outlines.
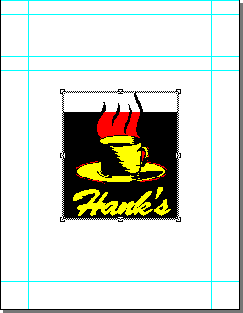
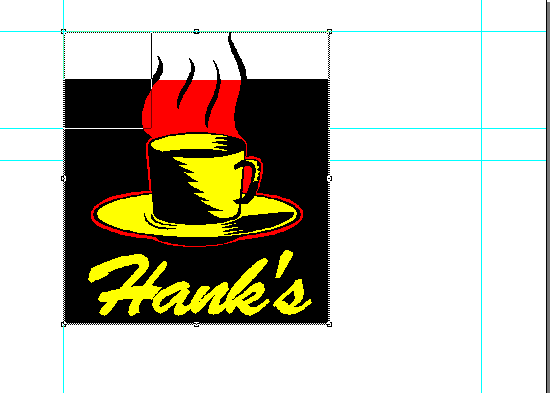
Try both moving methods to see the different results. The difference is very important when moving drawings such as this. When you have finished experimenting, move the logo so that its X and Y (top and left) coordinates in the Edit palette are 1.0" (25mm) and 0.5" (13mm), respectively. You chould notice the graphic snapping to the guides when it is moved near the guides.
If you make a mistake while moving or scaling an object, and want to try again, simply choose Undo from the Edit menu.
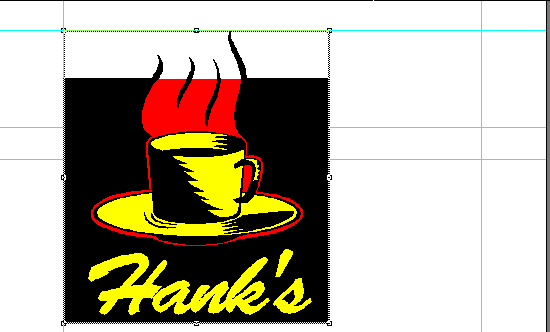
The logo needs to be scaled to a smaller size to fit on the letterhead. As with moving an object, scaling can be done quickly by showing the object's bounding box, or more slowly by showing the actual object outlines. Because this is a complex logo, you will want to start scaling the object without pausing.
Position the mouse pointer over the size handle at the bottom right corner of the drawing. Start dragging the size handle up and to the left. Without releasing the mouse button, hold down a Shift key. This will allow you to distort the picture's aspect ratio (the ratio of the horizontal to vertical size). Try releasing and reselecting the Shift key to see its effects. Imported graphics by default have maintain aspect ratio on for them.
Drag the size handle without the Shift held down until the width and height of the logo, as shown in the Edit palette, are 2.358" (76mm) and 2" (51mm) respectively, and then release the mouse button. This will align the top and bottom of the logo with the horizontal guides you created earlier. Because you created guides for the logo earlier, it is easy to scale the logo to this size.
![]()

Now is a good time to save your work again. Choose Save from the File menu.
The next step is to type the address of the company at the top of the letterhead. Creating a text block is the best solution for a small amount of text such as this. You could draw a text frame and then type into it, but it's often easier to just use text blocks for small tasks.
1. Choose the Text tool from the toolbox.
The mouse pointer will change to a text cursor shape.
2. Click to create the text block.
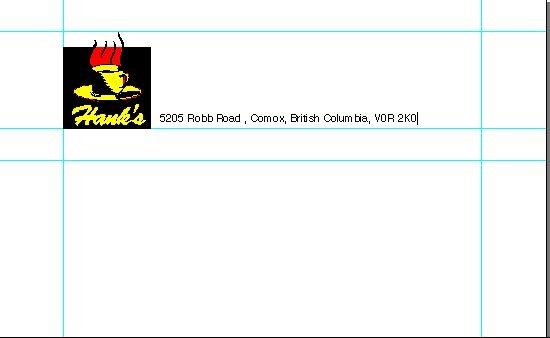
Click on a blank area of the page just to the right of the logo to create the text block. A blinking vertical bar will appear where you clickedthis is the text insertion point and shows where text will appear when you type.
3. Type the address.
Enter the address 5205 Robb Road, Comex, British Columbia, V0R 2K0 as shown below.
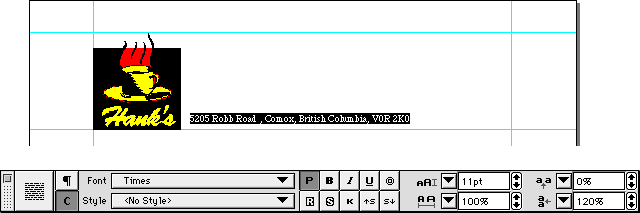
The text you typed is 12 point Helvetica. (Triumvirate on AmigaOS computers; Arial on Windows computers). These are PageStream's default fonts for each system. In this exercise, you will change the text to 11pt Times.
1. Select the text.
Drag the text cursor over the text, from the left to the right. The text will be selected when it is highlighted.
2. Change the font.
Select Times Roman (AmigaOS: Times Normal, Windows: Times New Roman) from the Font pop-up menu in the Edit palette. If the Font pop-up menu is not shown, click on the C button at the far left of the Edit palette to switch to Character view. Choose 11 from the Size popup menu.
Click the mouse anywhere in the text object to deselect the text when you are done.
Now you can move the text block to its final position.
1. Choose the Object tool.
The text block will be selected automatically because you just created it. Remember that you must choose the Object tool to select objects.
2. Move the text block.
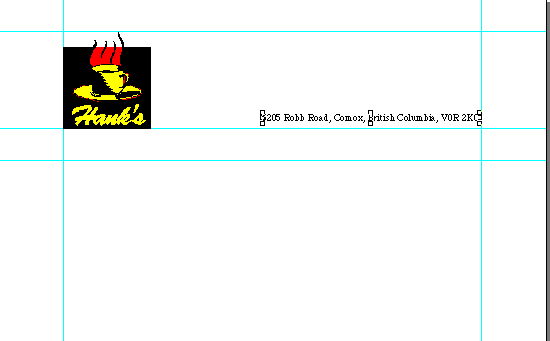
Drag the text block so that its right edge is aligned with the right margin guide, and its bottom edge is aligned with the 2" horizontal guide. Aligning the text block is easy because it will snap to the guides you created for it.
The last step to make the letterhead is to create a text frame to hold the body text for letters. You may want to decrease the view magnification so you can see the whole page, so choose Full Page from the View pop-up menu now.
1. Choose Create Text Frames from the Layout menu.
The Create Text Frames dialog box will appear.
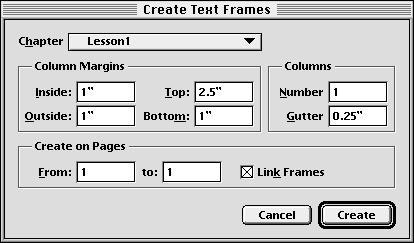
2. Click Create.
You don't need to select any options in this dialog box. Because you set the margin and column guides properly in step 1, creating a text frame is as simple as opening this dialog box and clicking on Create.
Hint for Advanced Users: If following pages in multi-page letters were to use a blank page instead of this letterhead, it would be advisable to create a second master page using the Document palette. The second master page could have a top margin of 1", and text frames could then be created on it easily.
Because this letterhead will be used as a template for future letters, you should save it as a template. A template is a special kind of PageStream documentwhen it is opened the window will be untitled. This will prevent you or others from accidentally saving a letter over the letterhead file.
1. Choose Save As Template from the File menu.
The Save file selector will appear.
2. Click Save.
Click Replace when you are prompted to replace the existing file. The document will be saved as a template.
The letterhead is now finished. To test it out, you will now close it, reopen it, and then import text into it.
1. Choose Close from the File menu.
The document window will close. If this was your only open document, the Navigator will appear again.
2. Choose Open from the File menu, or click Open in the Navigator.
The Open file selector will appear. Select Lesson1 and click Open. The letterhead will appear in a new window. Note that the window will be untitled because the letterhead was saved as a template.
If you cannot see the entire page in the window, choose Full Page from the View pop-up menu. In this exercise, you will import text created in a word processor into the text frame created in step 10. The text is stored in Rich Text Format (RTF), which is a standard format for exchanging text between applications.
1. Choose the Text tool.
Click in the text frame. The insertion point will appear at the top left corner of the frame.
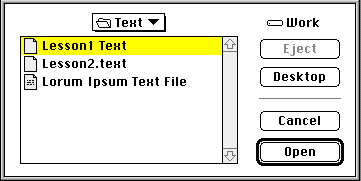
2. Choose Insert Text from the File menu.
The Insert Text file selector will appear. Select Lesson1 Text from the Text folder in the PageStream3 directory. If you don't see this file, you may not be in the correct folder. Click Open.
3. Click Insert in the Insert Text dialog box.
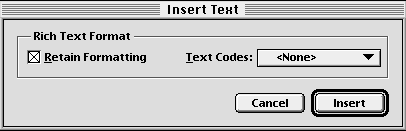
A status dialog box will appear to indicate the time to load the text. When it disappears, the text will appear in the text frame. If Select on Paste in the Files panel of Preferences is selected the text will be selected, so simply click anywhere in the text frame to deselect it.
4. Choose Save from the File menu.
The Save file selector will appear. Enter Lesson1 Letter as the name. You would not use Lesson1 because that would overwrite the letterhead file.
Now you are ready to print the letter. If you have not already configured your printer setup in PageStream, you should do so now. Refer to the Installation Guide for instructions.
1. Choose Print from the File menu.
The Print dialog box will appear.

Choose Color or Grayscale as desired from the Method popup if you have a color printer, or Grayscale if you have a black and white printer. The remaining options do not need to be changed.
2. Click Print.
PageStream will print your document. If it does not print properly, choose Print Setup from the File menu and review your printer configuration.
3. Choose Close from the File menu.
Congratulations! You have successfully completed the first lesson! You're ready to create your own letterheads and to move on to the second lesson.