|
Creating a lists of objects to scan
|
To view a list of objects to be scanned with a particular task, select the task name (for example, My computer) in the Virus scan section of main program window. The list of objects will be displayed in the right-hand part of the window of the status line.
Default object scan tasks are created when you install the program. When creating your own tasks you can create a list of objects.
You can add to and edit an object scan list using the buttons to the right of the list. To add a new scan object to the list, click the Add button, and in the window that opens select the object to be scanned. To delete an object, select it in the list (when you do so, the name of the object will be highlighted in gray) and click the Delete button. You can temporarily disable scanning for individual objects for any task without deleting them from the list. To do so, you only need to uncheck the object that you do not want scanned.
To start a scan task, click the Scan button, select Scan from the menu that opens when you click the Actions button.
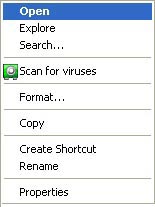
In addition, you can select an object to be scanned with the standard tools of the Windows operating system (for example, in the Explorer program window or on your Desktop, etc.). To do so, place the cursor or the name of the selected object, open the Windows context menu by right-clicking, and select Scan for viruses.