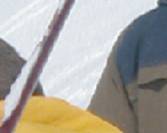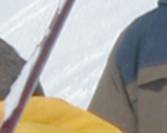

The full-screen viewer supports a numerous set of options. One of the more important is the High Quality scaling which is enabled by default. It makes the viewing of image slightly slower but dramatically improves display quality. Check this sample to get an idea: this image is slightly bigger than my display. To display it full-screen it therefore has to be scaled down a bit. On the left is a crop without the HQ scaling. On the right is the same crop with the HQ option on... See for yourself!
|
|
|
Other options include zooming, automatic fitting to the screen and much more. Zooming is done with the + and - keys. Once you have zoomed to a point where the image is larger than your display then you can move the image with the arrow keys or by dragging the image.
The default options should be okay for most users. If you want to change them you probably know what you are doing... One remark: it is not recommended to enable auto-fitting and enlarge as this will display any image (even very small images) full-screen which could lead to a very poor display.
You can also display file information over the image. There are different levels of information you can display. You can toggle the display by pressing the I (as in 'I am') key. You can change the foreground color and the background mode in the Options dialog. If the color chosen is not readable for a particular image you can try to cycle thru different colors with the C key.
Lastly, if you want to inspect the color of a particular pixel, select the "Toggle Pixel-Under-Cursor Display" option in the contextual menu. The color of the pixel under the cursor will be displayed in the lower left corner of the screen. Move the cursor over the image to inspect other pixels.