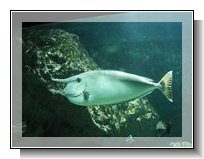
Adding borders to an image can greatly improve the way they look. This feature allows you to add borders to a set of images in batch. Here is an example of what you can do with this feature:

In this picture you can see that we added 4 "borders":
You can choose which border you want to add. You can only add a drop shadow for instance if you wish to. For each border you must specify the size of the border and its color. The size can be expressed in pixels or in percentage of the size of the image. For the inner frame you can also specify its transparency between 0 and 255, 0 being opaque and 255 completely transparent. For the drop shadow you must also specify the background color against which the drop shadow will be drawn.
There are several ways to tell where to ouput the resulting pictures. If you just want to overwrite the original pictures you can uncheck all the boxes in the Destination section. Otherwise check Rename or Output to or even both. If you chose not to overwrite the original pictures you can still choose to delete them if you do not longer need them.
Last section lets use specify the image format of the new images. By default, the original format of the image will be used: if you added borders to a JPEG file then the resulting image will be saved in JPEG, if you added borders to a TIFF file then the resulting image will be saved in TIFF. You can override that and force that all resulting images be saved in the format of your choice. When saving to JPEG files, you can specify the JPEG quality level: 0 means a highly compressed file of very bad quality while 100 means a big file size but with high quality.