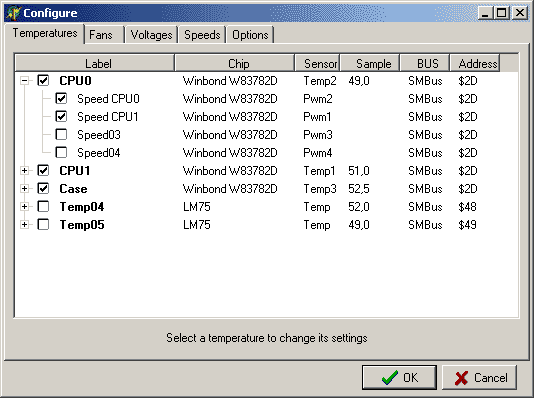

This is much better than the first look we had at program startup. Flames disappeared and unuseful values are no longer cluttering our nice view :-)
But weÆre still having SPEED CPU0 and SPEED CPU1 at 100%.
We would like them to slow down.
Remember that not all of you will have some SPEEDS available. It depends on the hardware monitoring chips youÆve got on your motherboard.
Since IÆve got a W83782D, IÆm lucky enough. So... letÆs go on :-)

After having accessed the configuration again, we can see that CPU0 temperature refers to all available SPEEDS and that two of them are selected and two are not. This is because we chose to hide two SPEEDS (PWMs) and SpeedFan assumes that those are actually unused and deselects them for us. Nice, isnÆt it? :-)
What are those checkboxes for?
Each PWM (SPEED) can speed up or slow down one fan.
Each fan can influence one or more (actually, even none, if you put the fan out of the room :-)) temperatures.
Here we are telling SpeedFan that SPEED CPU0 and SPEED CPU1 (that are renames for the original PWM2 and PWM1) both influence CPU0 temperature. This means that SpeedFan will try to speed up both of them when CPU0 temperature is too high and will try to lower them down when the temperature is lower.
This is how we have configured CPU0 temperature till now.
But this is not actually whatÆs happening inside my PC!
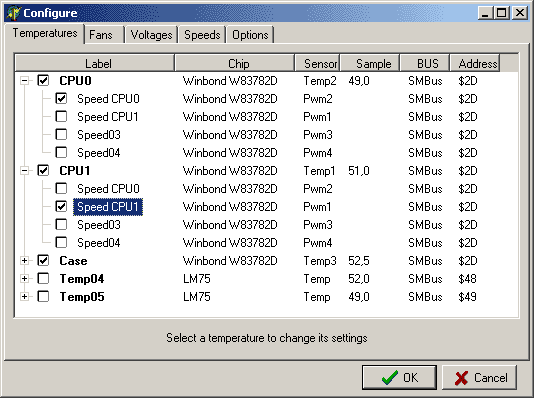
In my PC, CPU0 temperature is influenced by SPEED CPU0 and CPU1 temperature is influenced by SPEED CPU1.
So... we change the configuration accordingly.

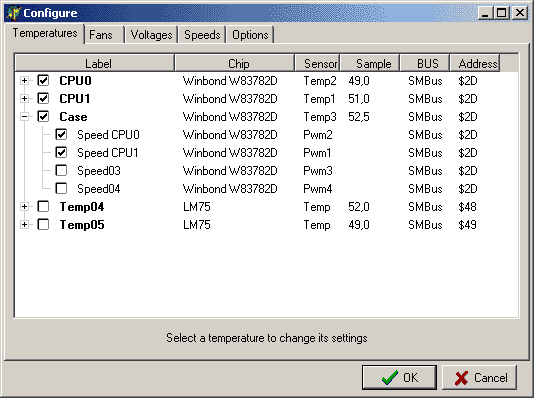
There is still another temperature that we chose to monitor: CASE temperature.
CASE temperature is actually influenced by both fans. We can easily inform SpeedFan about this.

Nice!
Now we can go back to the main window and see what happens to speeds.