|
Transform Tools In this chapter, we'll take a look at the different transform tools, including the Move tool and the Crop tool. |
The Move Tool
|
|
|
|
The Move tool can move the entire image or layer, guides, floating selections or empty selection shapes. Please read Layers And Floating Selections for information about layers. Moving Without Using The Move ToolIn "Selection Tools" starting on page 109 we discussed the fact that Gimp displays a move symbol when you move your cursor over a selection, although a selection tool (and not the Move tool) is active. If you move your selection using this move symbol, the selection will become a floating selection. You can only move it once, because the move symbol will disappear as soon as you let go of the mouse button. To move your selection a second time, you must switch to the Move tool. You can also ignore the selection tool's move symbol and go straight to the Moving Floating SelectionsWhen you use the Move tool on a floating selection, you'll notice that the double-arrow symbol becomes a single arrow when the pointer is outside of the selection. If you click your mouse when the single arrow is visible, the floating selection will anchor to (merge with) the layer that was last active. Moving The Entire Image Or A Single LayerIf you don't have a selection, the Move tool will move the entire image outside the drawable area. If your image has more than one layer, the Move tool will move the active layer. |
 |
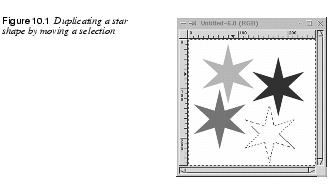
Moving Transparent LayersThe Move tool can't move an empty, transparent layer. If you try to do that, the Move tool will move the top layer in the layer stack instead! This happens because the Move tool needs something solid to grab onto. Of course, you could paint a dot of color in the empty layer, turn off all the other layers (see "Layers And Floating Selections" starting on page 315) and then move the layer (by grabbing the layer by the dot), but this isn't a very convenient technique. The solution to this problem is to press the Shift key as you drag. When you see the yellow layer boundary turn blue, you'll know for sure that you're moving the right layer. Moving Grouped LayersAlso notice that if you have grouped one or more layers (with the little anchor symbol), they'll all move, regardless of which layer is currently active. For example, if you have grouped a text layer with a drop shadow layer, you'll have to ungroup them or merge them before moving another layer, otherwise you'll move all three layers. See "Layers And Floating Selections" starting on page 315 for more information on working with layers. Moving Empty SelectionsIf you just want to adjust the position of a selection area, press the Alt key as you move the selection. With this technique, only the empty form of the selection moves, and not the contents. |
|
|
|
Note that this option only works for the normal (empty) selections you make with a selection tool. You can never move a floating selection using the Alt key. This option allows you to use the selection as a template: You can move the selection around and fill it every time you move it. Note that the Move tool or a selection tool must be active for this technique to work. | |
 |
HintsThe Move tool has an extra feature that allows you to nudge (move in small, precise increments) a floating selection or a layer with the keyboard's arrow keys when the Move tool is active. Pressing the Shift key as you press the arrow keys will increase the length of these steps. To nudge an empty selection, press the Alt key and the arrow keys. Note that when you make multiple selects, Gimp treats them as a unit. That means that you can't move one selection closer to another with the Move tool, because all of the selected areas will move together as one. |
The Crop Tool
|
|
|
|
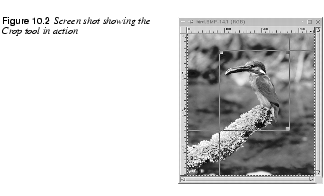
The Crop tool corresponds to the "scissors" in Photoshop. You can crop an image if you just want a part of the picture. To crop, click and drag the marquee diagonally. Release the mouse button when you are satisfied and the Crop Information dialog box will appear. See the next section for more information on the dialog box. The cropmarks can be placed very accurately. You can move the crop square by dragging on the lower-left or upper-right corners, or resize it by dragging on the upper-left or lower-right corners. You can also move (nudge) the crop area using the arrow keys on your keyboard. Alternatively, you can set guides (make sure that the Snap To Guides checkbox is checked in the |
|
|
|
Press the Crop button in the toolbox, or click inside the markings, and the portion of the image inside the cropmarks will be your new image. The Crop Information DialogThis dialog displays the crop area's X and Y Origins and Width and Height in pixels. If you have created a selection in your image, you can click on the Selection button in the dialog box. This will automatically place the crop area as close as possible to your selection. |
|

|
|
The Transform Tool
|
|
|
|
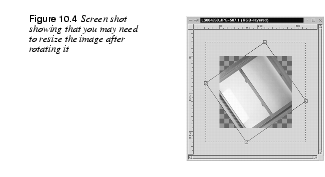
The Transform tool is much like the "Effects" menu in Photoshop. RotateWhen you're transforming using Rotation, you drag the mouse to rotate the selection. Note that parts of the image will end up outside the drawable area, so you may have to resize the image afterward. |
|
|
|
As you use the mouse to rotate the image, the rotation angle will be displayed in a small dialog box. You can't insert numbers into the dialog; it just displays how much you've rotated the image (this is not a very precise tool). However, you can press the If you want to rotate a layer or image 90 or 270 degrees (for example, if you scanned an image in portrait mode and you want landscape) the If you need to specify the exact rotation angle, use the |
|

|
|
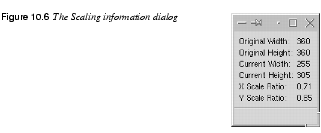
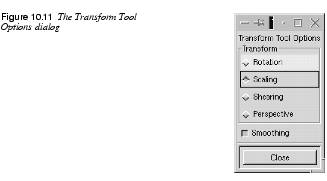
ScaleChoose Scaling from the Transform Tool Options dialog and then click on the image to see the Scaling Information dialog. The Scaling Information dialog provides you with information on both the Original Height and Original Width of the selection, as well as the Current Width and Current Height. |
|
|
|
|
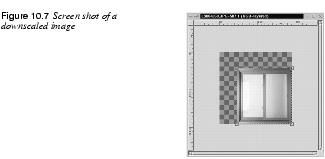
Drag on the image with your mouse to scale the image. The X Scale Ratio and Y Scale Ratio tell you how much you've altered the size and proportions of the original image. The Ctrl key locks the scale's X axis, so you can only affect the height of the image. Shift locks the Y axis, so you can only affect the width of the image. Ctrl+Shift forces the image to scale proportionally. |
|
|
|
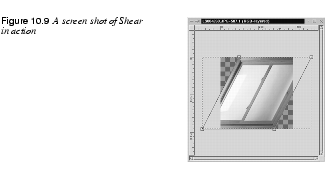
ShearingShearing will deform an image in either the horizontal or the vertical plane. In other words, it will turn a rectangle into a parallelogram. |
|

|
|
|
Click on the Shearing option in the Transform Tool Options dialog, then click on your image to see the Shear Information dialog. Shear your image by clicking and dragging on the corners. Dragging up and down shears in the Y direction, and dragging on the sides shears in the X direction. You can shear along either of the X or Y axes, but only on one at a time. In other words, if the X Shear Magnitude is other than zero, then the Y Shear Magnitude must be zero. |
|
|
|

|
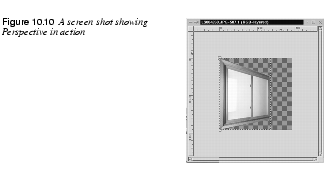
Tip: If you want to shear a selection both ways, you have to change to another tool icon, and then return to Transform. PerspectiveThe last option on the Transform Tool Options dialog is Perspective. The term perspective isn't quite accurate, because no actual perspective transformation takes place (making the image small in the far end and large in the other). It is better described as a distortive effect, since you can move all four displacement points (the corners) independently. You can certainly make a rectangular selection look like a perspective, but you have to do that manually. |
|
|

|
Observe that you can turn the "perspective" inside out if you like. If you let the lines of the perspective square cross or top each other, you'll mirror and wrench the selection so much it will eventually become unrecognizable. Transform SmoothingOn the Transform Tool Options dialog, the Smoothing checkbox provides an antialiasing option, which will make distorted edges look better. If you don't use Smoothing, your selection might turn out very rough and pixly on the edges. On the other hand, the Smoothing option can make edges very blurry, so you should take that into consideration as well. |
|
|
The Flip Tool
|
|
|
|
On the toolbox, the Flip tool does exactly that -- it flips the image, or more accurately -- the Flip tool mirrors the selection horizontally or vertically. If you are working with an image where you want the illusion of reflection (whether in water, glass or metal), this is the tool to use. |
The Magnify Tool
|
|
|
|
Please turn to Zoom. |
| Frozenriver Digital Design http://www.frozenriver.nu Voice: +46 (0)31 474356 Fax: +46 (0)31 493833 support@frozenriver.com |
Publisher Coriolis http://www.coriolis.com |