Arranging a document on pagesá
Concept Draw document size might be bigger than one printed page.á Because the printed page and the document page are different things, the size of the printed page is selected from the list of available sizes in the printer properties. The document page size is selected in the document properties dialog box.
While printing the document, all pages of the document are printed out one after another and split into printed pages if needed. For example, if the documentápage is A3 size, the printed page size is A4, then each document page will be split into 2 printed pages.
The orientation of the printed page is vital. For example, if
you wish to create and print a document sized A4 in the landscape
(wide) orientation, then you haveá to go through 2 steps:
1) Iná the Document Properties dialog (File/Document Properties
from the menu) choose A4 size and Landscape orientation under the
Page tab. These parameters refer to the document page sizes only,
and don't affect printing properties.
2) In the Print Setup dialog (File/Print Setup) choose A4 size
and Landscape orientation as well.
á
The Print command prints the document. To perform the command,
choose Print from the File menu, or click the Print button ![]() on the toolbar.
on the toolbar.
| Ctrl+P | Cmd+P |
Before printing starts, the Print Setup document will come up, where additional printing properties can be set.

Choose your printer type in theá Printer section. If more than one printer is available, you may choose the one you want from the list. Clicking the Properties button will bring up the printer properties dialog box. It may vary for different printer type. Naturally, this dialog lets you set the printed page size, page orientation, graphic printing properties, fonts and other.
In the same section, you may choose the Print To File option. Use this option if you can't print the document at the moment. Then the program will store information for printing in a file, which you'll be able to print on any other computer connected to the printer identical to that specified in the file, even if ConceptDraw is not installed on the system.
The Print Range section allows you to select pages to be printed if you don't want the whole document to be printed out. Specify the start page and the end page in the appropriate fields.
In the Copies section, set the number of document copies you want to get printed and how to print them.
When you are sure that all settings are okay, click OK to start printing.
![]() For MacOS, dialog
boxes for printing settings don't have a common appearance and
may vary with the printer type. Besides the above settings, the
may contain some specific ones such as paper quality, paper
supply way, print quality, etc.
For MacOS, dialog
boxes for printing settings don't have a common appearance and
may vary with the printer type. Besides the above settings, the
may contain some specific ones such as paper quality, paper
supply way, print quality, etc.
You may see how the printed document will look before you start printing it.
Choose Page Breaks under the View menu to see how the document will be divided into printed pages. Bold grey lines indicate the corresponding non-printing areas, thin - are the page separators.
The Print Preview command provides more functions. Select
Print Preview from the File menu, or click its á![]() button on the
toolbar. A new window will open where you can see a few pages on
the same screen at the same time.
button on the
toolbar. A new window will open where you can see a few pages on
the same screen at the same time.
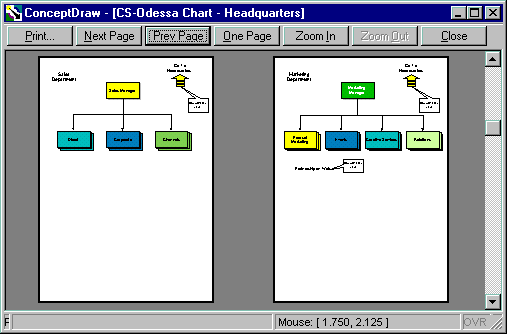
There are some buttons on the window toolbar:
Printá -á starts printing the document
Next Page / Prev Page - lets you view the document page
by page forward and backwards
One Page / Two Page - displays one or two pages on the
screen.
Zoom In / Zoom Out - changes magnification.
Close - closes the Preview window.
Select Print Setup from the File menu to access the Print Setup dialog box.

Choose your printer type in theá Printer section. If more than one printer is available, you may choose the one you want from the list. Clicking the Properties button will bring up the printer properties dialog box. It may vary for different printer types. In the Paper section enter the size of the printed page and the paper supply way (depends on the printer type).
In the Orientation area - select the orientation of pages in your printer (Portrait - for vertical and Landscape - for horizontal orientation).