ridruejo@apache.orgThis document introduces Comanche from an end user perspective, with an emphasis on how to quickly become productive with Comanche. As a guiding example, this introduction deals with the Apache module for Comanche.
This release of Comanche is completely functional. As in any other complex piece of software, there is always room for improvements and a decision needs to be made as to when to make a release. The author believes this release is a good blend of functionality and ease of use.
You can download Comanche at http://www.covalent.net/projects/comanche/downloads. Comanche runs on most Unices and Windows 95/98/NT. There are binaries available for the following platforms: Linux intel, Irix MIPS, Solaris Sparc, HP parisc and Windows. It is recommended that you download first the binary since it is ready to run. If you wish you may compile the source later (basically you have to compile Tcl/Tk and the incr Tcl extension). More on this in the appendix.
Download the appropriate binary file for your platform. Type: gunzip comanche-XX.tgz ; tar xvf comanche-XX.tar
Before the user becomes familiar with Comanche, it is a good idea for him to back up the configuration files. In Unix they are usually located under the conf subdirectory of the place where the user installed Apache. If he installed Apache from the source release and he did not changed the destination directory, it defaults to /usr/local/apache. If Apache came preinstalled, different distributions tend to place configuration files in different places. In Red Hat look under /etc/httpd. In other distributions the user may need to look into /usr/local/etc/httpd/.
In the conf subdirectory the user will find at least three files: httpd.conf, srm.conf, and access.conf. Later versions of Apache only need to deal with one configuration file, httpd.conf
The user should make a copy of those files and put them in a safe place.
In the Windows platform, the user needs to open the folder that contains the Comanche executable (Comanche.exe) and double-click on the icon. This will start up Comanche. There is no need for further configuration, since Apache stores it settings in the Windows Registry. Comanche reads these settings and provides the user the possibility to configure all installed versions of Apache. In case there is no version of Apache installed, Comanche will prompt you with a dialog to manually specify where Apache files are located. This is useful if you just want to write configuration files without the need to have Apache installed or you have a custom version of Apache that is not in the registry (take a look to the following Starting Comanche on Unix section for more details in this dialog)
The first time you install Comanche in Unix, you have to tell it where to find the Apache binaries and configuration files. It will display a dialog where you can specify:
If you are running Red Hat Linux:
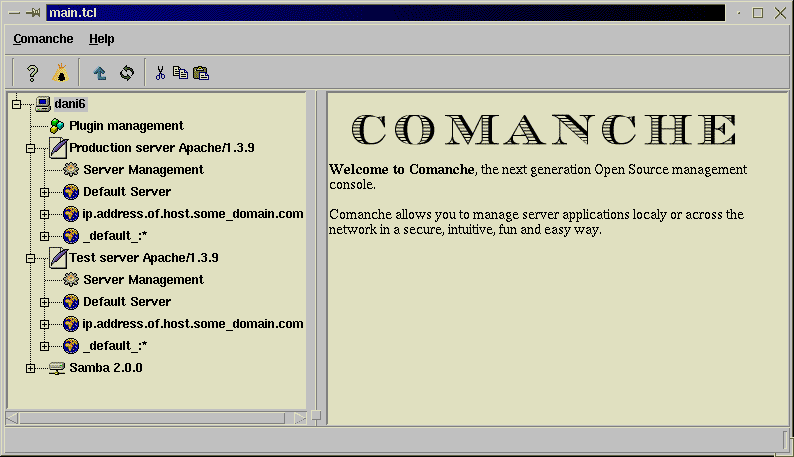
Once Comanche has been started, it displays a Windows Explorer like interface. It is divided in several parts. On the top, there is a Menubar. These menus can be used to exit Comanche, access online help or display an About box.
There is a tree structure in the left, which allows the user to connect to each of the managed machines, represented by icons, by double clicking on them. This expands them into various nodes representing services that can be managed. The user can navigate clicking the nodes or using the navigation buttons in the upper task bar.

When a user selects a node by clicking on it, the right panel will be loaded with a HTML page that will display information about the currently selected node. The user can request further inforamtion or execute actions by clicking in the appropriate links.
By right-clicking on a node, Comanche will pop up a menu. This menu is context sensitive and will vary depending on the node. In this version of Comanche it enables the user to request the property pages for a certain node or create new nodes
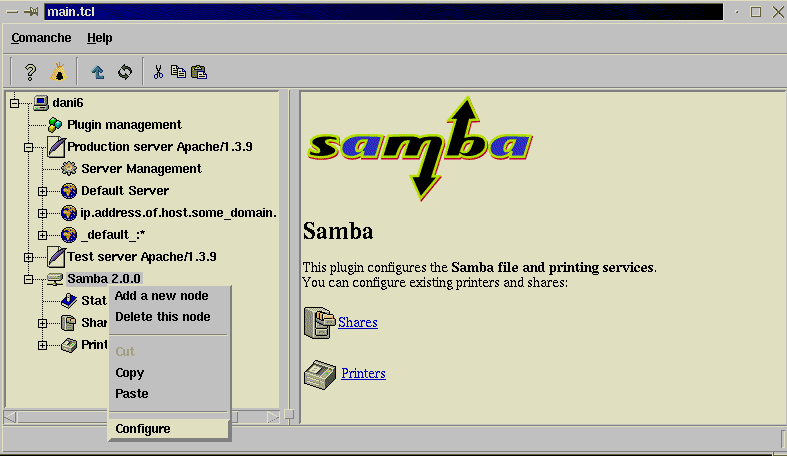
The current Apache module for Comanche supports the most commonly used options of Apache. All others options are preserved and can be edited via the command line interface if the needs arises. Support for new directives can be easily added through XML configuration files as described in other sections of this document.
To access the Apache plugin, click on the computer icon it will display the currently installed modules. One of them must be the Apache module. Expand that node and you will see at least the following nodes:
Server Management. Here you can Start/Stop/Restart the Apache server process. If you have certain parameters configured you can also have access to the current statistics served (via the status module).
Default Server. With Apache you can host several websites just using a single Apache server. This is a popular technique named virtual hosting. Comanche lets you configure different virtual hosts. These virtual hosts inherit certain settings from a main server (Default server). Characteristics defined here will be inherited by all virtual hosts. Certain Apache properties can only be configured in the Default Server node.
Setting an Apache server is simple using Comanche. If the user just wants a web server to server static files, there is only a few pieces of information that Apache needs to know in order to do its job.
Right clicking on the node named "Default Server" and selecting configure brings up a set of Property Pages.
Usually Apache is able to know the name of the machine it is installed via a reverse lookup of its IP address. This entry should be filled with the Fully Qualified Domain Name for the machine, which is probably something similar to www.somedomain.com. This name has to have a DNS record set up to work if it is to be accessed from the internet. Another important piece of information is the web master email address, which will get transmitted to the visitors if they encounter a problem while browsing the web site.
To complete the basic set up it is necessary to tell Apache the document root, which is the directory containing the web pages to be served. Once you have change these parameters, you can go back to the Server Management node and restart the server so the changes take place.
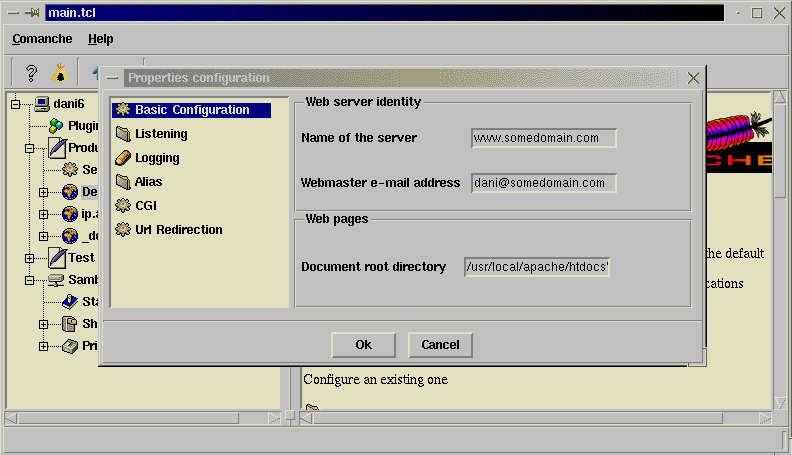
Other settings that can be configured are:
Listening settings: Web servers can listen to a specific port. The default port that Apache listens to is 80. To access ports lower than 1024 requires administrator privileges. Changing this parameter to a different number allows a normal user to run his own web server at a higher port.
Also, the user may choose to only listen to a certain IP address or to all the available IP addresses.

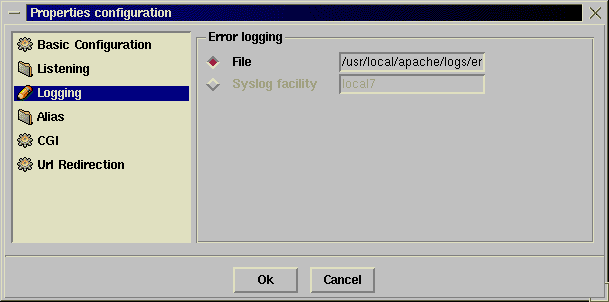
Logging: When Apache finds an error, it can report it to a file (the error log) or it can notify system logging system (syslog in Unix machines). The error logging files are the first place that should be checked when there is a problem with a web server configuration, permissions, etc.
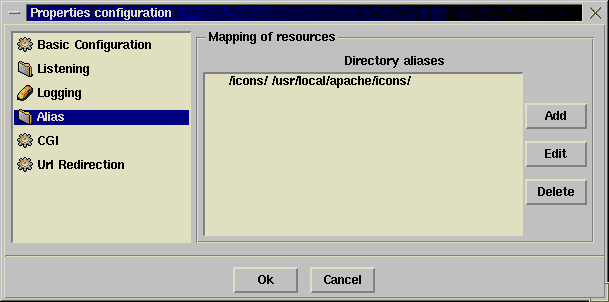
Directory aliases: It is possible to map certain URLs to directories in the filesystem. It is possible to map /images to /ftp/pub/images, and thus when the user requests the file http://www.someserver.com/images/button.gif the server will deliver the file /ftp/pub/images/button.gif
CGI: CGI does the same, but it instructs the web server that the destination directory contains cgi programs. Cgi programs are not served as is, but executed and they provide content to the user.
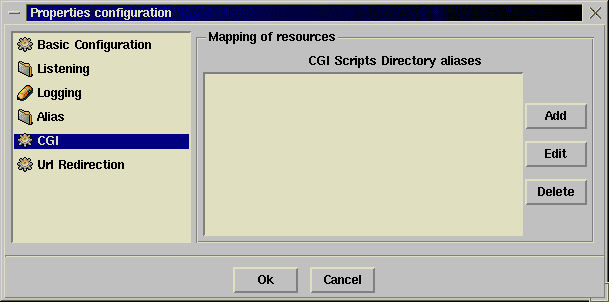
Redirection: Allows an user to redirect requests for certain urls to a different location.

Redirection, Directory and CGI aliases allow for regular expression modes (((link to appendix))). Regular expressions allow for matching of URLs against certain predefined patterns.
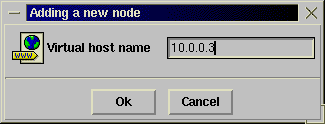
Comanche makes possible to easily create virtual hosts. As explained before, virtual hosts allows a singel Apache isntallation to serve requests for different internet domains. To create a new virtual host, the user can select with the right mouse button the Apache icon, and select the "Add new node" entry. This will pop up a window where the user can enter the IP address of the web server. The newly created node can then be administered with similar options to those of the Default Web Server.
Note: It is possible to enter the domain name in the previous dialog, but it is usually desirable to use the IP address. If a domain name is used instead, Apache must use DNS to find the address of www.somedomain.com. If for some reason DNS is not available at the time your server is parsing its config file, then this virtual host will not be configured. It won't be able to respond to any hits to this virtual host
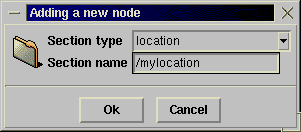
It is possible to create directory, location and files nodes under the default web server and virtual hosts. Directory and location nodes allow to place restrictions or configure properties based on the URL or file requested by the client. Files sections do the same for certain files or files patterns.
To add a new directory or location, right click in the default web server or one of the virtual hosts node and select aqdd new node. Type in either the path to the directory or the URL of the location (For example, if we want to create a location that will be accesed when the user types http://www.somedomain.com/mylocation, the name of the location will be /mylocation).
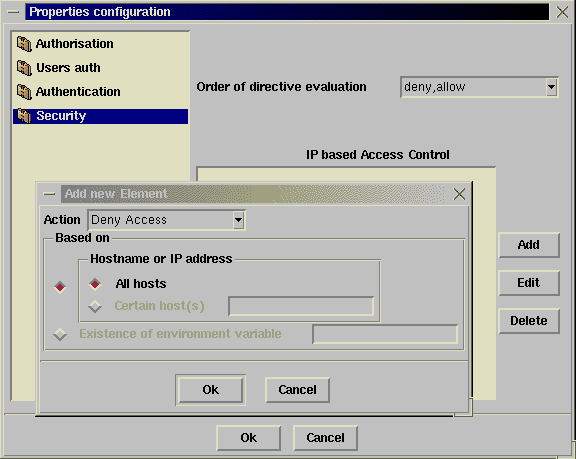
The features currently implemented for location and directories have to do basically with IP based access control and user authentication.
IP based access control.You can control who have access to these directories based on their IP address or domain name. You can choose in which order the directives will be evaluated and construct statements that allow denying or granting access based on certain IP, domain name or the existence of a certain environment variable (i.e specific version of a browser)
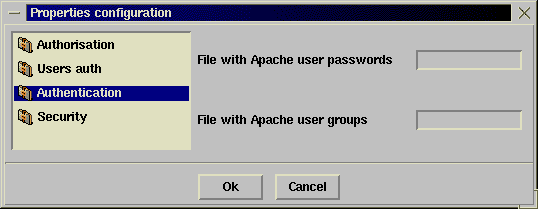
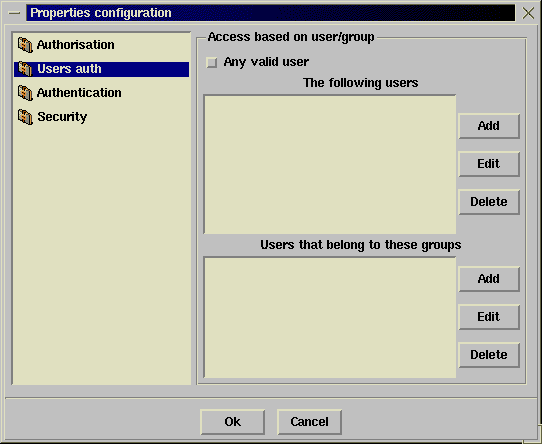
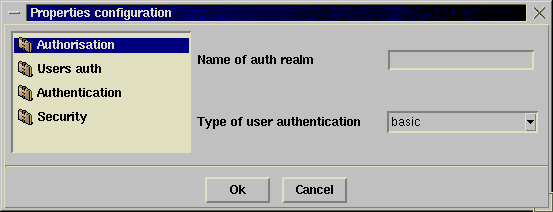
User authentication. With IP based access restrictions we can place restrictions on who can get our web pages based on where they come from. With user authentication, we can place restrictions based on who they are. For that we require a user name and a password (the password dialog box that appears on browsers when accessing restricted areas of a website).
The parameters that can be configured are:
