ASP Lesson 2: Setting up the Datasource
Before we can begin the fun stuff, we must first setup the data source. This is accomplished by first creating a database that you will use for your web site. Then you must add the data source to your System ODBC Manager.
TASK 1: Download the database.
For this tutorial I prepared a database for use throughout. Click here to download the database (you may need to CTRL +
CLICK to save it as a file). The database file can reside anywhere on your system,
though preferably outside the path of your root web. Depending on what web server you are
using, you may have to set read permissions on the directory where the data file is
located.
The database contains two tables called Students and Grades,
their fields and datatypes are shown below:
STUDENTS |
GRADES |
||||||||||||||||||||||||||||
|
|
TASK 2: Register the database in ODBC
- Open the Control Panel
- Double Click the ODBC icon,
 which opens up the ODBC settings for your computer.
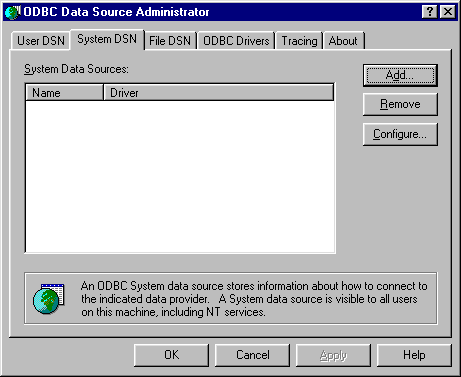
 - You need to add a System DSN. Click the System DSN tab, then click the Add button
- Since you created a MS Access database,
- Add the MS Access driver. Once selected you will be presented with the
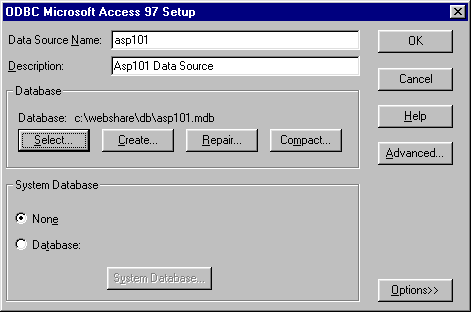
following dialogue box. Here you choose the database and associate a name with it.
- Data Source Name: asp101
- Description: Asp 101 Data Source
- Database: Locate asp101.mdb by clicking Select, then navagate to the
directory in which you saved the database (
c:\webshare\db).)
 Figure 2.1: Add the Data Source to the ODBC Manager. |
 Figure 6.2: Setting up the Data Source. |