Spherize
Every function in Distort catagory is designed for entertainment. To spherize an image would make it more interesting.
In PhotoEdit interface, move your mouse cursor onto the Third button  on Task Bar, and click
  on the pop-up sub-task bar. Then some templates appear on Operation Panel.
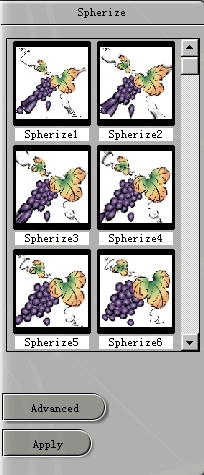 On the left is the Basic mode. You can see ten templates here. Click to select a template which pleases you, then click
  to apply the effect to current image.
If you are not satisfied with any of the templates and decide to adjust Spherize amount manually, Click  to shift to Advanced mode.
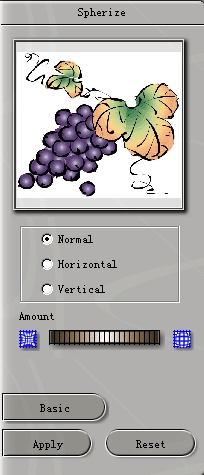 On the right is the Advanced mode.
First, you should decide in which direction would you like to spherize your image. Select Normal to spherize the image in all four directions; Select Horizontal to spherize the image horizontally; Select Vertical to spherize the image vertically.
Then, use you mouse to turn the small wheel  . Roll it towards left to spherize the image towards inside, towards right to spherize the image towards outside. You can preview the effect in the small preview window on Operation Panel.
When you are satisfied with the image after adjustment, click to apply the effect to current image, otherwise click  to reload the original version of the image. To go back to Basic mode, click
  .
.