Card
Functions in PhotoFun catagory are designed to make unique prints. Isn't it wonderful to send your friends cards made from your own photos?
In PhotoEdit interface, move your mouse cursor onto the Fourth button  on Task Bar, and click
  on the pop-up sub-task bar. Then some templates appear on Operation Panel as below:
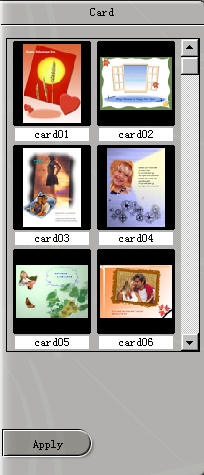 Double-click any of the templates, or click to select a template and press
  to apply the template to current image. Your photo will soon turn into a nice greeting card. You can see the effect in the large Preview Window in the middle of PhotoEdit interface.
Now you will see a new button  on Operation Panel. Click it to add some words on your newly created card.
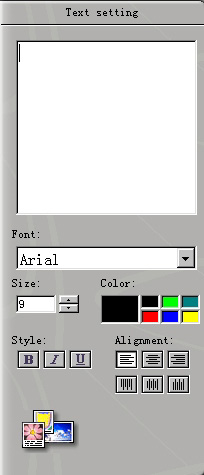
After you click the Greetings button, the Operation Panel will change to Text Setting page, as shown in the picture on the right.
Follow the follow- ing steps to add greeting words:
- Type your greetings into the text-area on the top.
- Select font in Font pull-down list.
- Type a figure which stands for Font-Size into Size textbox.
- Choose a Font-Style. Button B stands for Bold, I stands for Italic, U stands for Underlined.
- Choose a Text Color. There are seven color blocks in Color Palette. Double-click any of the six small color blocks on the right, the selected letters in the above text-area will change to the corresponding color. Click the large color block on the left, you will enter a larger color palette where there are more colors available.
- Choose Alignment style. Click
 to get text to align to Left;
  to Center,
  to Right; Click
  to get vertical text to align to Top;
  to Middle;
  to Bottom.
 to go back to Card Template page.
If you are satisfied with your new card, click  on Toolbar to save the effect to current image, otherwise click
  on Toolbar to reload the original version of the image.