Chapter 5 Getting Around in VirtualDrive
5.1 Inserting a VCD
There are several different ways to insert a VCD file.
Method 1 - Click on a VCD to select it then click on the Insert
![]() button.
button.
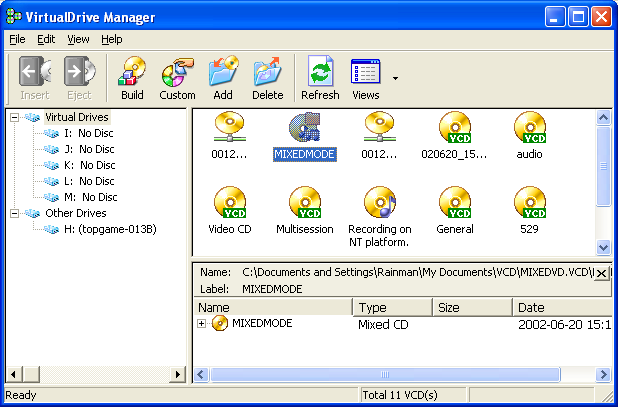
Method 2 - If no VirtualDrive is highlighted, double-clicking on a VCD icon will insert the VCD into an available drive.
Note: If a Default drive has been specified for the VCD, The VCD will be loaded into that drive. If the drive already contains a VCD then that VCD will be ejected and the currently selected VCD inserted.
Method 3 - Click and drag a VCD icon over to a VirtualDrive.
Note: If the VirtualDrive already has a VCD loaded then the loaded VCD will be Ejected and replaced by the current selection
Method 4 - Select the VCD icon then select Edit on the menu bar then Insert from the drop menu.
Method 5 - Right-click on a VCD icon then select Insert from the pop-up menu.
Method 6 – Right-click on the VirtualDrive icon in the System tray and selects Insert VCD.
Method 7 – Open Windows Explorer, right click on the Virtual drive and select Insert from the popup menu (Figure 5-1a).
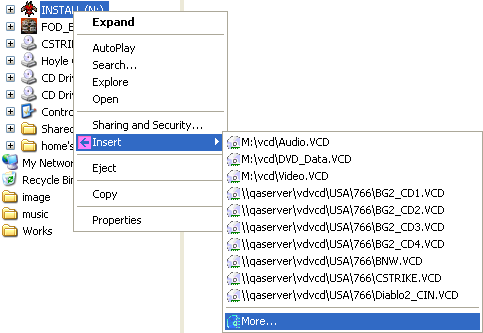
Figure 5-1a
If VCD files’ number are over 9, clicking on the More to select other VCD files (Figure 5-1b).
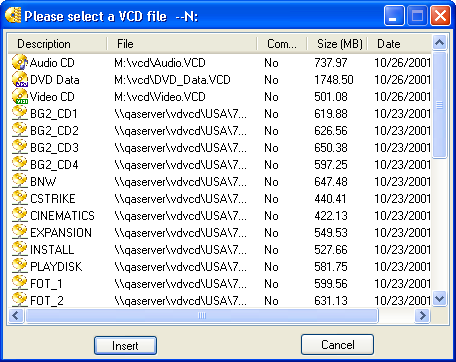
Figure 5-1b
Method 8 – Open Windows Explorer, right click on the VCD File and select Insert from the popup menu (Figure 5-1c).
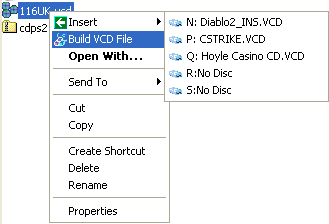
Figure 5-1c
Method 9 – In Virtual Drive Manager, Select a VCD file icon and clicking on the Insert key from the keyboard.
Method 10 – Specify a Hot-Key for inserting a VCD file and use the Hot-Key to insert that VCD file.