4.3 Building VCDs from Audio CDs
To create an audio VCD, open the Build VCD dialog box by 5 methods.
(a) Click on the
Build button![]() on
the toolbar.
on
the toolbar.
(b) Select File from the menu bar and choose Build from the drop menu
(c) Right click on the VirtualDrive icon in the System tray and select Build.
(d)
Using shortcut key Ctrl+B.
(e)
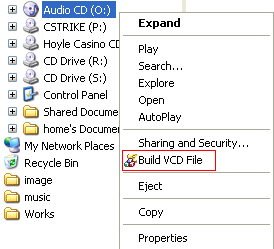
Open Windows Explore, right click on the inserted physical drive and
select Build VCD File from the popup menu (Figure 4-3).
(Figure 4-3)
Then follow the steps as described below.
Note: VirtualDrive will automatically detect the CD type and run the Build Audio VCD process.
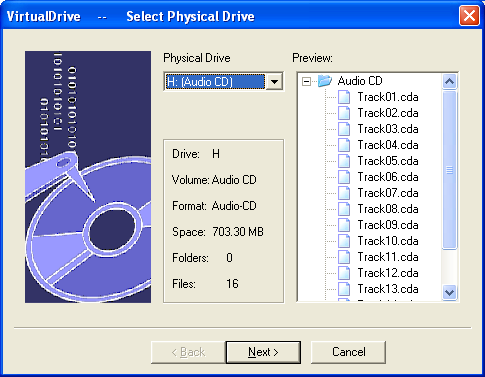
Step 1. Select the physical CD drive then click on Next.
Step 2 Check that selected hard drive has
sufficient ‘Free Space’ (Figure 4-3a) to store the new VCD.

Figure 4-3a
Step 4 Use the File Browser ![]() button (Figure 4-3a) to select a location to save
the VCD.
button (Figure 4-3a) to select a location to save
the VCD.
Step 5 Give the new VCD file a name and click on Next
(Figure 4-3a).
Note: If no new name is entered then the new VCD will use
the name of the folder in which it is to be stored, as the VCD file name.
Step 6 Select the tracks you want to include on the Audio VCD by clicking on the check boxes of Tracks column.
Note: If the CD player is running the Track selection will not be able to view the track list.

Figure 4-3b
Step 7 Set the Preview track
If you don’t need to build all tracks, you can click on the
Preview track play![]() button to select which track you
like to build and click on the Volume
button to select which track you
like to build and click on the Volume ![]() button to set the Preview track’s
level (Figure 4-3b above). when you select one track and click on the Preview
track play
button to set the Preview track’s
level (Figure 4-3b above). when you select one track and click on the Preview
track play ![]() button, you can see the track’s
playing progress bar from Progress.
button, you can see the track’s
playing progress bar from Progress.
Step 8 Select a Name for the quality and audio compression format. Figure 4-3f shows a range of recording quality settings provided by the Windows operating system.
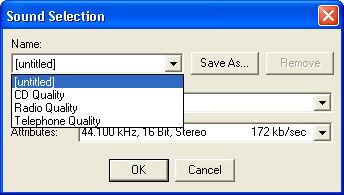
Figure 4-3c
You can also save your own custom audio settings by selecting a Format and Attribute from the drop boxes
Audio settings-Step 1 In the “Format” drop list, select an appropriate audio compression format (Figure 4.3d).
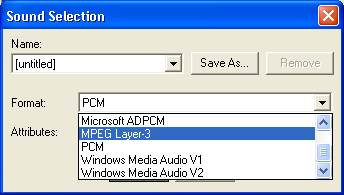
Figure 4-3d
If you have installed Microsoft Windows Media Player MP3 groupware or other including MP3 coding/decoding links storeroom, you can select MPEG Layer-3 In the Format drop list (Figure 4-3e) and build selected tracks as MP3 Format Audio VCD.
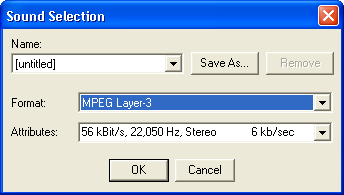
Figure 4-3e
Audio settings-Step 2 Select the sound recording sample quality (Figure 4-3f).
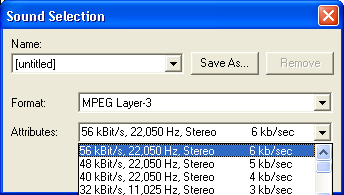
Figure 4-3f
Audio settings-Step 3 Save your settings.
Any combination of settings provided in the "Sound Selection" window can be saved to a file by clicking on the "Save As" button and giving your custom audio settings a Name. The next time you open the "Sound Selection" window this name will be presented as a choice in the "Name" selection box.
Step 9.Add a description for the new Audio VCD.
Note: This is not the VCD file name.
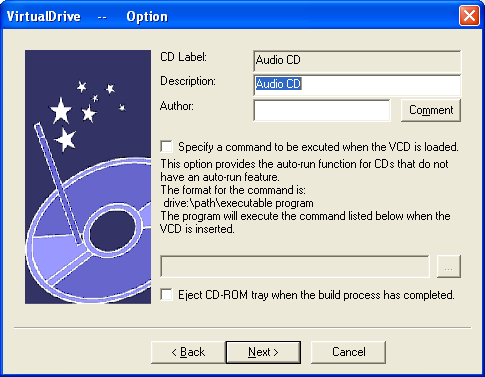
Figure 4-3i
Step
10 To Auto-Run the Audio VCD when it is inserted into a VirtualDrive, you
should specify a program to run when the VCD is loaded. To do this, click on the
file Browser ![]() button and select an appropriate multi-media program.
button and select an appropriate multi-media program.
Figure 4-3i above, shows the Windows Cdplayer.exe has been chosen to play the Audio VCD.
Step 11. Check the 'Eject
the
VCD' check box (Figure 4-3i above) if you want the CD to be ejected from
the CD drive. When
the Build has competed, then click on Next
to open the System Settings dialog. From here you can review the chosen VCD
attributes. To continue, click on Next to open the Build VCD window
(Figure 4-3j).

Step 12 If any audio player application is using physical drive, close it now and begin building the Audio VCD.
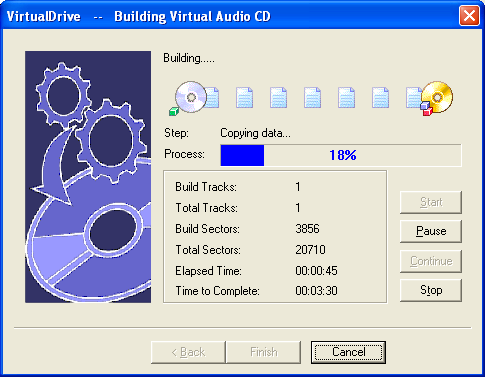
Figure 4-3j
Step 13 With the VCD successfully built, click on OK to exit the Build popup then click on Finish to close the VCD Build window (Figure 4-3k).
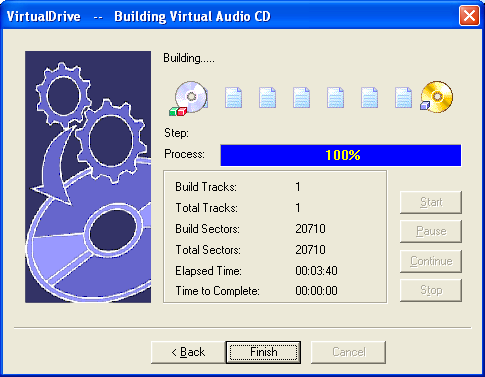
Figure 4-3k