The DeLogo filter is designed to remove static elements, i.e. logos or watermarks from video source. While there are many ways how to put a logo to a video, DeLogo filter only covers those that are really static, i.e. not moving and not animated. On the other hand, it can successfully remove alpha-blended logos without destroying the picture beneath.
DeLogo filter features two logo removal techniques. First of them is called DeBlend and it is designed to remove alpha blended logos using given alpha and color mask, which are supposed to be the real alpha and color mask of the logo. While it may be really tricky to create such masks, DeLogo filter features even an analyser which can do all the work for you.
The second technique - repair - comes where the first fails. Opaque logos can not be deblended because there is no remnant visible through the logo. These pixels must be painted anew depending on color of pixels surrounding the opaque part.
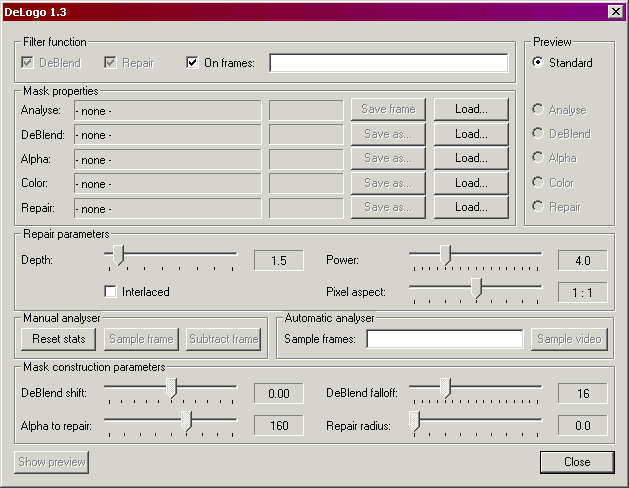
The filter configuration dialog looks like this:

All the values and settings showed on this picture are the default values.
In the following sections you will find some tasks - from the most trivial to somewhat complex one - that I actually did using the filter to achieve the result. Remember that not all controls are actually used and explained in this part, for detailed description refer to reference sections.
Though VirtualDub is primarily intended to edit video, since version 1.4.8 it is possible to load a series of .bmp images as a video sequence. The sequence may even consist of just one frame which makes it a complicated image processing tool. While for many cases there are much better tools to do the same, the DeLogo filter is actually the only tool I know capable to remove unwanted elements from an image without a lot of editing. Only the repair technique can be used for still images (DeBlend process needs to analyse at least two frames to get some results) so this is actually the most simple task you can use the filter for.

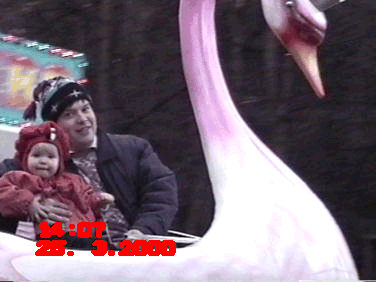


Opaque logos are for sure the most common case. As you can expect, the DeBlend algorithm can't be applied to opaque logos so the process is actually very similar to the still image provessing.
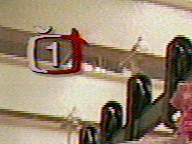
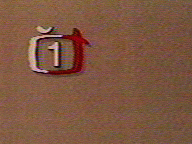
The alpha-blended logo removal feature is the main strength of the DeLogo filter. It is a simple task to alpha-blend a logo to a video but it turns out to be really tricky to remove it if you don't have the original logo and its alpha mask. Using the DeLogo filter it is necessary to find the original logo and its alpha mask first using the analysis procedure.
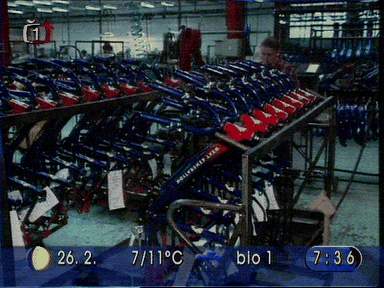



This tutorial only shows a simple case of the filter usage. There are many things unused or not explained. Read thoroughly the Mask reference and Controls reference sections to get full information about the filter.
I recommend you to concentrate on other mask features, namely a green color usage in Analyse and Repair masks. It is particularly useful for a letterboxed video processing or for still images processing when you don't want certain part to expand to the repaired area.
The analysis process can be done manually on a selected set of frames too. In some circumstances, its result may be better than a complete video analysis. Particularly if you find one completely white and one completely black frame with the logo, analysing just these two frames might be enough to produce high quality Color and Alpha masks.
|
Group |
Control |
Purpose |
Enabled |
|
Filter Function |
DeBlend |
Switches DeBlend processing on/off |
When DeBlend, Alpha and Color masks are valid |
|
Repair |
Switches Repair processing on/off |
When Repair mask is valid |
|
|
OnFrames checkbox |
When checked, only the specified frames are processed |
When OnFrames edit box contains valid information. |
|
|
OnFrames edit box |
Use to specify which frames contain the logo. All other
frames will not be processed by the filter. |
Always |
|
|
Preview |
Standard |
Switches standard filter output to be displayed in the Preview window |
Always |
|
Analyse |
Displays Analyse mask in the Preview window |
When Analyse mask is loaded |
|
|
DeBlend |
Displays DeBlend mask in the preview window |
When DeBlend mask is valid |
|
|
Alpha |
Displays Alpha mask in the Preview window |
When Alpha mask is valid |
|
|
Color |
Displays Color mask in the Preview window |
When Color mask is valid |
|
|
Repair |
Displays Repair mask in the Preview window |
When Repair mask is valid |
|
|
Mask properties |
(name column) | Shows the mask filename. "- none -" text is displayed here if no mask is loaded. "- generated -" means that the mask was created by the filter and was not saved yet. | |
| (size column) | Shows the mask size in pixels (width x height). The mask size must be equal to the video image size in order to filter use the mask. | ||
|
Save frame |
Saves source of the current frame displayed in the Preview window. You can use this output to create Analysis mask |
When the Preview window is open |
|
|
Save as... |
Saves the corresponding mask |
When the corresponding mask is valid |
|
|
Load |
Loads the corresponding mask |
Always |
|
|
Repair parameters |
Depth | Specifies depth of the border area around pixels to be repaired. The bigger depth the more pixels are used (and the slower the Repair phase is). Yellow pixels represent the border area in the Repair mask. | Always |
| Power | Specifies the power of repairing. Lower values give more blurred results. | Always | |
|
Interlaced |
Specifies that even and odd lines of the video image should be processed separately. Improves the result on interlaced video. |
Always |
|
|
Pixel aspect |
Specifies the pixel aspect ratio. When calculating the pixel distances, appropriate axis distance is multiplied by the aspect ratio coefficient. Useful when the pixel aspect ratio is not 1:1, e.g. when capturing in 352x576 format. It also affects the border size and shape. |
Always |
|
|
Manual analyser |
Reset stats |
Clears all the analysis arrays in memory. Start/reset the manual analysis using this button. |
Always |
|
Sample frame |
Adds the current frame statistics to analysis arrays. After analysing at least two frames you may start experimenting with the results. |
When the Preview window is open |
|
| Subtract frame | Subtracts the current frame statistics from analysis arrays. It is possible to 'undo' a manually analysed frame using this key or to create some fancy effects by subtracting frames not yet analysed (not recommended). | When the Preview window is open | |
|
Automatic analyser |
Sample frames |
Use to specify the frames which have to be analysed. You can use the same string as in the OnFrames edit box or be more specific (i.e. select less frames). The frame numbers are the frame numbers in the source video stream and deleting parts of video may lead to confusion here. |
Always |
|
Sample video |
Using the standard VirtualDub's sampling interface runs through the video and puts specified frames statistics to the analysis arrays. |
When the Preview window is open and Sample frames box contains valid information |
|
|
Mask construction parameters |
DeBlend shift |
If you think the result is too bright or too dark, you can try to move this slider a little to reduce that. Lower values tend to not fully remove the logo while higher values tend to make the result brighter. I didn't ever get better result using this slider. |
When the Analysis mask is loaded and some analysis has been done. |
|
DeBlend falloff |
Use to adjust blurring of the repaired area to its surroundings. The blur is supposed to make the artifacts less visible. |
When the Analysis mask is loaded |
|
|
Alpha to repair |
Use to specify how much alpha is needed to mark a pixel as non-deblendable and put it to the Repair mask. |
When the Analysis mask is loaded and some analysis has been done. |
|
|
Repair radius |
Use to inflate the Repair mask a little to mask some not ideally DeBlended pixels |
When the Analysis mask is loaded and some analysis has been done. |
note: "valid" mask means that it has been loaded or created and has the same dimensions (in pixels) as the processed video.
All masks can be saved and loaded as a 24-bit color standard Windows bitmap (.bmp) images. No other format of the bmp file is supported and an attempt to load it will cause an error.
While the statistical analysis runs on every pixel in the whole image area, the Analysis mask tells the analyser how to use the statistical results.
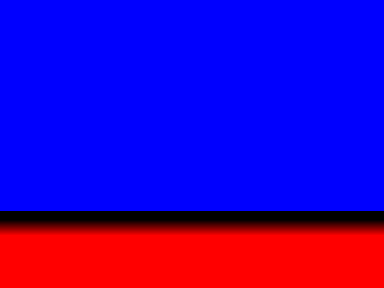
The only significant colors in this mask are fine red (255,0,0) which marks the "area of interest", fine blue (0,0,255) which marks the "unimportant" area and fine green (0,255,0) which marks the "not an image" area. All other colors are transformed to black upon load and these pixels are used as a "reference area" to compare analysis results against pixels in the "area of interest". This mask is copied to the DeBlend mask before blurring.
The "area of interest" (red) means the area where the analyser should try to find the logo. This area should be somewhat larger than the logo in order to cover all its parts that might not be clearly visible.
The "unimportant" (blue) area contains pixels which are statistically analysed and used to create the Alpha and Color masks, but they are not used in calculating the coefficients making the Alpha and Color masks. This area is not marked to be repaired by the automatically created DeBlend mask too.
The "not an image" (green) area is handled the same way as the "unimportant" (blue) area but its shape is also transferred to the Repair mask preventing the Repair algorithm to use marked pixels as border pixels.
The difference between the blue and green area is:
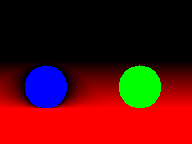
In the DeBlend mask, only the red channel is significant and marks the amount how much the DeBlend process result is blended to the original image. The fine blue and fine green areas are left here for your observation purposes. The Repair mask is subtracted from the DeBlend mask to reduce computing, too; the red color covered by the repair mask is changed to cyan.
The Alpha mask contains alpha value for every color channel in every pixel (so the mask doesn't have to be grayscale). Even more, due to the algorithm used, the alpha value may be bigger than one so alpha=1 is converted to a color value of 200.
It is not a good idea to try to draw the Alpha mask manually. Let the analyser do its work - you can try to use the manual analysis on a selected set of frames to achieve better results.
The same as the Alpha mask: just let the analyser to create the Color mask for you.
Color mask is supposed to contain the color part of the logo. Expect random colors in areas where the alpha is near 1 (i.e. almost transparent logo).
The Repair mask contains fine red (255,0,0) pixels to be repaired using their surrounding pixels and fine green (0,255,0) pixels that cannot be used as border pixels. All other colors are turned black upon load. The border pixels are marked yellow for your observation purposes but the border is created automatically using the Repair depth and Pixel aspect parameters:

When created automatically, the Repair mask cannot exceed the "area of interest" (red) marked in the Analysis mask even if you raise the Repair radius.
Every continuous marked area is repaired independently on other areas and it has its own border which may occasionally re-use border pixels of other areas. When the Interlaced option is on, each field is processed independently too and corresponding border pixels are taken from the same field only (thus, a continuous red marked area actually makes two continuous areas in interlaced mode).
The border area shape is slightly affected by the Interlaced option (may expand around 1 pixel up and down) and heavily affected by the Depth parameter (border width in pixels) and the Pixel aspect parameter (the border takes more pixels on the "thinner" axis).
If you create a repair mask region which has no border pixels (e.g. red area completely surrounded by green pixels), that area is not repaired.
When something is going wrong, the filter can show an error message. While most of them are pretty self-explanatory, some may confuse you so I decided to explain them all.
When saving a bitmap file:
When loading a bitmap file:
When saving a batch:
All the error messages only mean that not all the masks used are saved and the DeLogo function after loading from the batch will be different from the current function.
1.3
1.2.1
1.2
1.1
1.0
My name is Karel Suhajda and currently I am 35 years old. Once upon a time I was looking for some VirtualDub filter to remove a logo from video and I was surprised there is not any. Then, I found the LogoAway filter by Chris Wojdon which sure is good but didn't do exactly what I expected. So I sat at my computer, learned a little C and created this one.
Q: What VirtualDub version do I need to use this filter?
A: I always recommend to use the newest version of VirtualDub. The first version that runs the filter with no known problems is 1.4.7.
Q: I have specified frames to analyse in the Sample frames edit box but the filter still analyses the whole video.
A: That's okay. The filter has no control over what frames VirtualDub will send it to analyse so the analysis runs through all frames. The filter only analyses the specified ones, however. All the other frames are just skipped.
Q: What's wrong with deleting frames in the video?
A: Don't delete frames in the video if you intend to specify the frame numbers for processing or if you want to run an analysis of the video stream. At first, the filter doesn't have access to frame numbers as you see them on the VirtualDub's main vindow and it only refers to the original video frames, i.e. frame numbers in the complete video stream. For instance, if you have deleted frames 1000-1099, the frame 1000 as you see it will be frame number 1100 for the filter. Unfortunately, it's not all. VirtualDub 1.4.10 (and possibly older versions too) contains an error in the sampling routine causing it to apply the frame deletion two times, causing completely different frames to be analysed - sometimes even the deleted frames. Therefore, deleted frames in the analysed video may lead to unwanted results even without specifying frame numbers!
Q: The filter displayed an error message. What does it mean?
A: See the Error messages section
Q: The filter closes the Preview window whenever I press any Save or Load button.
A: This behavior is intentional because the save/load dialog box insisted on opening itself behind all the VirtualDub's windows whenever the Preview window was open.
Q: Do I need to run the analysis process to remove an opaque logo?
A: You don't have to run the analysis but you can use it to find the actual logo shape. You can use the Alpha mask instead of a saved frame as a base to draw the Repair mask.
Q: I have loaded a mask to the filter and the filter still does nothing.
A: Check if the mask size is the same as the video image size. In case of difference, the filter loads the mask but it doesn't use it.
Q: The repair process is very slow.
A: Due to the nature of the repair algorithm, it is the slower the bigger the repaired area is and the more pixels are in the border area. This dependence is not linear but rather quadratical (repaired pixels times border pixels). To speed it up you can try to reduce the border depth, reduce Pixel aspect and check the Interlaced box. You can also try to split the repaired area to more regions when the removed logo is not continuous.
Q: Does DeLogo support batch processing?
A: Yes, the batch processing is fully supported. There are some problems however - there is no way to store whole masks to the batch file so all masks must be saved somewhere first in order to be loaded at batch run. Also the filenames and paths should be short enough to fit to the 512 characters long configuration line at once.
Q: Is the filter optimised for my processor?
A: There are no MMX, SSE, 3DNow! or other processor specific optimisations in the filter. There is no assembly language in the filter because I don't know it. On the other hand, there are as many precalculations done as possible to speed up the process itself.
Q: I have some other question.
A: Mail me to kasuha@post.cz.
Avery Lee for VirtualDub
Donald Graft for hosting this filter
Chris Wojdon for creating LogoAway – a source of inspiration
Uwe Freese for LogoAway’s UGLARM method
Jean-Francois Pirus for bug reports/fixes