Aligning Keyframes
In each of the procedures below, the reference keyframe of any keyframe graph is the keyframe you activated most recently in that keyframe graph.
To align the reference keyframe to the position indicator, in one
keyframe track:

|
|
Right-click (Windows) or Ctrl+Shift+click (Macintosh) a keyframe
track, and select Align Keyframes.
|
To align the reference keyframes to the position indicator, in one
parameter group:
|
|
|
Right-click (Windows) or Ctrl+Shift+click (Macintosh) the parameter
group title track, and select Align Keyframes.
|
The reference keyframes move to the position indicator.
To align the reference keyframes to the position indicator, in the
entire effect:
|
|
|
Right-click (Windows) or Ctrl+Shift+click (Macintosh) the effect's
title track, and select Align Keyframes.
|
The reference keyframes of the entire effect move to the position
indicator.
 | |
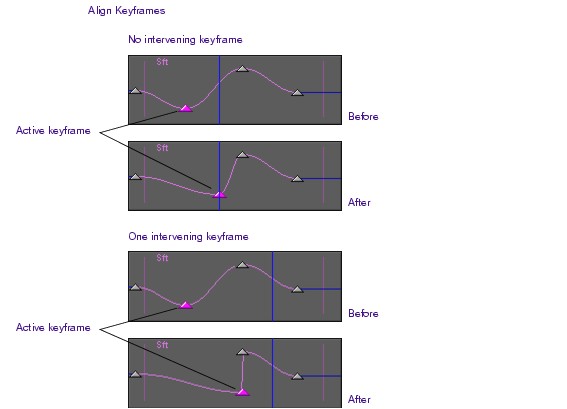
In each keyframe track, Align Keyframes will not move the reference
keyframe beyond an intervening keyframe; that is, a keyframe between the
reference keyframe and the position indicator. If there is an intervening
keyframe, the reference keyframe moves to within one frame or field of it.
|
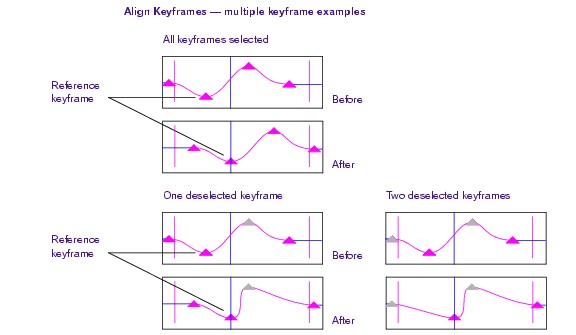
Align Keyframes exhibits more complex behavior when you have multiple keyframes selected in one keyframe graph.
If you select all keyframes in one keyframe graph, Align Keyframes is equivalent to Slip Keyframes. The reference keyframe moves to the position indicator, and all other keyframes maintain their position relative to the reference keyframe.
| |
Align Keyframes can move keyframes outside the time boundaries of the
keyframe graph. That is, you can make the effect behave as if parameter
values are changing before the beginning or after the end of the effect.
|