getting started
|
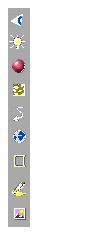
3.3 Material and Edit buttons.
It's time to do something with the button window below
the screen.
First go to the Material buttons.
This button field will be explained in later chapter. Just for now try to find the sliders: 'R' 'G' and 'B': the color components
The Preview Render directly displays the result. Try the little red sphere button above it. This indicates a preview option, it doesn't affect the actual rendering. Select the sphere (Leftmouse). This newly added Object
doesn't have a Material.
This pops up a menu with 2 choices:
This menu button and its browse functionality is an important Blender feature. Use it for almost all data types: Textures, Meshes, Worlds, Scenes, etc. Make a quick rendering to look at the new Material appearances
(F12). Note that the sphere still is rendered faceted. Smoothing by normal
interpolation is a not a Material Property.
< site under construction !!!>
|