A Blender Underwater Scene
Introduction
Okay people, let's start off by saying I'm not a great character
animator. But I promised some people to do an underwater tutorial, so here
goes. We'll be building a scene consisting of an ocean floor, a dolphin
swimming by, a school of small fish and some sea-bottom vegetation.
The dolphin
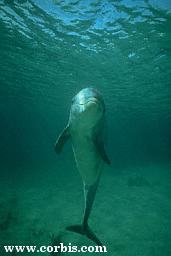
As a preparation, I collected some pictures of dolphins from the Internet. I recently discovered a GREAT picture database for this kind of stuff: http://www.corbis.com. Just enter a keyword and off you go. These are some of the pictures I studied: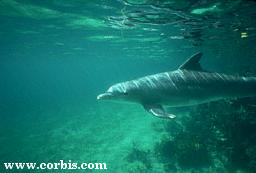
We'll build the dolphin using a deformation lattice. Of course, it can be done in a lot of other ways aswell, but let's make this interesting for me, too, shall we?
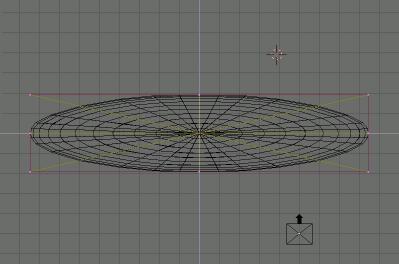
Fire up blender, and delete the default plane in the middle of the screen. Next, hit the spacebar to bring up the Toolbox and select add>surface>sphere. A small sphere appears in the middle of the screen. Now use resize (KEY S) to make it a bit bigger, and use resize with the middle mouse button to elongate the sphere. When you're done, your sphere should look like this:
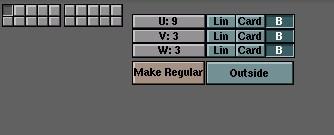
Switch to Front View (NUMPAD-1) and leave edit mode (KEY TAB). The model will now turn pink to show it's still selected, but you're not in edit mode anymore. Left-click in the middle of the sphere to bring the 3D cursor to the centre. Enter the Toolbox (KEY Spacebar) and select add>lattice. The sphere is deselected and a pink square appears in the middle of the sphereoid. Go to the EditButtons window (F9) and enter the following data for the lattice:
Before the lattice can actually affect the sphereoid, we need to attach the two together. To do this, first select the spheroid, hold shift and then select the lattice. Both should be pink now, but the lattice is brighter to indicate it's the active selection. Now we'll make the lattice the parent of the spheroid. Select CTRL-P, and a message comes up: OK? Make Parent. Hit Enter, or left-click on the 'Make Parent' option.
First, get a feeling for the way the lattice looks. Select it, hit tab and play around with the trackball mode (push the middle mouse button and move the mouse). As you can see, the lattice consists of several layers of control vertices. Remember this when you make selections in the next step of the tutorial. It is important to use the box tool to select several vertices at once and then move then. When you've had enough, restore the front view with keypad+1.
Now we'll start building the shape of the dolphin by modifying the shape of the lattice. You'll see that the lattice acts as a 'magnetic' boundary for the spheroid - when it's changed, the spheroid will follow. Okay, so now let's start the real work. Each time you need to move a vertex, right-click to select it, hit b for box selection and drag a little box around the selected vertex. This will also select the vertices that are 'behind it' in other layers. Now hold ctrl and move selected vertices with the right-mouse button. Release the ctrl button as soon as you start moving. This ensures that you don't accidentally de-select a vertex.
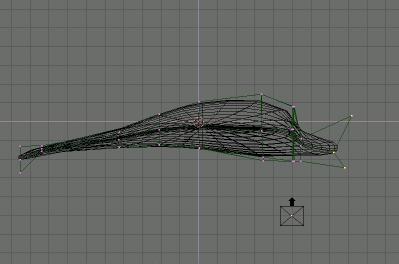
In the front view, keep working untill your lattice and sphere look like this:
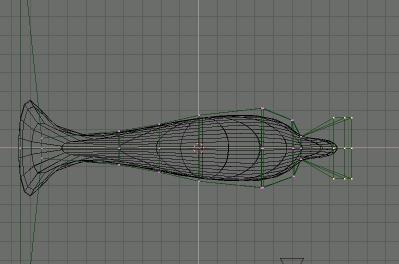
Now, switch to top-view (keypad-7) and re-arrange the vertices untill they look like this:
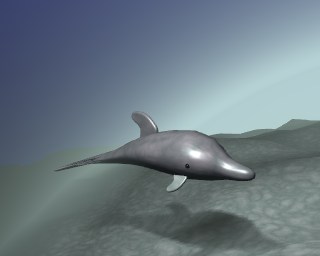
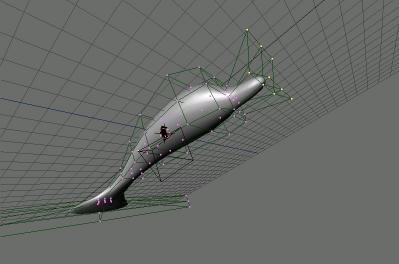
By now, we've already got the basic shape of the dolphin ready! Let's take a sneak peek. Hit keypad-5 to turn on perspective view, hit z to turn on shading and play around with the trackball option. Here's how it should look:
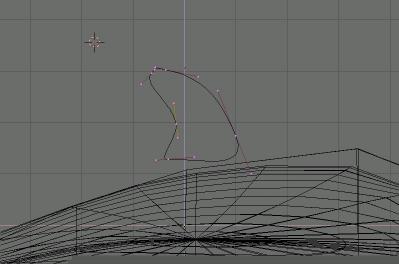
We're getting there, but it's not quite finished yet. Let's add some fins. Return to unshaded, orthogonal, front view (that's 'z',keypad 5 and keypad 1). I'm going to make the fins by drawing an outline and bevelling it. Hit TAB to leave the edit mode of the lattice. Place the 3d cursor above the dolphin's back (left click). Bring up the toolbox and select add>curve>bezier curve.
When in curve edit mode, you can add vertices by first selecting an endpoint of the curve, then leftclick while holding down the ctrl key. When you're satisfied, close the curve with key-c. Play around with the location and the direction of the bezier control points untill your curve looks like this:
Hit TAB to leave the editmode and F9 to go to the EditButtons screen. In there, change the Ext. 2 value to 0.15, and the BevResol value to 4. This should give you a nice, rounded fin. When you go to the right-view (keypad-3), it should look like this:

Now we'll duplicate this fin to create two other, smaller, fins. Duplicate the selected fin with shift-D. Move it away from the top and left click to place it. The position doesn't really matter yet - we'll attach it to the body later. Rotate it about 220 degrees (key r and move with the mouse - ctrl key constrains the angles), then scale it to a factor of about .6 (key s and move the mouse, ctrl key contrains here, too).
Duplicate this smaller fin and rotate it -80 degrees. Next, in the front and right view, move the three smaller fins around untill they are attached to the body in a proper way. This is how it should look (I rotated the fin on Willy's back a little bit to make it match the angle of his back):
We're almost there. As a finishing touch, we'll add to eyes. Switch to top view, use the toolbox to add a sphere. Scale it down and place it in the head, so that a little less than half of the sphere sticks out of the head. The height of the eyes should be equal to the top of the dolphin's beak and they are located a littlebit towards the back of the head.
Select the eyes, go to the MaterialButtons screen (F5) and create a new meterial. Make it black.
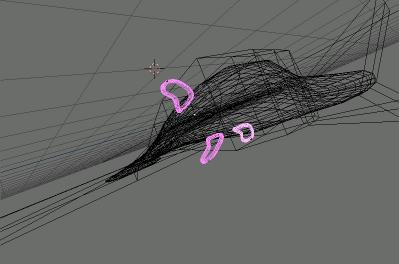
Next time, I'll elaborate on creating a little environment for our dolphin.
For the time being, here's a little preview of what's it going to be like: