|
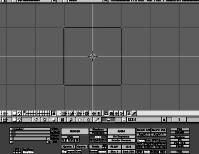
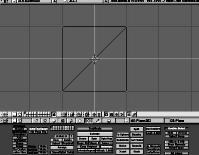
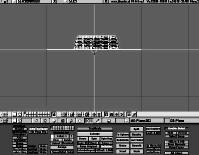
Step: 1
Make a square and enter edit mode
|
|
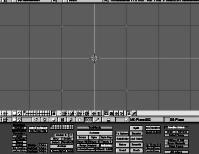
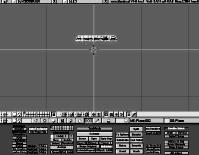
Step: 2
Delete the "Edges and Faces"
|
|
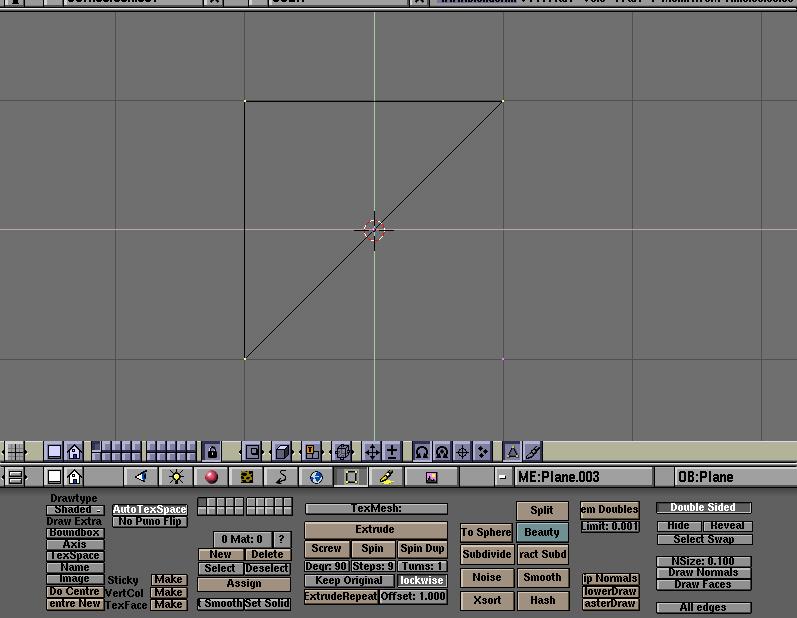
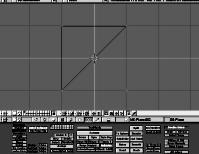
Step: 3
Connect three vertices to make a triangle
|
|
Step: 4
Connect the opposite three vertices to the other triangle
|
|
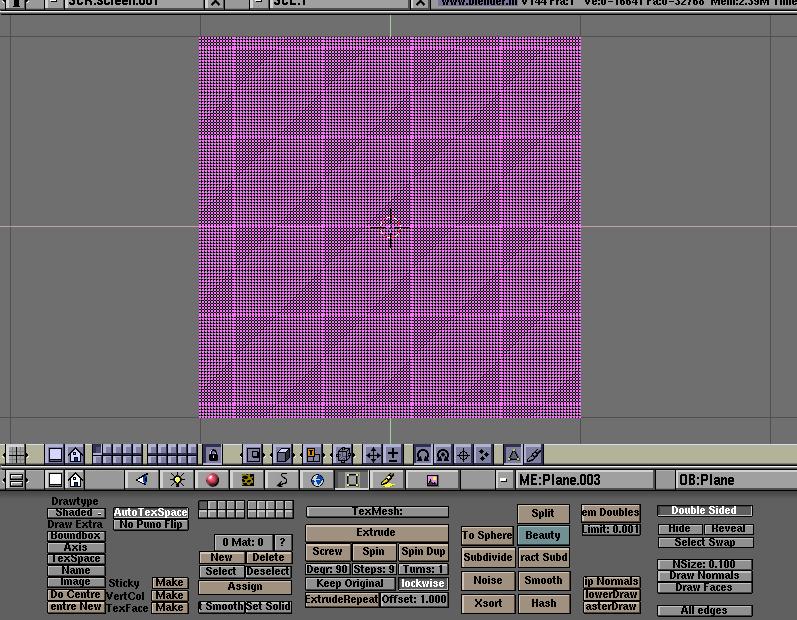
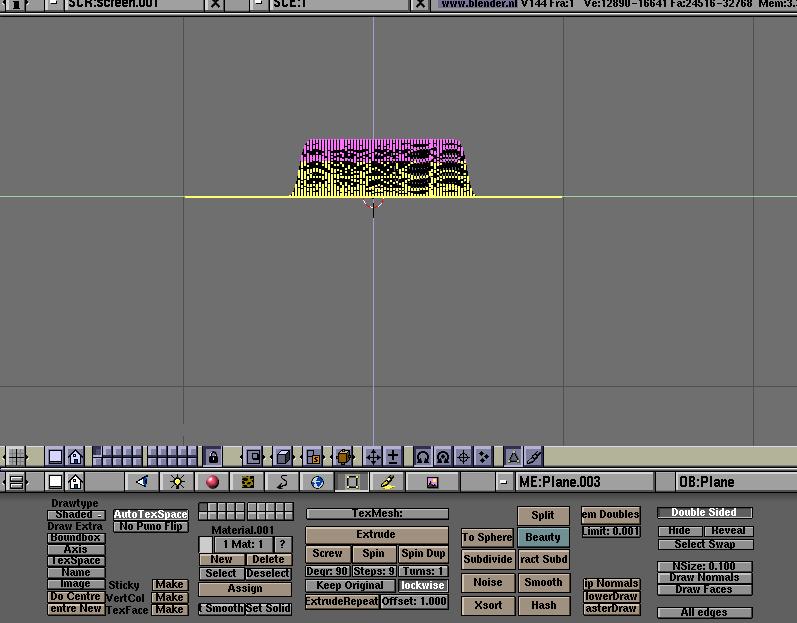
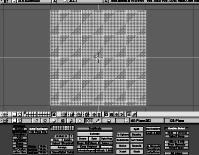
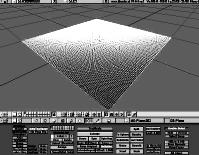
Step: 5
Select all points of the square and subdivide
as much as possible (the more, the smoother the logo)
|
|
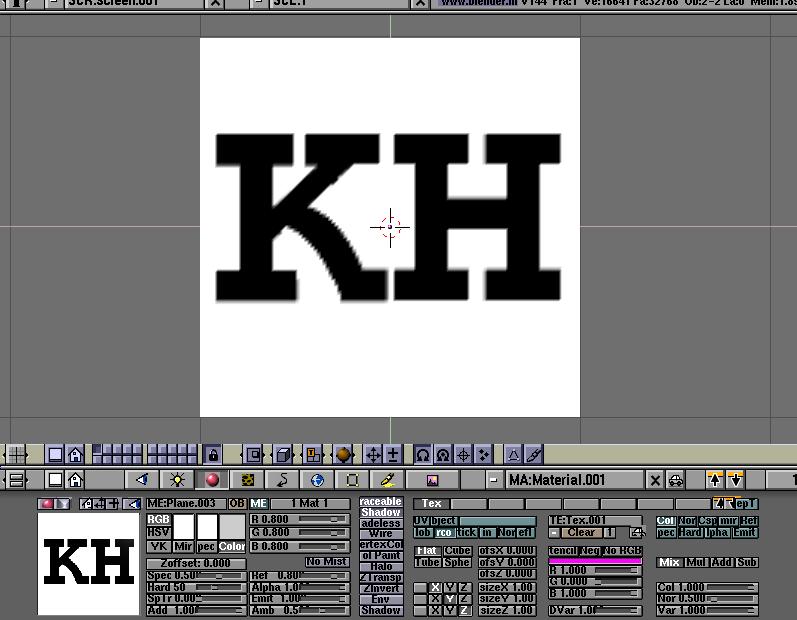
Step: 6
- Return from edit mode,
- Create a material for the square,
- Go to the texture window and create a image texture,
- load in the image (preferably 2 color image, 256x256 is sufficient),
|

|
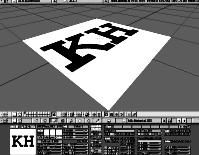
Step: 7
- Just to see where the logo will be, click on the texture's "emit"
button so the material is lit.. This is just for show..
- Turn on the texture shading by hitting Cntrl-Z.
|
|
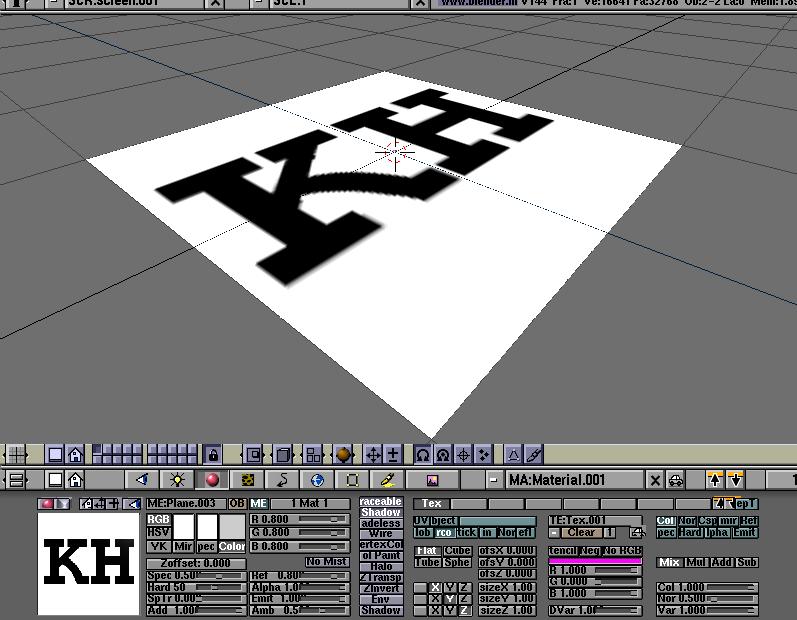
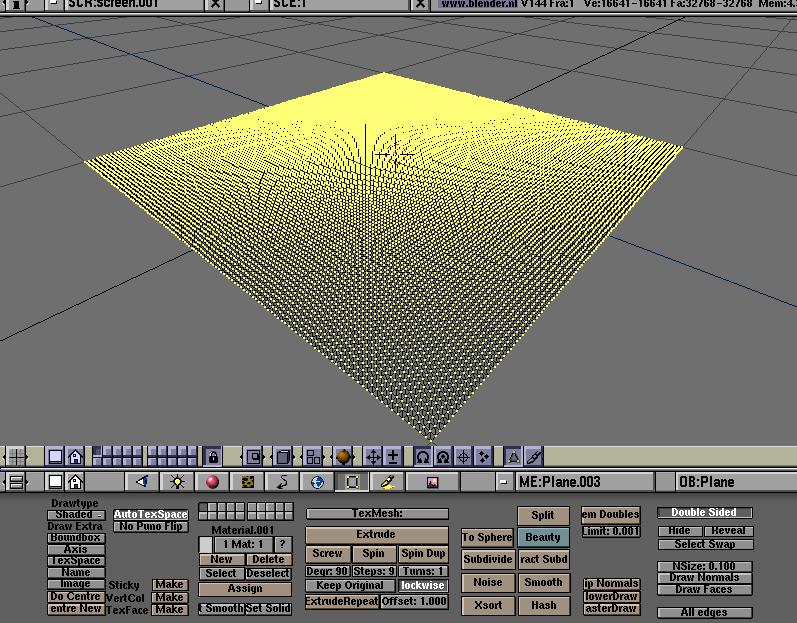
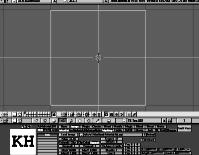
Step: 8
Switch to a perspective view of the plane. This is also just for show,
but this perspective view will best show the effects of the texture
displacement feature.
|
|
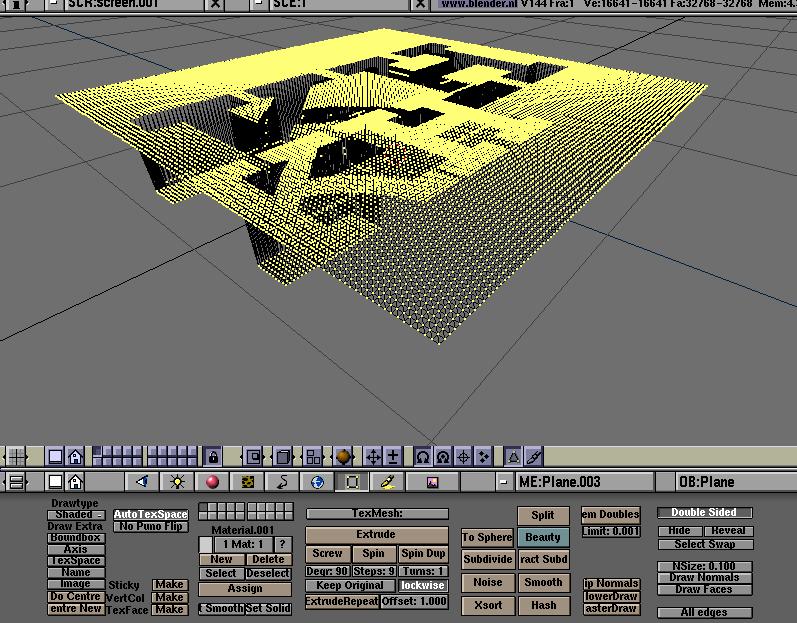
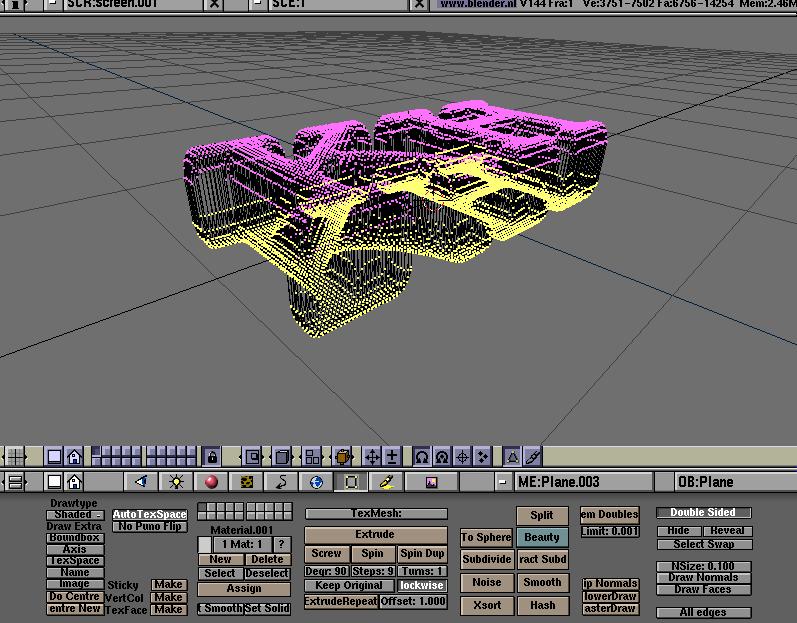
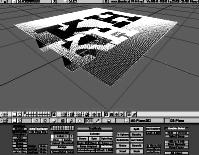
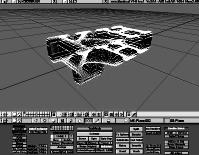
Step: 9
- Go into edit mode again, and select all the points.
- Hit F9 to enter edit buttons window.
|
|
Step: 10
Hit the "Noise" button several times
|
|
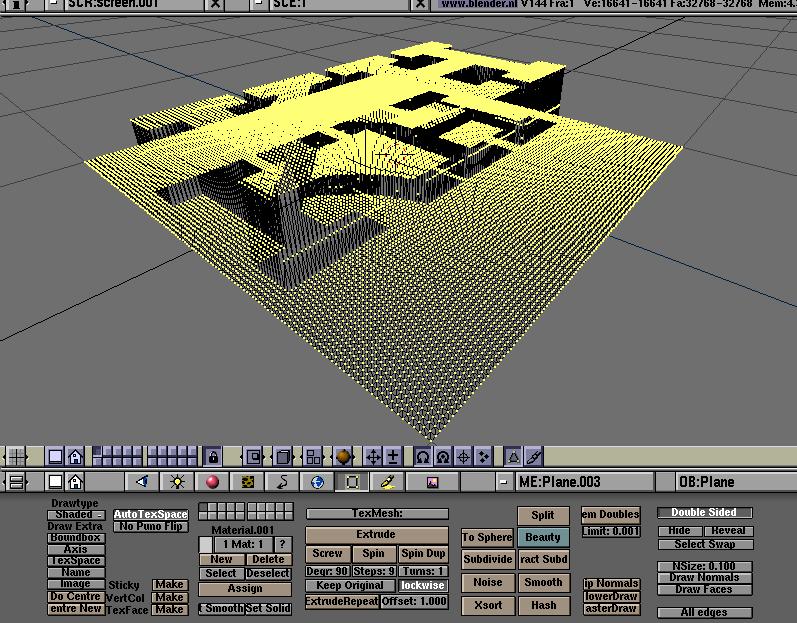
Step: 11
Scale the selection, and mirror on the y (hit the 'y' key)
|

|
Step: 12
Near the "noise" function there is a "smooth" button, hit that
several times with all the points selected.
|
|
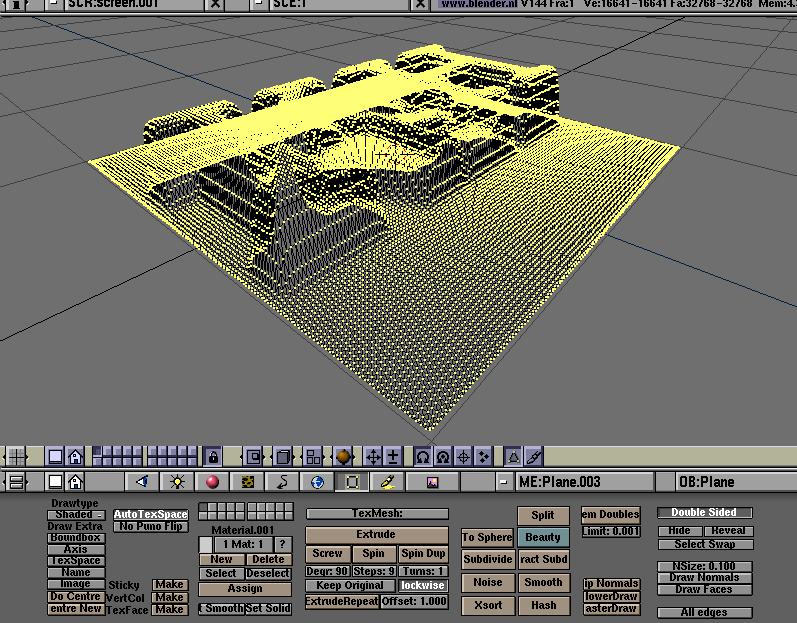
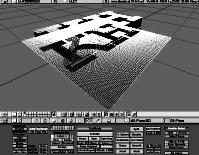
Step: 13
Exit edit mode and hit "z", this will give you a non-textured
shaded view of the logo.. We're not finished yet..
|
|
Step: 14
- Switch to edit mode, select a orthogonal side view (keypad "3" is good)
- Select some subset of the points below the face of the logo
|
|
Step: 15
Delete these points
|

|
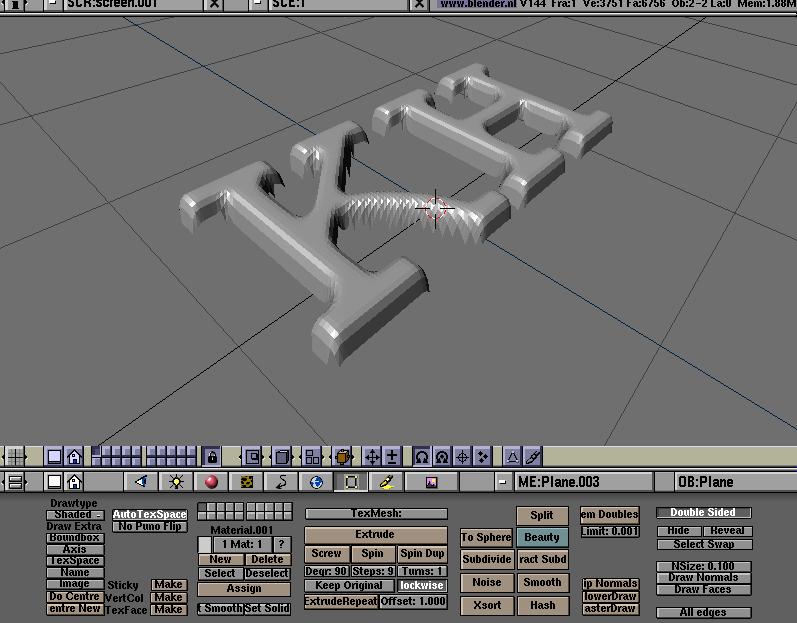
Step: 16
This is what the 3D logo should look like now.
If it still looks rough, you can smooth it some more if you like..
|
|
Step: 17
- Return to edit mode, (again?) Yess again..
- And this time select all the points, and extrude (yes extrude! trust me..)
- Now click-drag with the MMB downward (this is a constrained grab, to the Y axis), validate.
- Last, but not least, do a scale + flip on the Y, validate.
- Select all points and "set smooth" the polygons (this is so that the polygons appear smooth when rendered)
- Instant Logo!!
|

|
Step: 18
Create a new material (a metalic texture using a reflection map or normal map),
I would suggest a high contrasted cloud texture, "add" the texture to the base
material color, that will allow you to increase the gold value of the base
color while achieving a puprortionate metalic glare ontop..
|
|
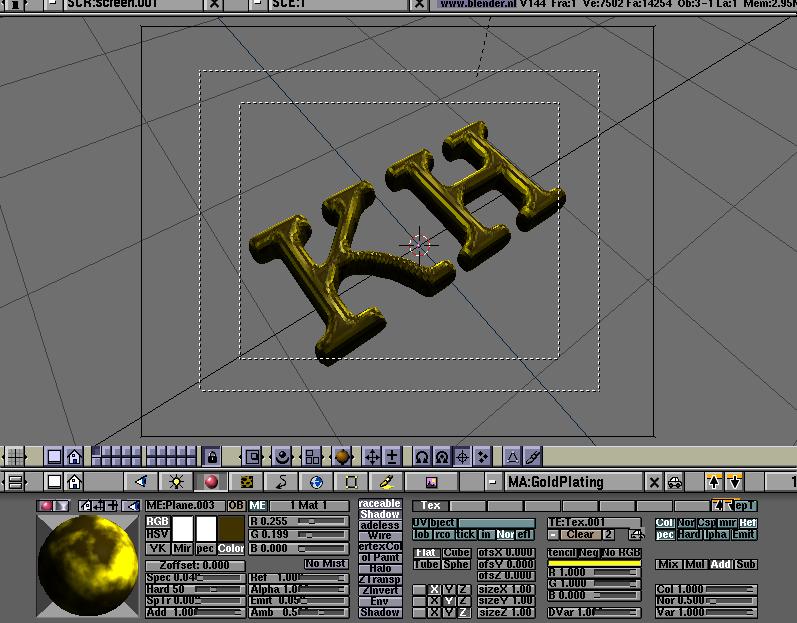
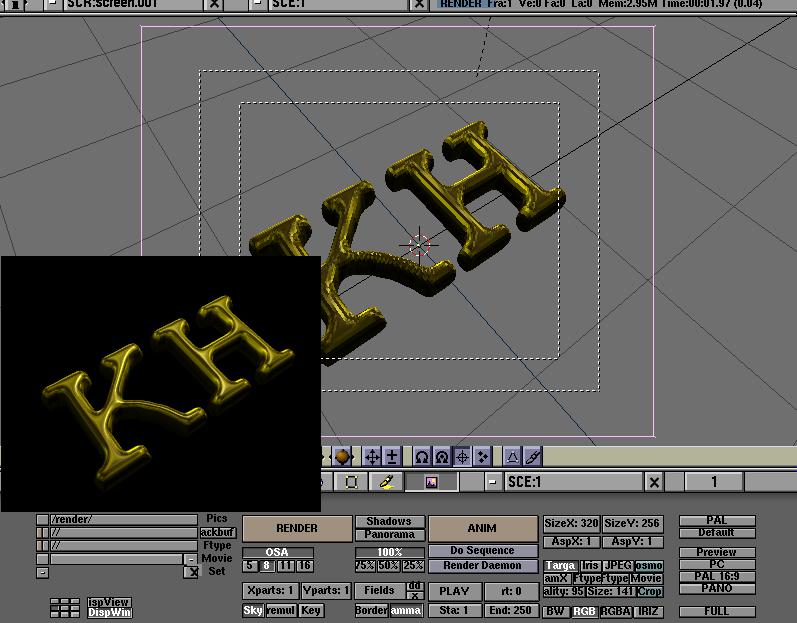
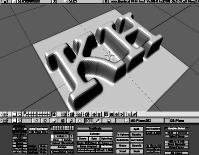
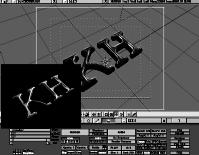
Step: 19
After the "Gold Plating" material is applied, the gold plated logo
should look like the figure. Note that one the Linux machines, it might
not be possible to achieve this realistic gold texturing look, this
is from an SGI
|
|