This section explains the procedures you should follow to begin using FileRescue Pro and to recover deleted data.
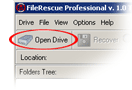
In the top left corner of the program window there is a "Open Drive" button.
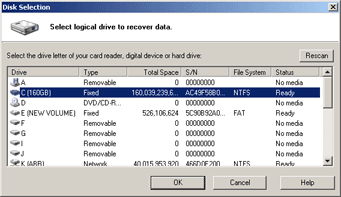
Click it to display a list of all local drives available on your system. Select the one that contained the lost file or files and click "OK".
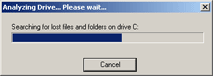
FileRecovery will start analyzing the content of selected disk. This procedure
is needed to find links to all deleted files and folders on the disk. Unfortunately
it is impossible to go right to your file until the whole content of the disk
is analyzed, so the procedure will take some time.
When analyzing finished, the program will display found files and folders:
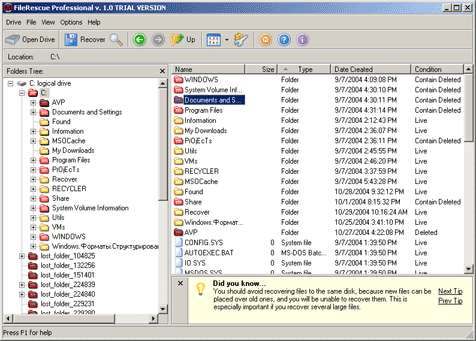
If you select a folder in the left view, you will see its content in the right view. Now you can browse the content of your disk right like you do in the Windows Explorer. In addition to existing files and folders you will also see deleted ones. They are marked by red color of the icon.
Legend:
| |
|
You can select View -> Show Only Deleted to make the program show only deleted files and folders.
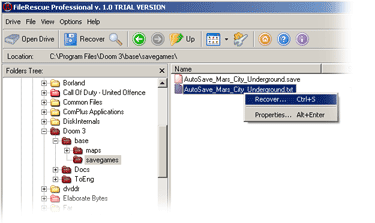
Use the right view to select files and folders that you want to recover.
You can also click the "Find file" button ![]() (Ctrl+F) on the toolbar to search for a file
by a part of its name or by a mask.
(Ctrl+F) on the toolbar to search for a file
by a part of its name or by a mask.
After you selected files and folders that you want to recover, click the "Recover"
button ![]() on the toolbar
(Ctrl+S). The "Recovery Wizard" will show up.
on the toolbar
(Ctrl+S). The "Recovery Wizard" will show up.
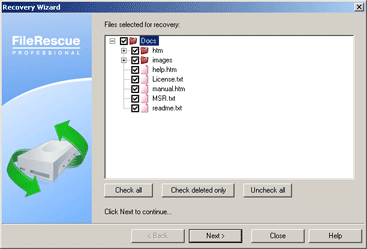
On first screen you may confirm or change the files you select for recovery. Uncheck the files not need to be recovered. Click Next > to continue with wizard.
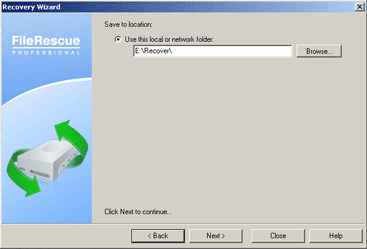
On second screen you select a folder where you want to save the recovered data. If you recover several files, it is strongly recommended to select a location on a different disk. This way you will make sure that first recovered file will not be saved over the data required to recover the next file.
You can also select the following options.
Restore folder structure.
If this option is selected, the full branch of the folders tree containing the selected files and folders will be recovered to the selected folder.Recover alternative data streams.
Recover alternative data streams along with the main file data. Alternative data streams are used on NTFS file system to store additional information about files, such as user comments.
Click Next > to start actual file recovery.
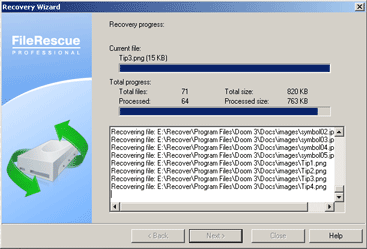
On this screen you can watch file recovery progress and see log of performed operations. When recovery complete - Click Next >, on the last step you will be View recovered files in Windows Explorer.
Note
If you are using the software in trial operation you will be able to recover 500 Kbytes within 30 days for FREE. This is the only limitation of the trial version. We will provide full support & assistance for you should you have any problems or questions. If you really like the product, you are welcome to buy it & register with us. Registered version does not have any limitations & can restore as many files as you need.To use the FileRescue without restrictions you need to obtain a licence key which can be purchased online.
THAT'S ALL.
Above we have described the most basic features of FileRescue to
get you started. However, FileRescue offers much more. Please read
the documentation to learn more about the powerful features of FileRescue
and discover how you can use it to recover your files!
See also:
Purchasing Information
Frequently Asked Questions (FAQ's)
Copyright © 2000-2004 ObjectRescue.com. All rights reserved.