|
|
 |
 |
 CloneDVD Using the Application CloneDVD Using the Application |
 |
The User Interface is very simple and you’ll notice that CloneDVD does not have any menus. It is a Filmstrip that takes you step by step, through
all the settings, until the copying process can start. Everything that you can and need to adjust is in the Filmstrip. You don’t have to oversee
anything! If you have not selected any necessary information, you cannot reach the next picture of the Filmstrip. The “Next” button will remain
inactivated until you select all of the required information.
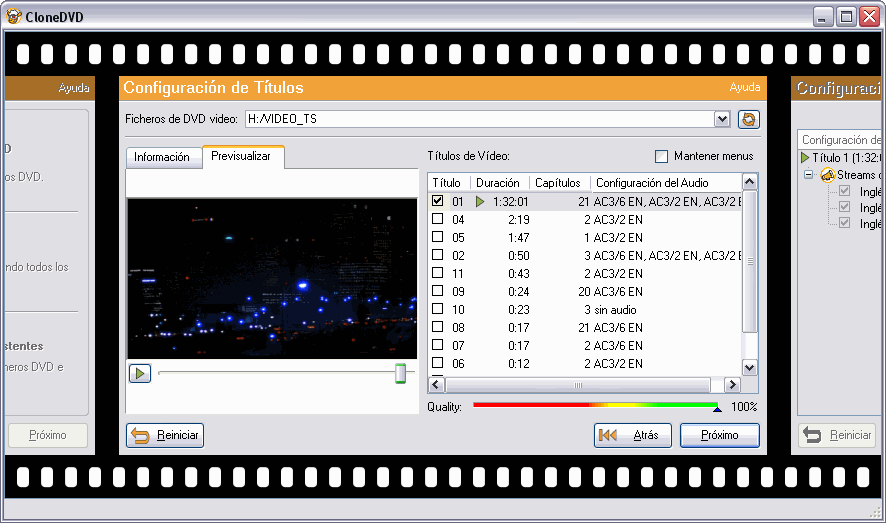
Start Picture
Please make sure that you have everything needed for copying:
- a DVD-Reader
- suitable DVD-Recordable media
- a DVD-Writer
- the original movie
- sufficient hard-disk space
Double-click the CloneDVD Desktop Icon to open the Start Picture of CloneDVD, or better, open to the first picture of the Filmstrip.
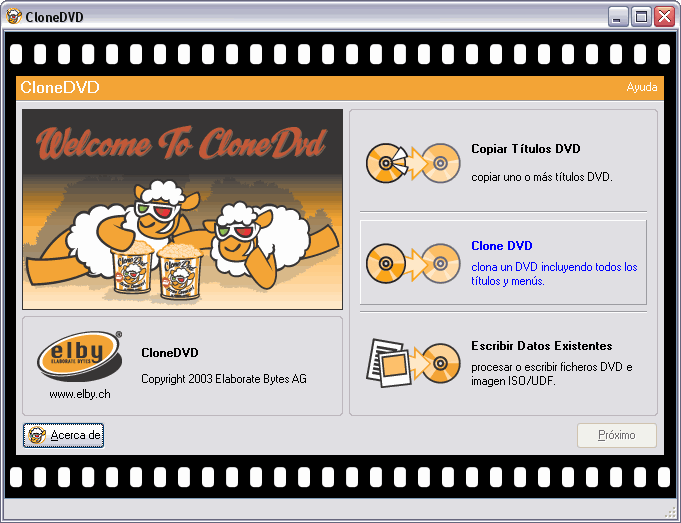
Here you decide which elements of the movie you wish to copy. You can copy one DVD title (for example only the main movie), several titles
or the whole DVD. You can also copy the original menu or leave it out. There are three categories of backup for you to choose from:
- “Copy DVD Titles”: Here you can copy one or more DVD titles, with or without the original menu. DVD titles you haven’t selected will be
marked as gray in the menu
- “Clone DVD”: Here you can copy all titles including the original menu
- “Write Existing Data”: Different file formats can be selected, created and saved at the point of “output method” (DVD Files or ISO/UDF Image).
You also have the option to proceed with existing DVD files from your hard disk or other source. This is suitable for advanced and experienced users
NOTE: In the following chapter, we'll describe the first two backup categories. The third backup category requires a slightly different approach
and user configuration – we'll get around to explaining this later in the document.
Select Title/s
Choose the drive where the original DVD is inserted. The data files of the original DVD will be loaded.
NOTE: You will see an error message if your DVD is CSS-encoded and CloneDVD cannot load your DVD, (please see note under “What you should know”).
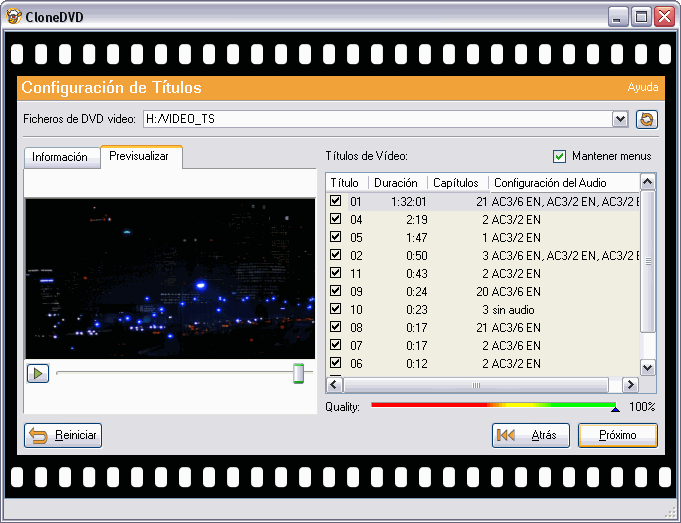
On the right hand side you’ll see the title selection and on the left hand side either the movie preview (which is started by default) or an
overview about the Audio and Subtitle Settings that are possible for the selected title.
The titles are preselected according to the category chosen:
- For “Copy DVD Titles“, only the main movie, without menus, is preselected
- For “Clone DVD“, all titles and menus are preselected
In any situation, you can change the title selection according to your personal preferences. The backup categories only describe a preselection
of options, to make the program easier to use.
You can make the following selections:
- Title selection: Here you'll find a list of all available titles from the original DVD. For each title, you'll see the playback time, chapter
count and original audio settings (audio tracks and subtitles). You can select one or more titles. Mark the checkbox corresponding to the title/s
that you want to backup and the selected titles will be highlighted accordingly
- Sorting order: By default, the titles are ordered by playback time. You can change the sorting criterion to title number or chapter count.
Simply click on the corresponding column description
- Movie preview: You can start the movie preview by first clicking on a title and then clicking on the “Play“-button (green triangle) right below
the preview panel. You can change the playback speed (1x-8x) by using the right mouse button inside the preview panel. The movie preview assists
with the identification of each title and ultimately the one required for backup
- Menu: You can copy the original DVD menu by selecting the “Preserve menus” checkbox in the upper right-hand corner of the window. The movie
content of unselected titles will be replaced with a blank (gray) picture
- FirstPlay: If you don't want to copy the DVD menu, but decide to select more than one title, you must specify which title should be played on
insertion of the DVD (“FirstPlay“). To select the “FirstPlay“ title, all you need to do is click just to the left of the title’s displayed
“Play time“ for the preferred title – a small green triangular arrowhead will indicate the FirstPlay title. By default, the title with the
longest playtime (which is usually the main movie) is preselected
- Quality bar: This quality bar gives you an idea of how much the compression (see help manual "Before you begin") of the data affects the movie quality.
The more titles you choose to include, the more the movie quality will suffer.
Now click on “Next”.
Audio and Subtitle Settings
Most movies offer various Audio and Subtitle selections, such as Languages, Subtitles, Audio encoding (Dolby AC-3, DTS), Audio properties
(like the director’s commentary) and Audio Channels.
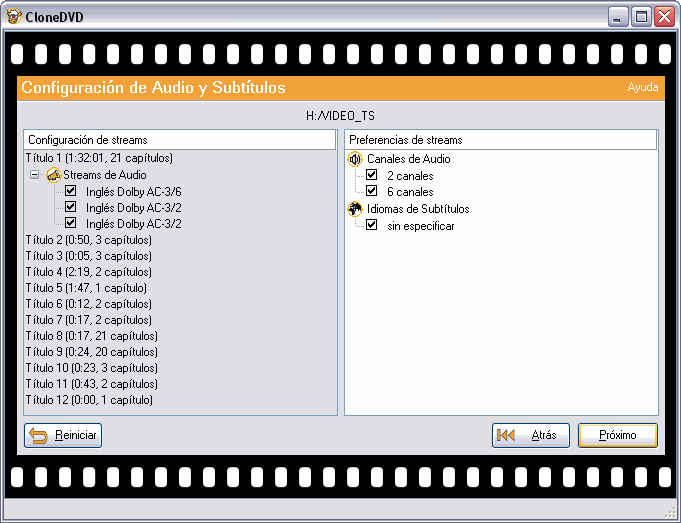
On the right hand side of the window you’ll find all the settings for the selected title in that particular movie chapter. Here you can make
personal selections about the backup process. CloneDVD will memorize these preferences until the next time you start the program. For example,
maybe you like watching your movies in German and English without subtitles with Dolby AC-3. Please make your personal selection now!
On the left hand side you’ll find all the settings of each of your selected title/s. The title with the longest play time or the “FirstPlay“
will be expanded automatically although there may be only one title shown. Each title has different settings. Depending on the selection of your
preferences on the right hand side, the settings on the left hand side will be tailored to suit.
NOTE: CloneDVD only memorizes the settings on the preferences or right hand side. We recommend you select your preferred settings on the right
hand side (preferences) and only correct the settings of each single title by exception.
You can make the following selections:
- Language: Select the spoken language for your personal movie backup
- Audio properties: Among these options are features like the director's commentary and closed caption for the hard of hearing
- Audio encoding: Select the different audio encodings you want to copy. Note that DTS uses more space than Dolby AC-3
- Dolby AC-3/Dolby Digital: “Audio Compression 3” provides you with true Surround-Sound. It is a real multi-channel technology usually
comprising six channels (5.1) or a maximum of seven (6.1). On DVDs the sample rate is 48 KHz at 448 Kbit/s
- DTS: Digital Theatre Sound also provides true Surround Sound and is considered superior to AC3, however, not all DVD players support
this format. On a DVD the sample rate is 48 KHz at 768 Kbit/s. It can support up to eight channels
- Audio channels: Select the preferred number of audio channels
- Subtitle languages: Select your preferred subtitle languages
- Subtitle properties: Among these properties are subtitles for the hard-of-hearing and subtitles for children
Output Method
On the lefthand side, you'll find a summary of your selected titles and properties. The “FirstPlay“ title is still marked with the green
triangle. On the right-hand side, you can select the preferred output method which is independent of the Start Window backup categories.

You have three options:
- DVD Files: DVD files are the basis for creating an ISO/UDF image which can be played with any DVD playback software on your computer.
Creating the DVD files first allows you to check the quality of the transcoder before proceeding any further. If you're happy with the
results, you can write them by using the third backup category “Process Movie Data“
- ISO/UDF Image: Image files are very useful for archiving, as they contain all the movie data in one single file and don't need to be
prepared any further before writing to a DVD-Recordable
- DVD Writer: If you want to make a direct copy of a movie, please place a DVD-Recordable disc into your writer and select “DVD writer“.
Your personal configuration of movie and audio selections will be transcoded and burned to the DVD-Recordable in one step from this point
Depending on the type of output, you will need to select appropriate output targets:
- With DVD Files and ISO/UDF Images, please select the folder where you want to save the resulting files
- If you want to make a direct copy, please select your preferred DVD writer in the drive selection window. You can manually change the
writing speed of your DVD writer to the maximum speed of your DVD blank media
- When generating an image or copying directly, you can optionally select the folder where you want to store the temporary files that are
generated while transcoding
Now click on “Go!”. The Filmstrip will proceed to the last picture.
Transcoding and Writing
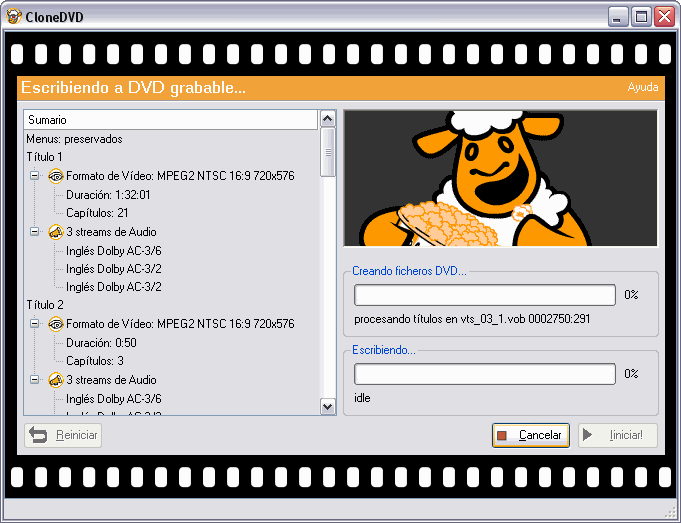
On the left hand side you see a final summary of all the selected and tailored settings. On the right hand side you can watch the progress
of the transcoding and imaging or writing procedure. Various animations provide a backdrop during the process!
|
|
 CloneDVD Using the Application


