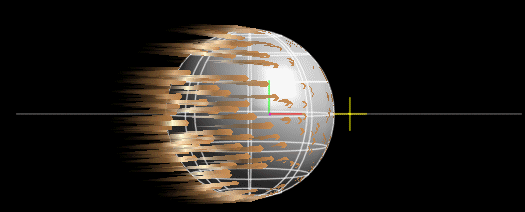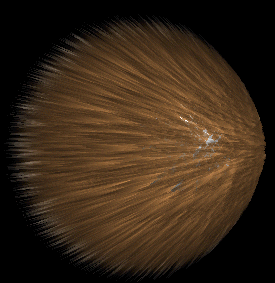
In this tutorial we will do a sphere that's moving across the screen. The fur will be influenced by dynamic velocity, as it moves.
First, do a default b-spline sphere in
Softimage|3D.
Move the camera to 0,2,-60.
Move the sphere to -15,0,0 and keyframe
the transformation in frame 1
Move the sphere to 15,0,0 and keyframe
the transformation in frame 100
You should now have a sphere that's moving across the screen.
Open FurDesigner (Matter/Mat_Oper/FurDesigner +)
Add some hairs to the sphere (I did 23 hairs/square unit), and make the hair thickness 0.2 at the root (refer to tutorial 3)
Tick the "Persistent" button, so the hairs will follow the sphere (refer to tutorial 2)
Move the time-slider to somewhere around frame 50, which is where the object has maximum speed.
The hairs are now aligned with the normals of the object. What we want to do is to make the hairs bend as a result of the movement.
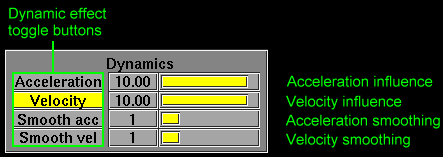
Press the "Dynamic" button (lower right corner of the interface) to open the Dynamic settings window for the selected object(s).
In the Dynamics section, press "Velocity" to toggle on Velocity calculations.

The Velocity button enables calculation
of the velocity of each hair on the object. The hairs are now bend as a
result of the velocity of the object.

The default Velocity influence is 1.0
which is fine for some animation's, but too much for this animation. Pull
the Velocity slider down to 0.08 (you may want to re-scale the slider to
gain more precision, refer to tutorial 1) The fur now looks like this:

As you can see, the fur is now bend 'backwards'
as a result of the object velocity.
Move the time slider to frame 1.
Notice that the fur is not influenced by Velocity here, as the object don't move.
Render and playback the animation (using
softimage flipbook)
Using Acceleration
In the "Dynamic" menu, press the "Velocity" button to switch off Velocity calculations and toggle "Acceleration" to switch on acceleration calculations. The Velocity calculations influences the hair most at high speeds, Acceleration influences the hairs most when the object accelerates. If you move the time slider to frame 5, the acceleration of the sphere is pretty high, so that's a good frame to style the acceleration influence slider.
Set it at 0.6 and render the animation. As you can see, Acceleration in itself looks a bit weird. Try to toggle the "Velocity" button on again, so we get a combined Velocity and Acceleration calculations. You may want to adjust the influence sliders to match this new setting.
Smoothing
As you probably noticed, the Acceleration
tends to give the hairs a whack, just when the object starts animating.
This may look like a bug, but really it's not. In the beginning of the
animation, the sphere was stopped, so the speed in frame 1 was 0.0. In
frame 2 the speed was different from 0.0, so in frame 2 the acceleration
of the sphere is infinite.
So, how do I fix it?
That's what smoothing does. The "Acc.Smooth"
button toggles on Acceleration calculation smoothing, so toggle it on and
set the slider at 5. This will calculate the acceleration of the object
at the current frame and some frames before and some frames after, only
to use a average value for the Acceleration Dynamics. This will make the
initial whack look much better, and solves "the Acceleration whack" problem
:o)