This tutorial describes methods for working
with multiple objects
-
Start Softimage
-
Load the scene "tut-3_start" from the "FurTutorial"
database
-
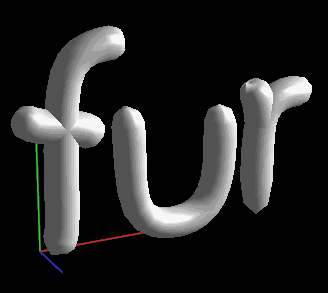
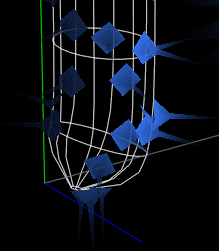
The scene consists of 5 patches,
-
Select all objects using the "All" button,
under the object browser.
-
Set the "Number of hairs" slider to app 100,
and length slider to 1.0
-
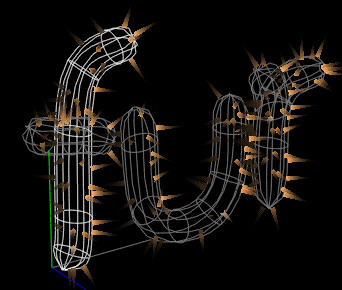
Change the display mode of selected patches
to wireframe: Open the Selected settings menu by pressing the "Selected"
button in the lower right corner of the menu area.
-
Click on "Show selected patches as:" Wire.
The objects are now displayed as wireframe.
-
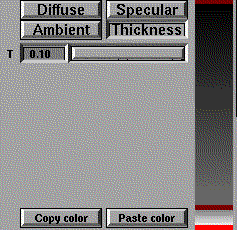
Change the thickness of the hairs to 0.02.
Click on the Thickness button and drag the T slider.
-
Now change the Diffuse color of the hairs.
Click on the Diffuse button.
-
Change colors until a desired result is obtained.
-
Render the selection <Ctrl>+s.
-
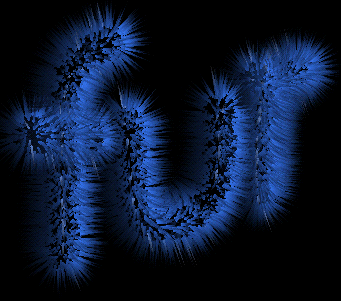
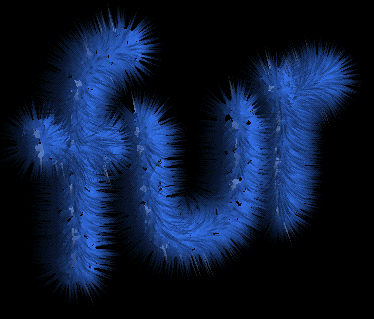
The hairs doesn't cover the surface very well,
add more hairs. Say number of hairs 200
-
Still the fur is to thin. It's time for a
trick.
-
To give a better coverage we make the starting
point of the hair very thick, and the rest of the hair thin.
-
If not already pressed, press the Thickness
button. Left click in the hair color area, near the bottom to add a new
thickness key.
-
Select the bottom color key using the left
mouse button.
-
Change the thickness of the hair base, by
dragging the T slider to 0.1.
-
Observing the result we se that the thickness
decays very slowly along the hair. To fix this add more segments to the
hair. Use the Segments slider to set 10 segments per hair. The green arrows
over the slider can be used to to change the segment value in steps of
1.

-
The base of the letter "f" is highlighted,
indicating that this is the first selected object. When you add or delete
ColorKeys, this is the only affected object.
-
Now the keys from the base of the "f" is transferred
to the other objects, to give them a similar appearance. With the "f" highlighted
press the Copy color button ( located under the hair color area ) or press
<Ctrl>+c. This Copies
-
With all objects selected press the Paste
color button ( guess where ) or press <Ctrl>+p. Now all the patches
has the same color keys.
-
The scene contains an animated light that
can be used to generate hilight and shadow on the objects. Hilight and
shadow calculations are on by default and they can be adjusted in the Selected
settings menu.
-
The color of the shadow is set in softimage
for the individual lights. In the Lights Edit/Define menu set Shadow type:
Raytrace and adjust the umbra value. Low values gives dark shadows. In
this tutorial the value is app 0.1.
-
Try to move the time line slider to se the
effect of the animated light on the shadow.
-
To tune the highlights adjust the Hilight
size and Hilight intensity sliders in the Selected settings dialog.
-
Turning off shadow and hilights makes the
scene look like this.

-
Save the work and Exit Fur.