Introduction tutorial
This tutorial will take you through the interface functions, and
show some of the possibilities of Fur.
-
Read the scene tut-0_start from the tutorial datebase: Fur_Tutorial
into softimage. This is a plain and simple patch sphere with a default
camera, and nothing else.
-
Exit softimage.
-
Type:
Fur Fur_Tutorial tut-0_start.
This will start the fur designer program, loading the scene tut-0_start
from database Fur_Tutorial. If you have a problem loading the scene, refer
to the installation manual. Once the scene is loaded, you are ready to
start designing the fur.
|
|
Start building the basic hairs.
In the lower left corner, you will find a box with the names of
all patch objects in the scene. This is the same name as the object had
inside softimage. Select the sphere called "sphere1" and notice that the
object is hilighted. Right over the object-selection box, pull the slider
"Number of Hairs" to 50.
This builds 50 hairs pr. Softimage square unit of the surface area.
Building the hairs is the slowest process in the program because a lot
of data is precalculated. Then again, you only have to do it once on a
not-moving object. Moving objects needs to have the hairs rebuild for each
frame, refer to the tutorial Animating objects.
Under the Number of hairs slider, notice the "Preview quality" slider.
This is set at 0.05, and limits the number of hairs that is actually
displayed, while you design the fur, 0.05 shows you 5% of the actual hairs.
|
 |
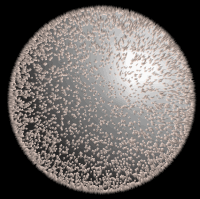
| Press Render Selectionon the right hand side of the interface
or use the <ctrl>+s shortcut. This renders the hairs on all currently
selected objects. You should now see something like this: |
 |
Setting the hair length. Locate the "Length" slider. It's set to 0.5
by default. This is in Softimage units too, meaning that each hair is 0.5
units.
Drag the slider with the left mouse button, and watch the length
of the hairs change, as you drag it. If you use the middle mouse button
to drag a slider the display only updates when the button i released.
The length slider has a default range from 0 to 1, to change the
range use the right mouse button. With the slider draged to the right,
value = 1, drag using the right mouse button to the left and release. Observe
that the slider stil has the same value, but the scale has changed. Experiment
a while with the rather strange, but efficient range changing system.
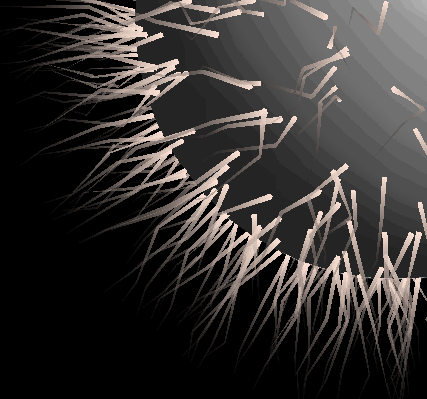
Set the length to 5.0. Change the scale of the slider as needed.
You will now have something like this zoomed image. The hairs looks rather
low res, so we are going to add some more segments. |
 |
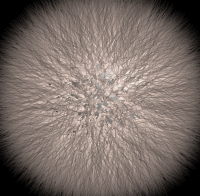
The segments slider sets the number of segments pr. hair. Each hair
is rendered using polygons, and sometimes the default number of segments
just aint enough. Set it to 15, which is just fine for this fur.
Press "Render selection", and you should see this:
|
 |
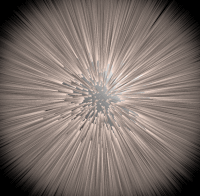
Adjusting waviness. The fur looks a bit rough, so lets strigthen it
out. Pull the "Wave" slider to 0.0 to strigthen out the hairs.
Press "Render Selection"
[Tip: If you press the number to the left of the slider, you can
type in values] |
 |
Adjusting the color.
The color of the hairs is a crucial point. In most fur programs,
you only have one color parameter for the hairs, and thats clearly not
good enough. Examine an animal, and you will see how the colors changes
along the length of the fur, as well as over the whole surface. (I used
my cat as a reference when designing the program). The interface to setting
the hair color allows you to make color keys along the length of the hairs,
using the color grade in the middle of the interface.
The hairs can have different colors at the root, at the tip and
anywhere else along the hair.
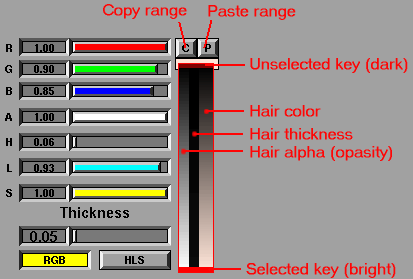
Notice the small bright red line in the bottom of the slider, thats
a key, a point at which you can edit the color. There is another key at
the top of the color grade, the dark red line. The bright key is selected
(and therefor bright), the dark key is unselected.
The color range allways has at least 2 keys, one at the root and
one at the tip of the hair.
[ß:The color keys can be a bit hard to select, Ill try to
solve that........]
You can add keys to the color grade by pressing the left mouse button
where there is no key.
To select a key, press it with the left mouse button.
To delete a key, press and hold the middle mouse button on it.
To add a key, press the left mouse button where there is no key.
To move a key, select it with the left mouse button, and hold and drag
it.
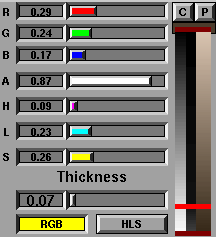
When a key is selected, you can edit the color of that key (at that
point of the hair) with the RGB sliders or the HLS sliders. If you edit
with the RGB sliders, the HLS sliders update accordingly, and if you edit
the color with the HLS sliders, the RGB sliders changes too.
The "A" slider sets the alpha of the hair at that point, and the "Thickness"
slider sets the thickness of the hair at that key.
If you need fine detail in the color range, you have to make sure that
the "Number of segments" is high enough to reflect the detail, as the color
range is only sampled where there is a segment on the hair.
|
 |
Lets make this look a bit more like real fur.
Select the lower key (on the color grade) , and set the R value
to 0.21, G to 0.16 and B to 0.09.
Select the upper key, and set R:0.86 G:0.78 and B:0.70.
You might want to add a bit of waviness to the hair again, I set it
at 0.33.
Press "Render Selection".
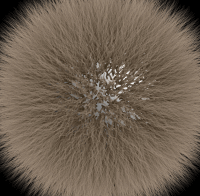
That looks Somewhat better. Unfortnatly, we can see the object itself
through the hairs, where they point towards the camera, and we need to
do something about that. One solution is to add alot of hairs, but that
slows down the rendering, and uses alot more memory. |
 |
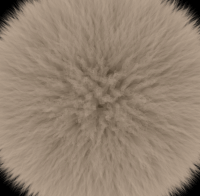
What we are going to do is, to make the hairs thick at the root of the
hair, and make it thinner just above the root. Select the lower key, and
drag the "Thickness" to 0.27. Allready in the preview (as you drag the
slider) you see the hairs grow thicker, and "Render Selection" gives a
much better result.
Unfortnatly, the whole depiction of the fur changed there. This
looks like the fur on a bear, where as before it looked quite different. |
 |
Lets see what we can do about that. What we want to do is, to have
thick hairs at the root of the hair, and become thinner after a bit of
length, and be thin for the rest of the length of the fur.
Add a new key 1/5 above the root, and adjust the thickness down
to 0.07. Press left mouse button on the color range to add a key. |
 |
If you want to, you can drag the new key by pressing it and drag it
up and down. Notice that the values of the new key are set automatically
to match the point where you first set it, and do not change as you drag
it up and down. (use this to change the distribution of colors, if they
are too dense or too far apart).
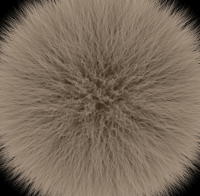
Press "Render selection" and the fur looks much more like the fur we
had before changing the thickness, and the object itself dont show at
the root of the hair anymore.
|
 |
Changing the growing direction of the hairs.
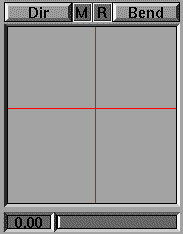
In the middle left of the interface, you will find the "Direction/bend"
positioner.
This is basically like a slider, only, it's 2 dimentional, whereas
a slider is one-dimentional.
The red cross is now in the middle of the positioner. This makes
the hairs grow stright off of the surface (along the normal). lets make
it grow downwards.
Dragging the positioner around, changes the growing direction of
the hairs. |
 |
|
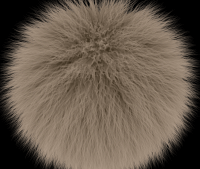
When you drag the positioner around, you rotating each hair around
the U axis and V axis of the patch, and thus changing the grow direction.
Leave the positioner pointing downwards, and you should get this: |
 |
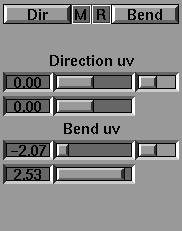
Use the M button to change between positioner and slider mode.
The sliders have the same effect as the positioner, but are specially
useful if the Direction or Bend values uses a picture map or to se the
actual values of the parameters.
Press the reset R button, between "Direction" and "Bend" buttons
to reset the direction/bend.
That will make the hairs grow along the normal of the surface.
|
 |
|
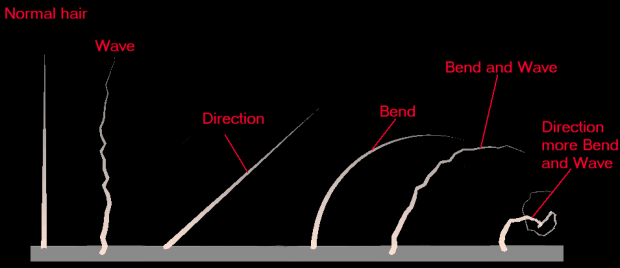
The "Direction" and "Bend" buttons selects the function of the positioner.
Press "Bend" to switch the positioner into bend mode, and you edit the
way the hairs curls. Press Direction to swich into the mode, where you
are able to control the growing direction of the hairs. In both modes youre
able to drag the positioner, to adjust the hairs. |
 |
|