■
THE PROLOGUE
When you've
completed your training meet Aribeth, the Paladin of Tyr.
Fight off the invaders that appear in the room, and then get
the scoop on what's going on.
Head through the
double doors and fight off the few enemies in the corridors.
Along with your henchman, Pavel, be sure to fight monsters one
at a time wherever possible. Use the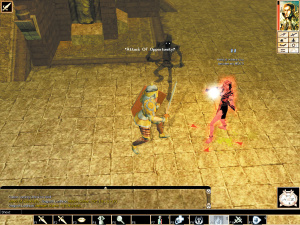 "stand your ground"
command to leave Pavel safe, then draw out an enemy and run
back to him. When a monster is close, change Pavel's command
to "guard me" and beat it to death. Move carefully, never race
into an unchecked room, and if faced with multiple enemies,
use obstacles such as doorways to limit the number of
creatures within striking distance. "stand your ground"
command to leave Pavel safe, then draw out an enemy and run
back to him. When a monster is close, change Pavel's command
to "guard me" and beat it to death. Move carefully, never race
into an unchecked room, and if faced with multiple enemies,
use obstacles such as doorways to limit the number of
creatures within striking distance.
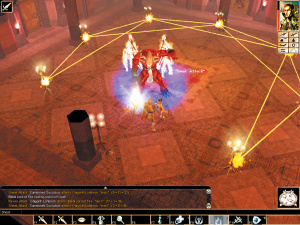
Get the cure potions ready -- if
Gulnan brings down the divine firestorm, you're toast. Wait
until you're about 7th-level before facing her. >>
■
CHAPTER 1
After discovering
that the prickly Desther is
Fenthick's mentor, and having your hopes of scoring with the
hottie Aribeth dashed when she reveals that she and Fenthick
are lovers, you need to collect the reagents from the four
creatures scattered around Neverwinter.
Talk to Aribeth to
get her take on the rumors that point to where the monsters
might be among the four districts branching off from the
Neverwinter City Core.
The Peninsula District
|
Drinkin' and
Whorin' |
|
You've
gotta love any game
that lets you drink 'til you fall over drunk, plus get
it on with a cordial lady of the night. Of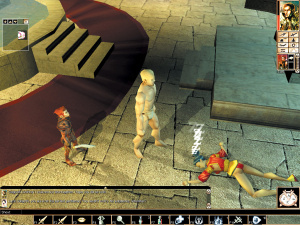 course, we don't condone any of this kind of behavior╖no
siree! Just so you know where to "avoid" on your long
journey of righteous good-doing,
note these locations:
course, we don't condone any of this kind of behavior╖no
siree! Just so you know where to "avoid" on your long
journey of righteous good-doing,
note these locations:
Hey,
Tomi -- is that a short sword in your hand, or are you
just happy to...er, nevermind.
Drinkin'
Once inside
the Seedy Tavern in the docks, talk to half-orc Jalek.
Play his drinking game to earn respect, and get useful
information on where to find Vengaul. Sure, you may pass
out for a while, but those virtual hangovers don't hurt
like the real ones. (Bonus points for your own drinking
game: match your character and Jalek one-for-one╖dare ya!)
Whorin'
The
Moonstone Mask in the City Core is regarded by some as a
house of ill repute. Talk to the landlady, Ophala, and
ask about the key you need to get upstairs. Then talk to
Torgo the bartender to get a Pass Coin for 200gp. (He'll
buy your unwanted junk, too.)
Head
upstairs and find a well-adorned room with a lady (or
gentleman)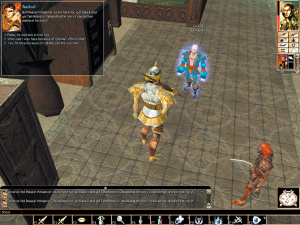 who takes your fancy. The girls are polite, so treat
them with respect. Talk, ask questions, and
sound interested (even if you aren't). After the
small-talk is done, if you're
finding it difficult to, er, seal the
who takes your fancy. The girls are polite, so treat
them with respect. Talk, ask questions, and
sound interested (even if you aren't). After the
small-talk is done, if you're
finding it difficult to, er, seal the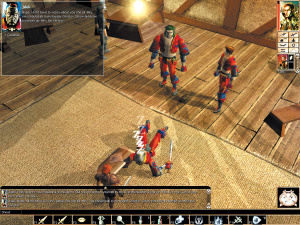 deal, unequip your armor and weapons and you should find
you hit the right mood.
deal, unequip your armor and weapons and you should find
you hit the right mood.
Remember,
you and your henchman go through a lot together -- even
this.
Visiting the Androd
Estate is one of three requirements for completing
Ophala's quest. The matron of the Moonstone Mask tavern
(and bordello) asks you to retrieve three "valuables."
Enter the Estate and fight through the thugs to the
central room. In one bedroom is the cowardly nobleman
Androd, who will turn over a statuette with a little
persuasion. (ABOVE) |
Get the lowdown on
the Head Gaoler, Alaefin, from Captain Kipp. Find Sedos Sabile
in the Guard Headquarters located in the eastern portion of
the map. She wants you to go to the prison and kick ass!
There are two
routes. The first is to get the key to the front door from the
Gang Leader: he's tough, and you'll have to fight his bigger
buddy, too!
The second (and
easier) path is through the Tanglewood Estates underground
passage. Look under the mat at the front door for a key to the
estate! You should be about level three before fighting the
creatures guarding this route. Going down the passageway to
the left of the front door, you'll come to a huge chessboard
that's rigged with loads of traps, so tread carefully.
Go through the
portcullis to get to the prison. Talk to the guard Emernik,
who can point you to a room of supplies. Fight through the
three levels (Prison Main level, Prison Containment Level, and
the Prison Pits where the Head Gaoler awaits). Through the
tunnels of the Pits, fight Kurdan until he surrenders, then
get ready for a tough battle.
The Head Gaoler is
under the control of an Intellect Devourer. You have to kill
the guards it possesses until there are no more and you fight
it on its own. Take the brain to Aribeth, and also check in
with Sedos Sabile for more reward.
The Beggar's Nest
Prepare to fight the
zombie infestation in the streets and head toward the Shining
Serpent, west of the city gate. Talk to Harben Ashensmith, who
will talk about Krestal and Jemanie. Follow the Jemanie path
(it's easier) and go to his house, where he'll tell you about
his brother, Torin. Take the Ward Stone to gain access to the
Snake Cult building just north of the house.
Fight through the
cultists (be sure to have a henchmen here for help, like a
cleric if you can't turn undead yourself), and after defeating
the Cult Leader, take the north stairs into the Underground
Crypt, where you're looking for Gulnan. This area has insects
and Shadows and has a tough Dire Spider that protects the
entrance to the Great Graveyard.
Now head into the
sprawling Warrens of the Damned. As you face the Ghouls and
other undead, be sure to pick up Torin's ring to return to
Jemanie as proof that his brother is dead. You can also pick
up the Ancient Key, which gives you access to Gulnan's lair.
Gulnan is a 10th-level Yuan-Ti Cleric who can singe you in a
heartbeat. When entering her central lair, head to the right
and bash the altar to take the marauding zombies out of the
equation. (You may have to clear other locations around the
city to level up before coming back with the power to defeat
this tough mutha.)
Collect her black,
black heart. Now go back to Jemanie and Harben before taking
the heart to Aribeth for a larger reward.
The Blacklake District
You have to go
through a No Man's Land to get to Blacklake. Here you'll learn
about Meldanen hoarding food. At the front door to his estate
use persuasion, bribery or threats so that Orrean lets you in.
Once inside,
persuade Grommin to open the door (or take his key from his
dead body). Go west to get to the next floor. There are quite
a few traps throughout the house, so move carefully, fighting
imps, mephits, and finally Meldanen's Apprentice.
In Meldanen's Inner
Sanctum you must speak to the Dryad before Meldanen appears.
He will surrender if he receives enough damage. Get the
warehouse key from him and give it to Formosa for a side
quest. (But take a look around the warehouse for loot for
yourself first.)
Take the lock of
hair from the Dryad back to Aribeth.
|
Inside Castle
Jhareg |
|
Belial can buff you, give
you a magic item, or help with the judgment by supplying
a written oath.
If you
find yourself
in Castle Jhareg, you can come out of the judgment
quests with a cool phylactery (casts Sanctuary twice a
day) if you play your cards right. In Karlet's quarters,
in the room with the brazier, make sure you have his
Protection Wand and Burning Hands Wand. Place a fire
beetle belly on the brazier, cast Protection from Evil
on yourself, then cast Burning Hands from the wand on
the brazier. Now chat to Belial, who will give you a
written oath that it was all him if you take the high
road and tell him about judging. When you're back at the
Guardian with the journals, say neither brother was
guilty and then offer to keep the phylactery safe for
yourself.
At
the finale, acquit both or Quint. Acquitting Karlet
ensures a hot reception outside. |
The Docks District
Your first goal is
getting access to the Seedy Tavern, where an auction for a
cure is to take place. Kill pirates and thugs and search
crates for Smugglers Coins. (It takes five to bribe the guard
on the door, but collect more to buy low-end magic items for
great prices.) You can also wear a Bloodsailor uniform snagged
from any of these pirates you've killed.
To find the missing
Vengaul, pick the lock on the door in the tavern (or beat
Jalec in a drinking contest╖just keep drinking!). Bribing the
guard on the door is the easiest method of entry.
Downstairs you'll
encounter Dara'nei, who is Vengaul's lover; she'll give you a
Locket. Now go to the Silver Sails and use the Locket to open
a passage that leads to the boatman Charon (really). He'll
take you to Vengaul's lair.
Kill Callik and his
men (a tough fight). Confront Vengaul and he'll most likely
send his guards to slay you while he attempts to escape,
though you could talk your way out of it. Get the Cockatrice
feather from the chest and return it to Aribeth.
Helm's Hold
At the ritual to
create the cure, prepare for the "I didn't see that coming"
twist. Now follow Aribeth's instructions and head into the
portal.
If you're a cleric
or paladin, take the front door, as the undead you'll face are
easy when you can turn them. Alternatively, go west to the
cave entrance.
In the Courtyard, be
sure to pick up the Etched Gem, which can be found on the body
by the front gate. Place the gem on the altar in the center of
the Entranceway to prevent the Guardian Armors from attacking.
In the Prison Block,
you can pass by the caged undead without disturbing them by
wearing a Helm uniform. If you don't have a Helm uniform (from
one of the guards), prepare to fight.
Get to the staircase
leading up -- it'll take you to the last encounter. To weaken
Desther, destroy his minions first and then wail on him until
he surrenders. Now for the trial and the executions!
■
CHAPTER 2
Getting the Evidence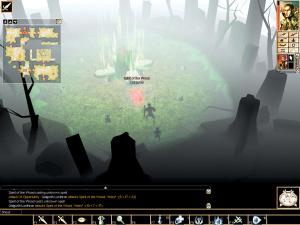
Numerous people
demand your attention throughout this chapter. Talk to them
all if you wish, but here's the lean and mean direct route:
Aribeth insists on
seeing two pieces of evidence that suggest where the cult is
located. Follow the signs to Charwood village and go to the
inn. Keep talking until the sorcerer attacks, then take his
journal as the first piece of evidence.
Facing the Spirit of the Wood,
cure the disease with the antidote found near Relmar. >>
A second piece of
evidence is retrieved through the Spirit of the Wood quest. In
Neverwinter Wood speak to Aarwill the Archdruid. Now head back
to the Deep wood. Find the Nymph's House (in the NE corner of
the map) and fight her until she gives up a ceremonial dagger.
If you do the quest involving the witch Setara, she'll also
give you information on using the dagger, as well as on
rescuing one of the three druids for another side quest.
With the dagger, go
to the altar and plunge it into your chest (it only stings for
a moment). Now fight Relmar and get his journal. Get the
antidote from the rubble near where he attacks, and go to the
center of the map, where the Spirit of the Wood attacks you
but can then be cured. Search the altars for magical goodies.
Now head back to Aribeth with the journals, speak to Aarin
Gent, and head to Luskan or do other quests.
Luskan
|
Dragon Slayer |
|
Slaying dragons
is one of the coolest and most dangerous tasks you can
try. In Chapter 3 you have a tough decision to make --
though there's really only one path for the righteous.
■
Go through
the first Moonwood area to the second area (the entrance
is in the northeastern-most corner of the map). Go to
the center of the map. Behind the waterfall is the
entrance to Akulatraxas' cave.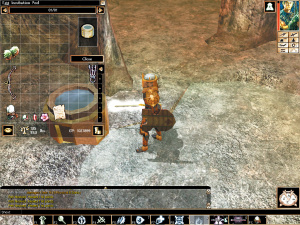 You've got two choices: do the dragon's quests against
the giants in the nearby caves, or slay the dragon and
steal its egg. The latter task is tough but do-able.
You've got two choices: do the dragon's quests against
the giants in the nearby caves, or slay the dragon and
steal its egg. The latter task is tough but do-able.
Kill
Akulatraxas and swipe the egg.
■
The cheap
option is to sneak with Tomi to the door leading to the
eggs. Pick the lock, and then race in and grab the egg
from the incubation chamber. The dragon will follow, but
you can use the Stone of Recall to get the hell out
(though you've got a long trek back╖).
■
Now go to
the Spine of the World and find the Mysterious Cave.
Here you can do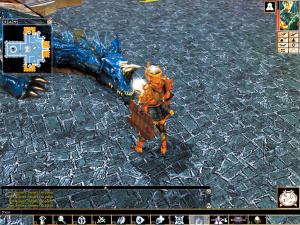 the quest for Gorgotha or fight. (You need only one egg
to give to the red dragon Klauth later in the chapter,
but don't worry if you don't get either egg -- you can
still fight Klauth head-on.)
the quest for Gorgotha or fight. (You need only one egg
to give to the red dragon Klauth later in the chapter,
but don't worry if you don't get either egg -- you can
still fight Klauth head-on.)
With
the blue dragon dead, get the sphere from the fountain.
Head north
through the cave entrance to the Fire Giant Lair. Once
you've been through the North Lair, head to the East
Lair. Ignore the northernmost Deep Cave unless you want
to fight Death Slaad for the experience. Enter the
second cave -- the Dragon Dungeon.
■
Kill the
Yuan-Ti and then put the dumb blue dragon out of its
misery. Now grab the Dragon Sphere from the fountain;
grab the Ritual Book, too, and read the instructions if
you haven't already. Place the Dragon Sphere on the
pedestal (the Blue Dragon must be dead) and it'll be
filled. Now it's time to face Klauth.
■
Either give
Klauth an egg swiped from the other dragons, or chat him
up, then cut him down. His breath weapon does around
140hp per burst, so be prepared. Klauth will try to
power himself up, so make sure the dead-dragon sphere is
on the pedestal: he'll imbibe its essence and do himself
major damage.
Now grab the
Word of Power, listen to Haedraline, and then enter the
portal home. |
Go to the Temple of
Tyr (west edge of Luskan -- use the Stone of Recall to get
there without fighting all the wererats on the streets) and
get the lowdown on the High Captains Baram and Kurth.
You're looking for
the High Captain's seal to get into the Host Tower, and that
requires hitting the sewer. It's filled with undead (so
paladins and clerics have it easy); you can enter through the
grate in the center of Luskan, entering in the NE corner of
the sewer. Take the exit in the north area to Baram's sewer.
In Baram's sewer,
work your way around to the entrance to Baram's Lair. If
you're not a cleric or paladin, bring one along to bring short
work of the bone spirit ritual. One turn undead destroys all
the skeletons!
Fighting Baram
himself is tough. Take out the priestess and minions first,
then quaff potions before facing Baram. Get his seal from the
chest, but also take his head if you want to pursue the side
quest and give it to Kurth.
Now you can go to
Aarin and get the documents needed to enter the Host Tower, or
you can go after Kurth (or kill Kurth before Baram -- either
option works). In Kurth's lair, get both the token from
Burke's body and the sphere, and follow the instructions in
Burke's manual to close the portal, which removes the extra
enemies from the fight with Kurth.
Host Tower
Once inside, go to
Aribeth's former room on the west side to get the key to the
Host Portal room. Now you're working up the tower. Search each
floor for the runes to transport you up. For the direct route,
get to floor six and find the Pinnacle rune that gives you
access to the top.
Some floors have a
puzzle of sorts that you need to solve. Here are some
examples:
Floor three: Don't
fight the quasits and imps -- they reappear through the
braziers. You'll need to place a quasit eye in one portal, and
an imp eye in the other to stop the flow.
Floor four: Get the
golem control and replication rods and use them on the pod to
get the Helmed Horror that opens the seal.
At the Pinnacle,
talk to Arklem, then destroy the braziers and defeat the
monsters. Now head to the real finale!
Here you'll listen
to the movers and shakers in this other-worldly conspiracy
discussing the next chapter -- the Words of Power. Sup down
potions of Bless or Aid (every little helps), Barkskin, and
even Speed as you face a large number of powerful lizardmen.
Once defeated, head
down to Maugrim's lair╖and on to Chapter 3.
■
CHAPTER 3
You'll start off
Chapter 3 in Aarin Gend's lodge. Talk to Aarin
Gend to get the update on Aribeth
and Maugrim.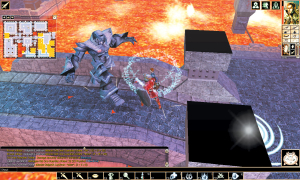
Once you have all
the information, head toward the
Drinking House, which is only a short walk away. Here, talk to
Lillian, who has some information about the Words of Power.
Agree to get her Snow Globe from Nax, and she'll offer you a
Teleport Scroll.
When you're back in time, get
the creators to give the golems a vulnerability to your
favorite attack. >>
Go on to Coldwood,
as per Lillian's suggestion. Head east to enter the Wizard's
Dungeon. Fight through the dungeon until you come upon a room
with four gongs in it. Hit the gongs in the correct order:
cat, dog, bear, dragon. Head to the room that contains the
Snow Globe, kill the Huge Fire Elemental that guards it, then
teleport to town once you've recovered the Snow Globe.
|
Barun's
Catalog |
|
At the Shining
Knight
in the City Core in Chapter 1, the shopkeeper
will give you a key to a secret room, where a dwarf
blacksmith will make magic items if you bring him the
correct combinations of jewels and magic items. He also
gives you a book called Barun's Catalog of Weapon and
Armor Modifications that lists all the possible
combinations. Here's the list so you can plan ahead
before receiving the book (or in case you don't get it,
and/or you don't find the dwarf in Beorunna's Well in
Chapter 3). Each item uses a magic version of its
namesake and the component listed:
-
Chromatic Breastplate
Magic Breastplate AC6 + Diamond
-
Scales of Truth
Magic Scale Mail AC5 + Holy
water
-
Leather Whitebone
Armor
Magic Leather Armor AC3 +
Gargoyle skull
-
Sentinel Battleaxe
Magic Battle Axe +
Adamantite
-
Double Axe of the
Tall Kin
Magic Double Axe +
Adamantite
-
Stonefire Great
Axe
Magic Great Axe + Adamantite
-
Ice Reaver
Handaxe
Magic Handaxe + Dragon blood
-
Gladiator Club
Magic Club + Ironwood
-
Ironwood Dire
Mace
Magic Dire Mace + Ironwood
-
Reaver Heavy
Flail
Magic Flail + Dragon blood
-
Storm Light Hammer
Magic Light Hammer + Diamond
-
Foundation Light
Flail
Magic Light Flail + Ironwood
-
Mace of
Disruption
Magic Mace + Holy water
-
Drone Morning
Star
Magic Morning Star + Faerie
dust
-
Rune Hammer
Magic Hammer + Adamantite
-
Harbinger Great
Sword
Magic Great Sword +
Adamantite
-
Sword Saint
Katana
Magic Katana + Adamantite
-
Astral Blade
Longsword
Magic Longsword + Diamond
-
Namarra Rapier
Magic Rapier + Dragon blood
-
Desert Wind
Scimitar
Magic Scimitar + Adamantite
-
Feyduster Shortsword
Magic Shortsword + Faerie
dust
-
Uthgardt Two-Bladed Sword
Magic Two-Bladed Sword +
Ironwood
-
Ravager Halberd
Magic Halberd + Dragon blood
-
Sea Reaver Scythe
Magic Scythe + Adamantite
-
Fey Spear
Magic Spear + Faerie dust
-
Golden Sickle
Magic Sickle + Holy water
|
Talk to Lillian,
then enter the Snow Globe, as she instructs. Talk to either
Hodd or Arwyl to find out why the Dwarves and Dryads are
fighting. Head into the cave between the groups, and approach
the Dragon, Winter Fang. Find out as much as you can from him,
and then grab Arwyl's Journal and Hodd's Journal, as well as
the Amulet of the Ages. Take the amulet to Hodd, and then to
Arwyl. Head back to Winter Fang and kill him. Grab the Word of
Power out of one of the chests in his lair, then teleport back
to town and talk to Aarin Gend.
Creator Ruins
Make your way out of
Fort Ilkard, and head into the Creator Ruins. Don't try to
kill the golems that are wandering around yet. Go to the
garden and find Sapphira. Talk to her and get the Time
Crystal, which will allow you to go back in time to weaken the
golems. Find the sundial in one of the rooms in the Creator
Ruins, and use the Time Crystal's special ability; then click
on the sundial in the northeast corner.
Kill the Old One
Commander and grab the Translation Amulet he drops. Speak to
Lokar, and get his ring (aptly named Lokar's Ring). Grab the
On Temple Defenses note from the bookcase, then look around
for some slaves in nearby rooms. Show them Lokar's Ring, and
you will be able to decide which weaknesses they build into
the golems. Go to the smoke room, where you'll find an
alchemist's table. Grab the Blue Powder, Red Powder, and
Yellow Powder, which you'll use to complete the Ritual of
Smoke. In the sound room, pay attention to the sound of the
gongs -- you'll need to know it to complete the Ritual of
Sound. Finally, head to the light room to find out how you'll
complete the Ritual of Light.
Go back to the
present, and complete the three rituals. Grab the Word of
Power found in the vault -- kill the Balor Lord.
Make your way
through Moonwood until you finally enter the Spine of the
World. Here, you'll head north to the entrance to the Fire
Giant Lair. Once you've made your way down to Fire Giant Lair
3, speak to Klauth, the Ancient Red Dragon. He will trade you
the Word of Power for Dragon Eggs, which you could have gotten
from either Gorgotha or Akulatraxas. (Both dragons can be
found earlier in the chapter: Akulatraxas in Moonwood Part II;
Gorgotha in the Spine of the World.) It's best to do the
quests for the other two dragons against the giants, then take
on Klauth by killing the blue dragon and placing it in the orb
so that Klauth consumes it and is seriously wounded. Defeating
Klauth scores some kickin' red dragon armor. With the third
Word of Power in hand, you're now ready to head on to Chapter
4.
■
CHAPTER 4
Talk to Lord Nasher,
Aarin and then in the dungeons to Haedraline who'll inform you
about the final Word of Power.
The most direct way
to Maugrim's lair is to go through the Luskan Guard House.
(Watch for the invisible assassin.) Be prepared to fight a
Balor to gain access
to Maugrim's
Sanctuary. Within the Sanctuary you will encounter tragic Lady
Aribeth and have the option to slay her outright or convince
her that it is not too late for her to return to the path of
good. In either case, success means you will get a key that
grants you access to Maugrim's lair. Maugrim has mucho magic
as well as Servants of Flesh who don't much like you either.
After his messy defeat, you'll gain the Word of Power. Return
to Castle Never and report back to Aarin Gend.
Speak with
Haedraline and she'll direct you to the caves past the
dungeons beneath Castle Never. You'll find three stands that
are lit with green lights and one unlit stand. Place the Word
of Power upon the unlit stand to open the door in a brilliant
flash.
You can now go
inside the Source Stone Sanctuary.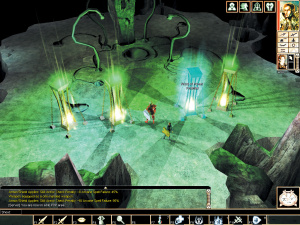 You'll encounter a great deal of Lizardmen hankerin' for
freshly squeezed adventurer bits. You also have the option of
rescuing Asheera, who may grant you an amulet to help in your
final struggle.
You'll encounter a great deal of Lizardmen hankerin' for
freshly squeezed adventurer bits. You also have the option of
rescuing Asheera, who may grant you an amulet to help in your
final struggle.
In the next area
you'll encounter two corrupt dragons. Beat them to obtain the
key to the Inner Sanctum. Waiting there is a very high-level
cleric and his warrior help. The cleric's defeat will grant
you access to the final battle.
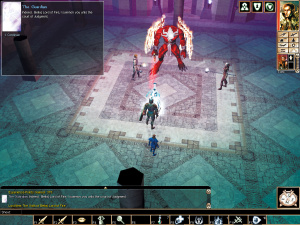
Maugrim's
Word fits on this pedestal to open the entrance to the
penultimate area. >>
In the next (final)
room, destroy the gargoyle statue to dispel the permanent
blade barrier. Make sure you're as buffed as possible with
spells and potions to give you every advantage as Morag and
her henchmen will be lobbing spells at you the whole time.
Focus your attacks
on the priest that refers to your biggest damage type. (So if
you use a sword, slay the one protecting Morag from slashing
weapons.) Conveniently, the priests are invulnerable to all
damage themselves except the type of damage they are
protecting Morag from. With Morag now vulnerable to your
preferred attack type, go get medieval on her ancient flabby
ass. Flex your sleek hero muscles after her defeat.
Finally, speak to Haedraline to finish the game. Woo-hoo!
|
Cheater's
Corner |
|
The
following codes can be used in single-player games or by
the dungeonmaster in multiplayer games. To enable them,
hit the ~ key to lower the console and then type
DebugMode 1 (it's case-sensitive). Now type any of
the following codes in the console, and then hit Enter.
(NOTE: To remove access to the cheats, type DebugMode
0 in the console.)
-
dm_allspells 1
Lets you cast all spells from all classes. (Typing
dm_allspells 0 disables this ability.)
-
dm_giveXP X
Gives X amount of experience points to target you
click on.
-
dm_givegold X
Gives X amount of gold to target you click on.
-
dm_givelevel X
Gives X amount of experience levels to target you
click on.
-
dm_god Makes
you invincible.
-
dm_heal
Restores you to full hit points.
-
dm_levelup
Advances you by one level of experience.
-
dm_modifyCHA/CON/DEX/INT/STR/WIS X
Adjusts base Charisma/Constitution/
-
Dexterity/Intelligence/Strength/Wisdom of target you
click on by X amount. (For example, typing
dm_modifyCHA 2 gives target +2 Charisma, while
typing dm_modifyCON 2 gives target +2
Constitution, and so on.)
-
dm_modifyage X
Adjusts age of target you click on by X amount.
-
dm_modifyattackbase X
Adjusts base attack bonus of target you click on by X
amount..
-
dm_modifysavefortitude X
Adjusts fortitude save value of target you click on by
X amount.
-
dm_modifysavereflex X
Adjusts reflex save value of target you click on by X
amount.
-
dm_modifysavewill X
Adjusts will save value of target you click on by X
amount.
-
dm_modifyspellresistance X
Adjusts spell resistance of target you click on by X
amount.
-
dm_mylittlepony
Increases movement speed, accompanied by appropriate
horsey sounds.
-
dm_setCHA/CON/DEX/INT/STR/WIS X
Sets base Charisma/Constitution/Dexterity/
-
Intelligence/Strength/Wisdom of the target you click
on to X amount. (For example, typing dm_setCHA 2
sets target's Charisma at 2, while typing dm_setCON
2 sets target's Constitution at 2, and so on.)
-
dm_setCR X
Sets challenge rating of target you click on to X
amount.
-
dm_setage X
Sets age of target you click on to X amount.
-
dm_setattackbase X
Sets base attack bonus of target you click on to X
amount.
-
dm_setfaction X
Sets faction of target you click on to X faction.
-
dm_setfactiondefender
Sets faction of target you click on to be a defender.
-
dm_setfactionenemy
Sets faction of target you click on to be an enemy.
-
dm_setspellresistance X
Sets spell resistance of target you click on to X
amount.
-
dm_showarea
Reveals all tiles in the current area by removing the
fog of war.
Also,
during a single-player game, typing makesafe in
the console will move you to a safe location (i.e., a
valid location in the area -- not in walls or on other
creatures). |
|

