■
NORMANDY
MISSION 1
After your fall
through the barn, a group of soldiers will rush inside to kill
you. Press the Use key to detach quickly from the parachute,
and then climb up the broken stairs to avoid the gas grenade.
One enemy will throw a grenade from the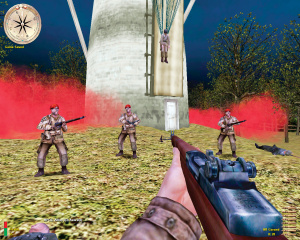 top level of the barn, so waste him first. From the open
window, shoot the two soldiers standing across the stream.
Peek through the broken floorboards to kill the guy waiting
for you downstairs. Descend to the lower level and grab the
health on the table. Shoot three soldiers outside the window,
then go back upstairs and jump into the stream. Climb out from
the right side of the stream to the back of the house and rush
the soldiers manning the artillery. Use the artillery to blow
up an incoming truck.
top level of the barn, so waste him first. From the open
window, shoot the two soldiers standing across the stream.
Peek through the broken floorboards to kill the guy waiting
for you downstairs. Descend to the lower level and grab the
health on the table. Shoot three soldiers outside the window,
then go back upstairs and jump into the stream. Climb out from
the right side of the stream to the back of the house and rush
the soldiers manning the artillery. Use the artillery to blow
up an incoming truck.
Meet up with these
beret-wearing buddies to free Normandy from the Nazi scourge.
(Normandy Mission 1) >>
Head along the road
and kill the soldiers hiding behind trees, along with the one
using a machine gun. When you reach a field with a windmill, a
new wave of soldiers will ambush you from the back. After
disposing of them, shoot one of the enemies near the windmill,
and some friendly NPCs will arrive to assist you. Take control
of the 88mm cannon to blow up the tank. Follow your allies to
complete the mission.
MISSION 2
Don't let the
captain die in this mission! Start by rushing the three
soldiers inside the windmill. Run to the house that's to the
right of the windmill; stay away from the opening in the
fence. Kill all the enemies inside the house, then exit
through the back and ambush the baddies in the barn. Advance
down the road and be prepared for a large number of soldiers
waiting to the left of the house. After the captain throws a
grenade inside the barn, storm in and eliminate the four
soldiers inside. Bomb the first artillery cannon, but be ready
for many enemies to spawn right after the explosion. Stride
across the wheat field and under the sewage gutter.
As you exit the
tunnel, shoot the sniper in the large barn and kill all his
buddies inside. Go around the adjacent house and toward the
gated compound. As you enter, shoot the two snipers in the
windows, and then kill the men in the barn to the right. For
the buildings to your left, enter the one farther away from
you -- that's where the captain rushes to first. Take out the
men in the other building only after the enemies in this one
are dead, to avoid the captain getting into any death duels.
Don't shoot the soldiers working on the artillery, or they'll
blow you away once the next sequence begins. Follow the
private outside the balcony and rush the enemies when given
the order. Look out for two enemies hiding in the white tent.
Blow up the second artillery and get on the boat to finish the
mission.
MISSION 3
 Get
off the boat and then head to the house. Shoot the men through
the right-side windows before going through the door. Don't
let the captain enter first: he might get killed. Exit the
back of the house and immediately kill the enemies to your
left. Let the colonel ride away on the bike, then rush up the
road and kill the soldiers waiting outside. Go up the stairs
and pump the colonel full of lead. Get
off the boat and then head to the house. Shoot the men through
the right-side windows before going through the door. Don't
let the captain enter first: he might get killed. Exit the
back of the house and immediately kill the enemies to your
left. Let the colonel ride away on the bike, then rush up the
road and kill the soldiers waiting outside. Go up the stairs
and pump the colonel full of lead.
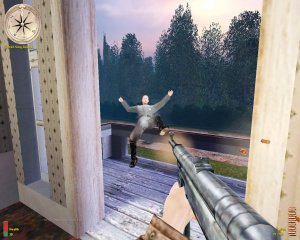
<< The colonel escapes from you
several times. Pump him full of lead so he can't do it again.
(Normandy Mission 3)
Down the road, a
tiger tank will break through the wall, killing the private.
Go through the break in the wall and man the flak cannon.
Shoot through parts of the wall and let the captain lure the
tank into range. Blow up the tank with two timely shots before
it kills the captain. He'll say "Good job" and tell you to
blow up the flak cannon that you just used to destroy the
tank. Place a charge on the flak (just as you did twice in the
previous mission) and run for cover. After the flak blows, an
airplane flies overhead and the captain tells you that it's an
Allied plane dropping off some explosives for you to use to
destroy the bridge.
 Continue
through the map, slaying everyone you encounter. You have to
bypass the first of two MG42 nests shortly after the airplane
sighting. (Whenever dealing with MG42s, toss a smoke grenade
in front of them and then rush in, taking them out before the
smoke dissipates.) You'll find the supply drop shortly
thereafter. Gather the explosives and use them on a
communications center located in a shack. Continue
through the map, slaying everyone you encounter. You have to
bypass the first of two MG42 nests shortly after the airplane
sighting. (Whenever dealing with MG42s, toss a smoke grenade
in front of them and then rush in, taking them out before the
smoke dissipates.) You'll find the supply drop shortly
thereafter. Gather the explosives and use them on a
communications center located in a shack.
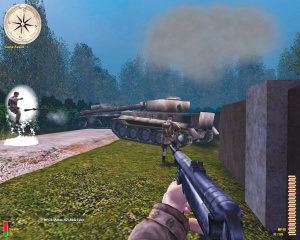
<< This
tiger tank comes out of nowhere to waste one of your allies.
Man the nearby artillery cannon to blast it to pieces.
(Normandy Mission 3)
After eliminating
the comm center, continue through its wreckage; you'll soon
come upon the second MG42 nest. After you've killed the
gunner, you can man the gun and use it against a squad of
Nazis. From this point, you'll engage in some more
room-to-room fighting until you eventually make it to the
bridge, which you're supposed to blow up before the supply
train arrives. You have approximately 40 seconds to plant four
charges on the bridge while fending off a stream of enemies:
If you take too long, the train will arrive, and you'll fail
the mission.
■
BELGIUM
MISSION 1
Lead your soldiers
along the frosty road, staying to the right side of the road.
Shoot the idle group of guards, and then proceed until you
reach a fork in the path. A truck will approach from the right
side, so head toward the left and secure the area with the
artillery cannon. Man the cannon to take out the truck and
enemy soldiers climbing over the hill. Grab sticky bombs from
one of your teammates and blow up the cannon.
Follow the
navigation arrow on your compass along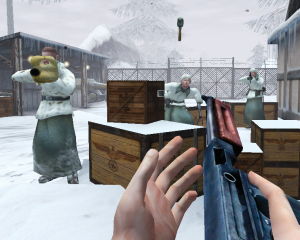 the path that the truck came from. When you reach the tower,
destroy the cannon and shoot the men guarding it, including
the one in the tower. Continue on the path, keeping to the
right. A tank will be coming toward you soon: shoot the gunner
on top, and attach a sticky bomb to blow up the tank. Get off
the path and follow the compass to the right. Avoid the
artillery on the other side of the road and take out the
soldiers hiding in makeshift trenches. Blow up the artillery.
the path that the truck came from. When you reach the tower,
destroy the cannon and shoot the men guarding it, including
the one in the tower. Continue on the path, keeping to the
right. A tank will be coming toward you soon: shoot the gunner
on top, and attach a sticky bomb to blow up the tank. Get off
the path and follow the compass to the right. Avoid the
artillery on the other side of the road and take out the
soldiers hiding in makeshift trenches. Blow up the artillery.
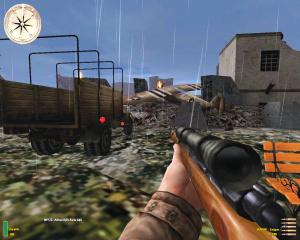
Enemy groups use
various weapons. Nail the rocket-launcher guy first, but watch
for grenades! (Belgium Mission 1) >>
Not far along the
road is another cannon, followed by a tank. Take out the tank
first using a sticky bomb, then blow up the cannon to finish
an objective. A swarm of troops will spawn immediately after,
so make sure your teammates aren't all killed. When you reach
the fenced compound, wipe out the soldiers from the
flipped-over truck, and go along the left side of the fence.
Enter the building and clear it of pesky soldiers. After
killing everyone in the compound, enter the second garage
building, next to the shed with the vehicle. Take the supply
truck hanging from the ceiling.
It's all run-and-gun
for this next sequence. The ammo indicator may show only 20
rounds, but you actually have an unlimited amount. Just shoot
everything that moves, but make wasting tanks and rocket
infantry your top priority. Don't let that supply truck be
destroyed!
MISSION 2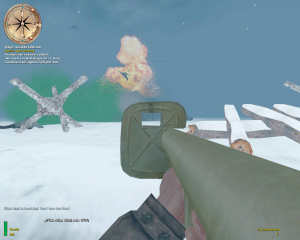
After your camp is
bombarded, run toward the nearest trench to find cover. Find
the injured captain and get instructions to find the medic.
Make your way back in the direction you came from, using
trenches whenever you can find them. Follow the navigation
arrow and pass a trench with hapless soldiers crushed by a
fallen tree to find the medic assisting a fellow NPC. Lead the
medic to the captain via the same route you used to get there.
When
defending the lines, target tanks first: Nazi infantry aren't
nearly as deadly. (Belgium Mission 2) >>
Defending the right
and left flank is simply a matter of shooting first -- and
accurately. The invading Nazis will start off using gas
grenades, and then slowly emerge from the ensuing haze.
(Distinguishing enemies from the green gas may be difficult at
first, but changing the brightness and gamma in your video
settings may help.) Use the dug-out trenches to shield
yourself from the onslaught. The enemy will come in waves, so
fire in spurts and not wildly.
After defending the
right flank, head over to the left side and pick up the rocket
launcher. Ready your launcher to take out a tank, but don't
let any of the enemy get through to the front line: Your
allies are fodder in hand-to-hand combat, and won't provide an
adequate defense. When instructed to return to the right
flank, pick up two more rockets before entering the trench.
The first tank back at the right flank will be destroyed by an
ally, but you'll need to rocket two more vehicles before
finishing the mission.
MISSION 3
This level is
Spearhead's Omaha Beach counterpart. First, rush to hide
behind the small hill area where the other soldiers are
located. When given the advance signal, run out from the right
side and head for the next safe spot, where a rocket launcher
will be waiting for you. At this point, there are two tanks to
destroy -- one on either side of the hill. Take them out and
continue on. At the gunner, go to the left of the house to
eliminate two ambushers. Clear the tank that's waiting for you
ahead.
The next sequence
involves entering several buildings and wiping out the
soldiers inside. First is the church, which has two men
waiting inside on the ground floor and numerous enemies
lurking on the upper two levels. Be sure to climb the ladder
to reach the upper-roof level, where several more soldiers
 are
waiting. The house that follows has two enemies on either side
of the door, just as you enter. Secure the school and hotel,
and watch out for soldiers that spawn outside after each
building is cleared. Meet up with the captain after every
building, and get instructions to take down a plane with a
flak cannon. The plane makes several passes, but you must
shoot it down before it bombs the captain. Grounding the plane
ends the mission. are
waiting. The house that follows has two enemies on either side
of the door, just as you enter. Secure the school and hotel,
and watch out for soldiers that spawn outside after each
building is cleared. Meet up with the captain after every
building, and get instructions to take down a plane with a
flak cannon. The plane makes several passes, but you must
shoot it down before it bombs the captain. Grounding the plane
ends the mission.
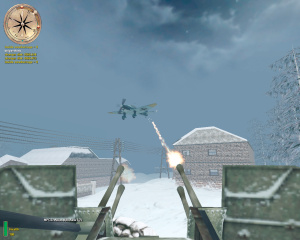
<< This airplane makes several
passes, so figure out its flight pattern, then shoot it down
before it bombs the captain. (Belgium Mission 3)
■
BERLIN
MISSION 1
The first objective
is to cross the bridge to your right. The first wave of Nazi
defenders should be easy to take out with the help of your
Soviet allies. Along the way to the fallen pilot, you'll pass
several trucks, moving and stationary. You can blow up a truck
by sticking a bomb on one of four spots (two on each side),
but the rain will defuse the bomb before detonation. Shoot the
bombs to make them explode. Keep in mind, you don't need to
wait for the fuse to go out before shooting the bomb.
Follow along the
path until you reach a large plaza. Take out the sniper camped
out on each of four buildings, and decimate the tank with a
well-placed bomb. Find the dead
 pilot
and documents next to the plane and immobile truck. Take
command of the cannon in the large Greek building to blow up
an incoming tank. Proceed through the alleyway left of the
niche in which the tank was hiding, ready to face another
tank. Quickly attach a bomb and run past the tank, turning
around to detonate the bomb. On the next street, several
snipers sit on the balconies waiting for you. A tank hides
behind the ruins of another building immediately after the
next truck drives by. Destroy both. pilot
and documents next to the plane and immobile truck. Take
command of the cannon in the large Greek building to blow up
an incoming tank. Proceed through the alleyway left of the
niche in which the tank was hiding, ready to face another
tank. Quickly attach a bomb and run past the tank, turning
around to detonate the bomb. On the next street, several
snipers sit on the balconies waiting for you. A tank hides
behind the ruins of another building immediately after the
next truck drives by. Destroy both.
<< Find the
fallen pilot's documents next to his plane and this
ready-to-blow-up truck. (Berlin Mission 1)
When you approach a
small car, turn left to enter the Chancellery Building. Climb
up the first flight of stairs and turn left around the corner.
The safe with the list of double-agents is in the room behind
the first door to your right; the combination is in the small
room around the corner to your left. Continue down the hall
and descend the stairs to exit the building. Get into the tank
waiting outside after taking out the sniper in the broken-down
building to the right.
MISSION 2
Tank
control is sweet and simple: Use the main cannon to shoot down
other tanks, but switch to the machine gun to mow down
infantry. (The cannon is efficient at taking out large groups
of soldiers, but it takes too long to reload.) As in the
Belgium level, look out for infantry with rocket launchers who
are looking to pierce your armor. Follow the arrow down the
path you came from, but look around corners for hidden tanks
and rocket-equipped trucks. Always keep your tank on the move,
either forward or backward,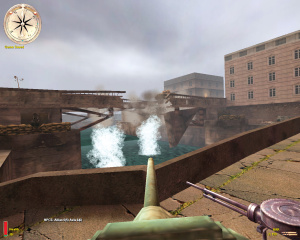 to avoid incoming rockets. Most tanks can be disposed of with
one hit, so place your shots carefully. Blow up the far bridge
as you cross over to the Soviet side of the map. When you
reach the Soviet Recon Group, the final objective is to hold
your position against tanks and infantry. Let the Soviet tank
take care of the infantry crossing the bridge, while you focus
on the tanks across the river and on the adjacent bridge. Once
you've held your position for a long enough time, the bridge
will be bombed, and you've won the game!
to avoid incoming rockets. Most tanks can be disposed of with
one hit, so place your shots carefully. Blow up the far bridge
as you cross over to the Soviet side of the map. When you
reach the Soviet Recon Group, the final objective is to hold
your position against tanks and infantry. Let the Soviet tank
take care of the infantry crossing the bridge, while you focus
on the tanks across the river and on the adjacent bridge. Once
you've held your position for a long enough time, the bridge
will be bombed, and you've won the game!
After you
destroy the bridge, a duel between Axis/Allied armor ensues.
(Berlin Mission 2) >> |

