
Create panel > Shapes > Splines > Object Type rollout > Helix
Create menu > Shapes > Helix
Use Helix to create open flat or 3D spirals.
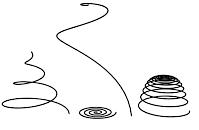
Examples of helixes
Procedure
To create a helix:

 Go to the Create panel and choose Shapes.
Click Helix.
Choose a creation method.
Press the mouse button to define the first point of the Helix start circle.
Drag and release the mouse button to define the second point of the Helix start circle.
Move the mouse and then click to define the height of the Helix.
Move the mouse and then click to define the radius of the Helix end.
Interface
Mesh Settings rollout
All spline-based shapes share these parameters. See Splines for an explanation of these parameters.
Interpolation
The helix differs from other spline-based shapes in that it always uses adaptive interpolation. The number of vertices in a helix is determined by the number of turns.
Creation Method rollout
The Helix shape uses the standard creation methods of Center or Edge. Most spline-based shapes share the same Creation Method parameters. See Splines for an explanation of these parameters.
Parameters rollout
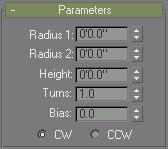
Once you have created a helix, you can make changes using the following parameters:
Radius 1: Specifies the radius for the Helix start.
Radius 2: Specifies the radius for the Helix end.
Height: Specifies the height of the Helix.
Turns: Specifies the number of turns the Helix makes between its start and end points.
Bias: Forces the turns to accumulate at one end of the helix. Bias has no visible affect when the height is 0.0.
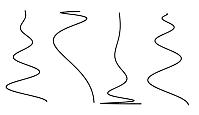
Helical spline varied only by bias settings
A bias of -1.0 forces the turns towards the start of the helix.
A bias of 0.0 evenly distributes the turns between the ends.
A bias of 1.0 forces the turns towards the end of the helix.
CW/CCW: The direction buttons set whether the Helix turns clockwise (CW) or counterclockwise (CCW).